StarTech.com MPEX300WN2X2 User Manual
Instruction manual, Packaging contents, System requirements
Instruction Manual
DE: Bedienungsanleitung - de.startech.com
FR: Guide de l'utilisateur - fr.startech.com
ES: Guía del usuario - es.startech.com
IT: Guida per l'uso - it.startech.com
NL: Gebruiksaanwijzing - nl.startech.com
PT: Guia do usuário - pt.startech.com
Manual Revision: 09/19/2014
For the most up-to-date information, please visit: www.startech.com
Packaging Contents
• 1 x Wireless Card
• 1 x Driver CD
• 1 x Instruction Manual
System Requirements
• Available Mini PCI Express expansion slot (half-height)
• Windows® 8 (32/64bit), 7 (32/64), Vista(32/64), XP(32/64),
Windows® Server 2008 R2, 2003(32/64), Linux
MPEX300WN2X2
Half-Height Mini PCI Express 300Mbps Wireless N Adapter- 2T2R
Installation
Hardware Installation
WARNING! Mini PCI Express cards, like all computer equipment,
can be severely damaged by static electricity. Be sure that you are
properly grounded before opening your computer case or touching
your Mini PCI Express card. StarTech.com recommends that you
wear an anti-static strap when installing any computer component.
If an anti-static strap is unavailable, discharge yourself of any static
electricity build-up by touching a large grounded metal surface
(such as the computer case) for several seconds. Also be careful
to handle the Mini PCI Express card by its edges and not the gold
connectors.
1. Line up and insert the Mini PCI Express card into the Mini PCI
Express slot on the system board. Make sure to match up the
gap in the card edge connector, with the notch in the slot.
2. Secure the card to the motherboard using screws or clips, as
required by your motherboard.
NOTE: Different systems may have different methods for installing
Mini Cards, so please refer to documentation for your system/
board for more specific installation instructions for your
particular application.
3. Attach the wireless antenna cables to the Mini PCI Express card.
Driver Installation
Windows
NOTE: The wireless card may auto-install using native drivers,
however it is recommended to use the procedure below to update
to the latest version.
1. Upon starting Windows, if the Found New Hardware wizard
appears on the screen, cancel/close the window and insert the
included Driver CD into the computer’s CD/DVD drive.
2. Navigate to your CD/DVD drive, then to the “Windows” folder and
run the Setup.exe application to launch the installer.
3. Follow the on-screen instructions to complete the installation.
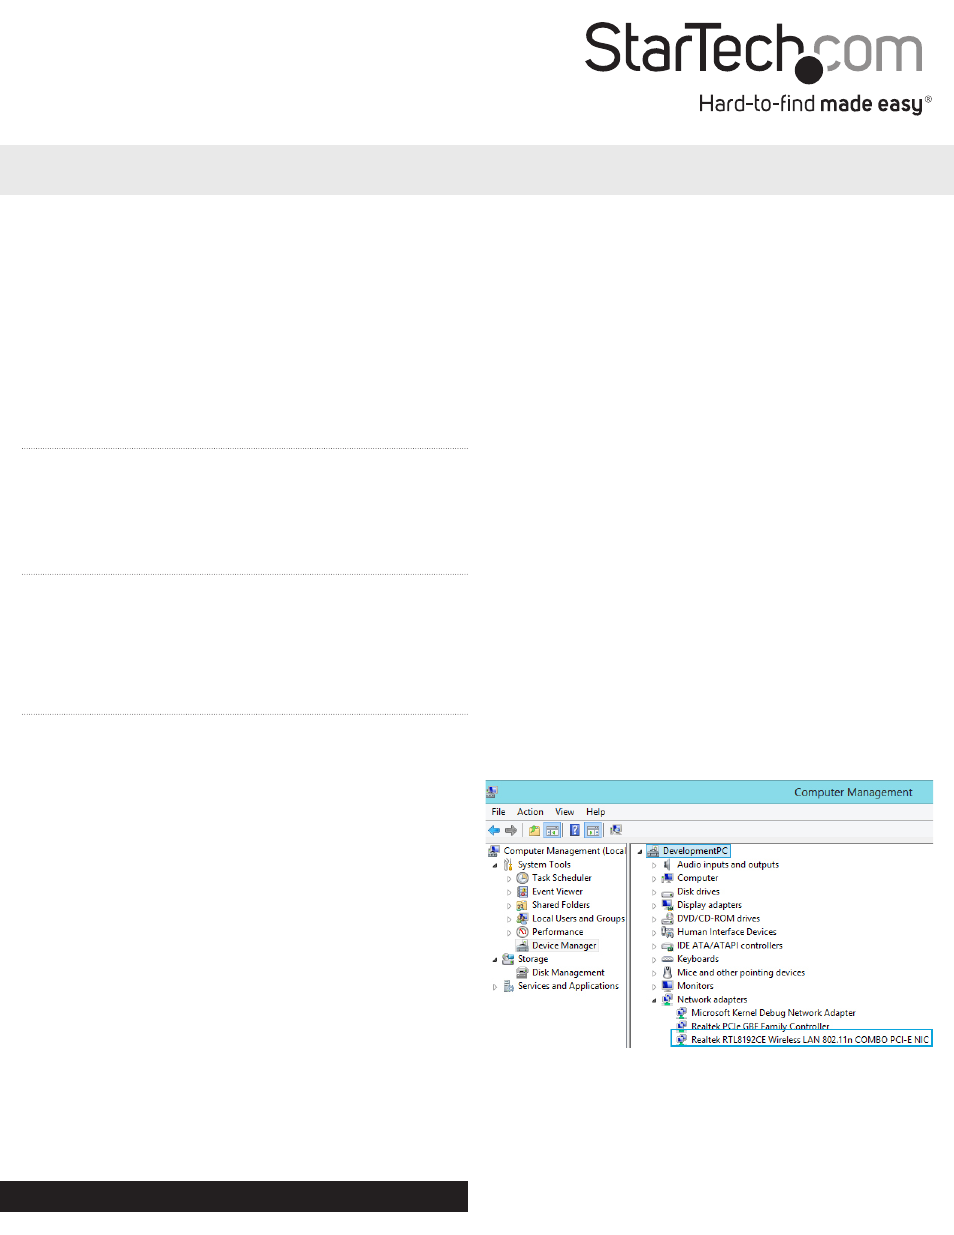
Verifying Installation
Windows
1. Open the Device Manager by right-clicking on Computer, and
then select Manage. In the new Computer Management window,
select Device Manager from the left window panel (For Windows
8, open the Control Panel and select Device Manager).
2. Expand the “Network Adapters” section. On a successful install,
you should following devices in the list with no exclamation
points or question marks.