Installation – StarTech.com ST7CU35122 User Manual
Page 6
Instruction Manual
3
Installation
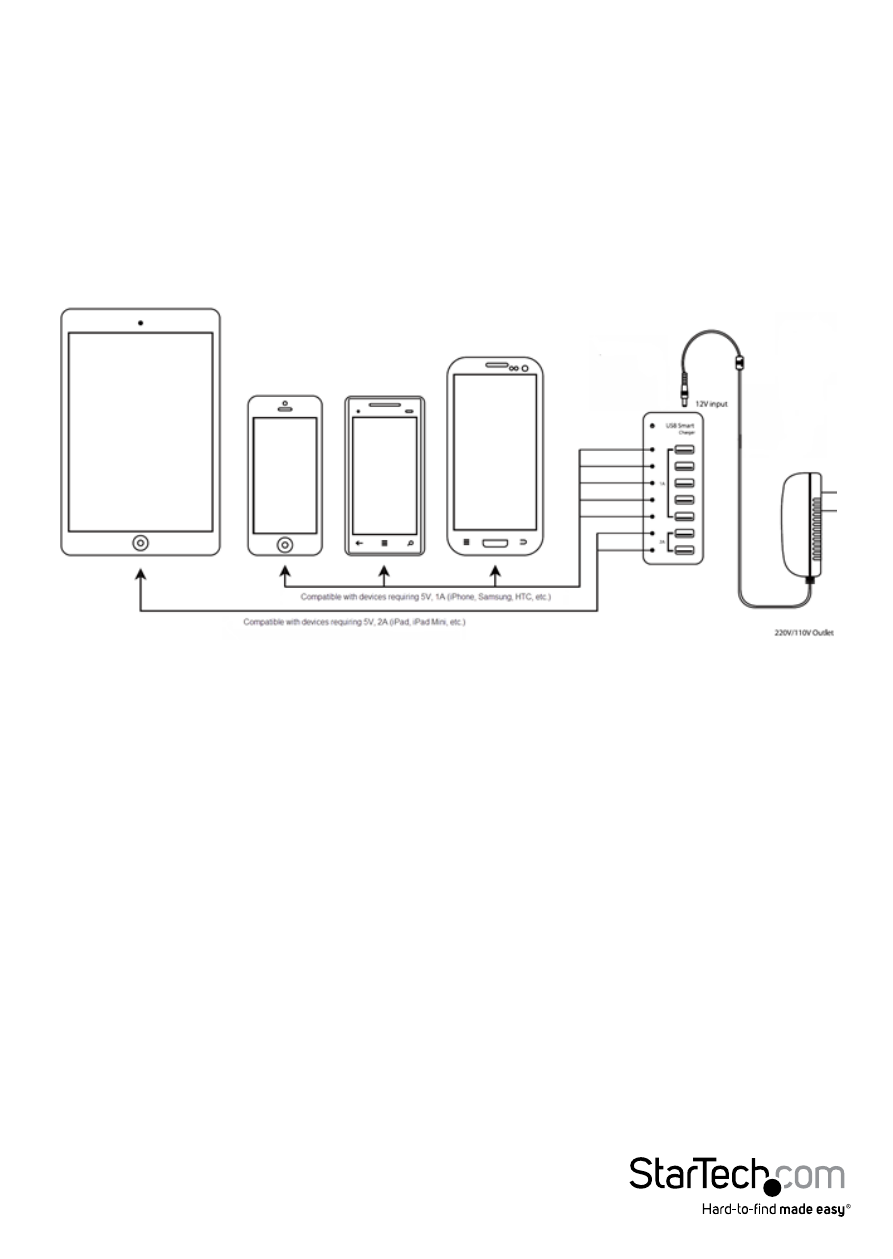
WARNING! Do Not Connect Devices which do not require charging into the charging
ports of this device (e.g. USB Flash Drives, Card Readers, etc.)
1. Connect the included power adaptor to an AC outlet, then to the device.
2. Press the power button to turn the device on. Once the power LED is lit, it can
charge devices.
3. Connect your device(s) to the corresponding port of the charging station (1A or 2A),
according to the charging requirement your device(s).
NOTE:
a. The choice of charging mode is dependent upon what mode the connected device
supports. The quantity of charging electricity provided is also dependent upon how
much the connected device needs to get a full speed charge.
b. Some devices with a 2A charging requirement can be charged in a 1A USB port,
however, the provided power will be 1A and the charging time will be longer.
Likewise, devices with a 1A charging requirement can be connected to a 2A USB
port and the connected device will only draw the power that is required. It is
recommended that you connect your devices to the proper USB ports based on the
charging requirement of the connected device(s).
c. The charging station may become warm to the touch during charging – this is
normal and will not harm your connected device(s).
d. With an exhausted battery, a Samsung Galaxy Note tablet will not display a charging
icon when connected to the charging hub. After approximately one hour of low
speed charging, the charging icon will show up and begin high speed charging.