StarTech.com SATDUP11 Quick Start User Manual
Quick install guide, Packaging contents, 1 to 1 standalone hard drive duplicator and eraser
Quick Install Guide
DE: Bedienungsanleitung - de.startech.com
FR: Guide de l'utilisateur - fr.startech.com
ES: Guía del usuario - es.startech.com
IT: Guida per l'uso - it.startech.com
NL: Gebruiksaanwijzing - nl.startech.com
PT: Guia do usuário - pt.startech.com
Manual Revision: 07/23/2013
For the most up-to-date information, please visit: www.startech.com
Packaging Contents
• 1X – HDD Duplicator/Eraser
• 2X – SATA Cables
• 1X – Power Adapter
• 3X – Power Cords (NA, UK, EU)
• 1X – Instruction Manual
• 2X- HDD Pads
SATDUP11
1 to 1 Standalone Hard Drive Duplicator and Eraser
NOTE: Please visit www.startech.com/downloads for the full
set of operating instructions.
WARNING! Hard drives and storage enclosures require careful
handling, especially when being transported. If you are not careful
with your hard disk, lost data may result. Always handle your hard
drive and storage device with caution. Be sure that you are properly
grounded by wearing an anti-static strap when handling computer
components or discharge yourself of any static electricity build-up
by touching a large grounded metal surface (such as the computer
case) for several seconds.
Hardware Installation
1. Ensure the power switch is set in the off position. Connect the
included power adapter from an available AC power outlet to the
Power Adapter Port on the back of the SATDUP11.
2. Using an included SATA Cable, attach the HDD you would like to
duplicate to the source port. (SATA port on the left identified as
source, see below).
3. Using an included SATA Cable, connect the HDD you would like to
have over written, or erased to the target port. (SATA port on the
right identified as source, see below)
Note: For added protection, and heat insolation the source
and target drives can be placed on included HDD Pads.
WARNING! Any Data remaining on the target drive will be
over written.
4. Press the power switch to the “On” position, the SATDUP11 is
now ready to use.
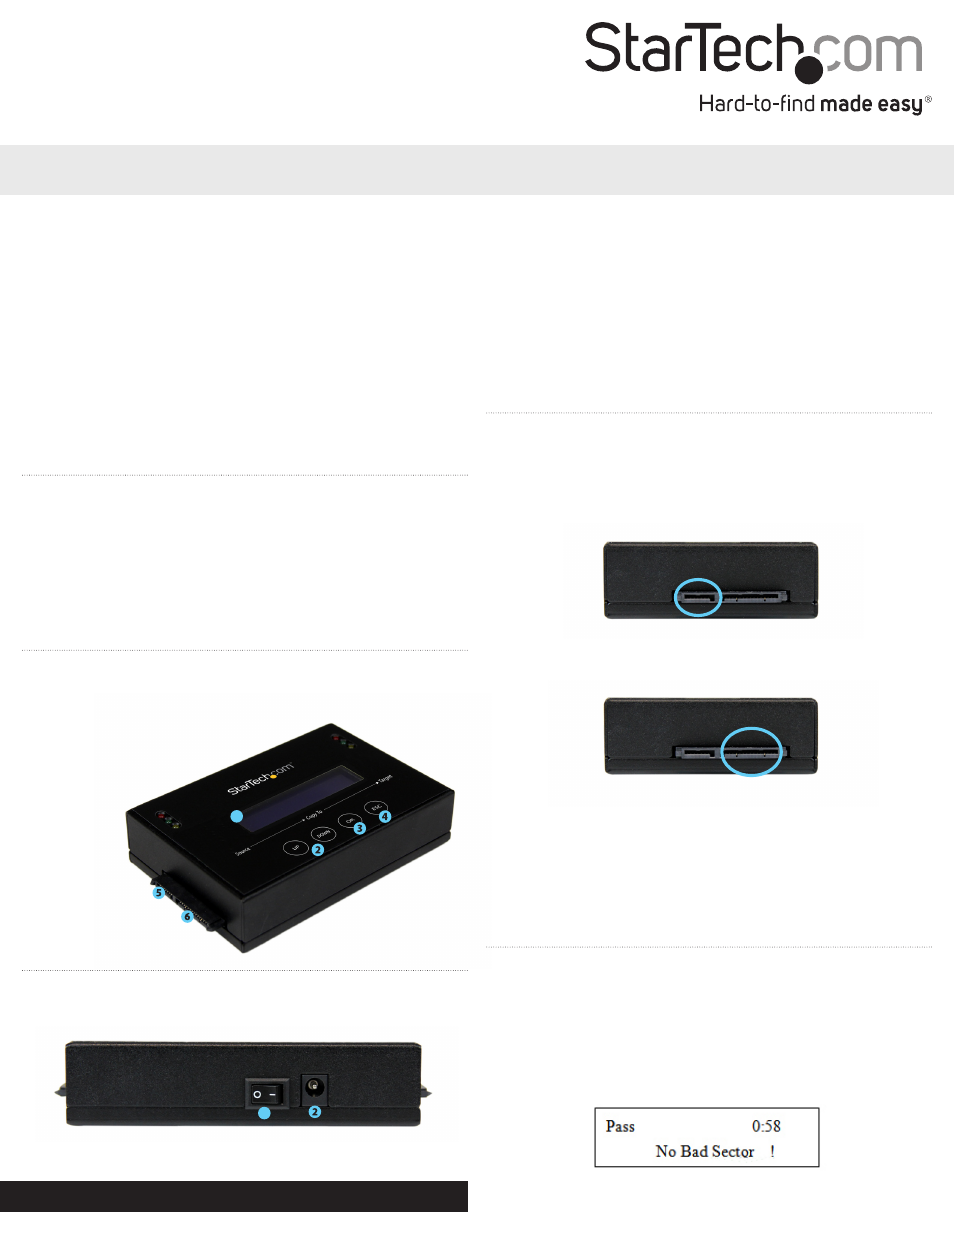
Front
1. Display Screen
2. Navigation buttons
3. OK button
4. Esc button
5. SATA HDD source port
6. SATA HDD Target port
Back
1. Power Switch
2. Power Adapter Port
Hardware Operation
Hard Drive Duplication
1. Using the Navigation buttons, locate “1. Copy” and press OK.
Default copy mode is “System and Files”
2. The duplicator will analyze the source drive and ensure the target
is ready, by verifying size. Once the drives have been analyzed you
will receive an indicator stating the duplicator is ready. Press OK,
and the system will begin duplication automatically.
1
1