Drive removal – StarTech.com SDOCK2U33EB User Manual
Page 7
Instruction Manual
4
3. Once the drives have been installed and the docking station has been powered on,
the computer Operating System will automatically recognize the drive(s) and it will
be accessible as though it were installed in the system internally.
Note: If your computer fails to automatically recognize your drive it is likely your
drive has not been initialized or formatted correctly. (See Drive Initialization in
Software operation for further instructions.)
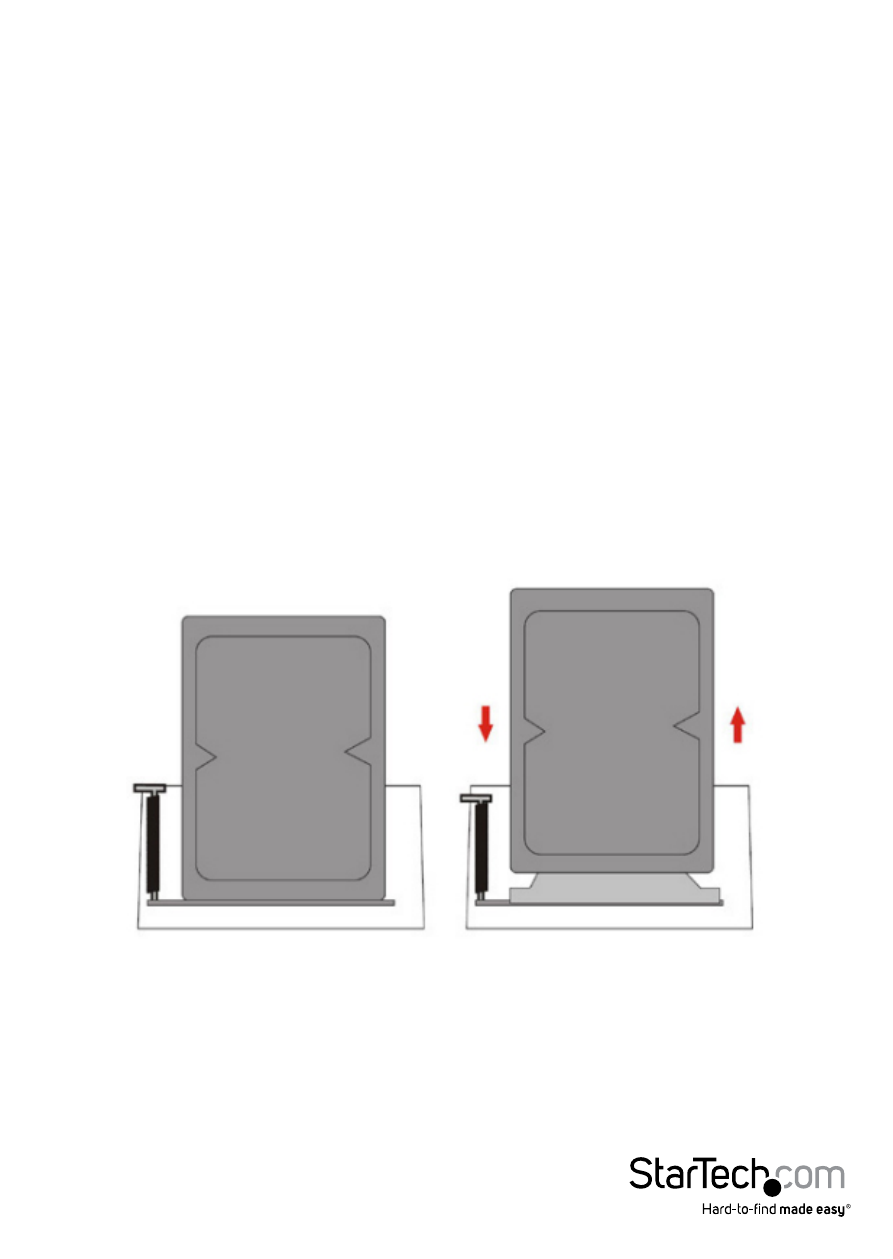
Drive Removal
WARNING! Ensure your hard drive(s) has been disconnected from your computer
operating system prior to attempting drive removal. Failure to properly disconnect
your drive may result in lost data or drive damage. (See Disconnecting the Hard Drive
in Docking Station Operation for further instructions.)
1. Turn off the docking station by pressing the power button.
2. Press the eject button that corresponds with the drive you wish to remove.
3. Carefully grasp the ejected drive and lift it upwards until the bottom of the drive has
completely risen above the hard drive slot.
4. Safely and carefully store your drive in a secure location. (See your hard drive
manual for proper storage instructions.)
Note: We recommend ensuring the docking station is powered off before any drive
is physically inserted or removed from the docking station. If two drives are docked
simultaneously, and one drive is removed while the docking station is still powered
on the other drive will momentarily disconnect from your computer which could
cause drive damage or loss of data if other drive is still mounted.