Installation, Rear panel header, Hardware installation – StarTech.com SATSASBAY3BK User Manual
Page 6
Instruction Manual
3
Installation
WARNING! Hard drives and storage enclosures require careful handling,
especially when being transported. If you are not careful with your hard disk,
lost data may result. Always handle your hard drive and storage device with
caution. Be sure that you are properly grounded by wearing an anti-static
strap when handling computer components or discharge yourself of any
static electricity build-up by touching a large grounded metal surface (such
as the computer case) for several seconds.
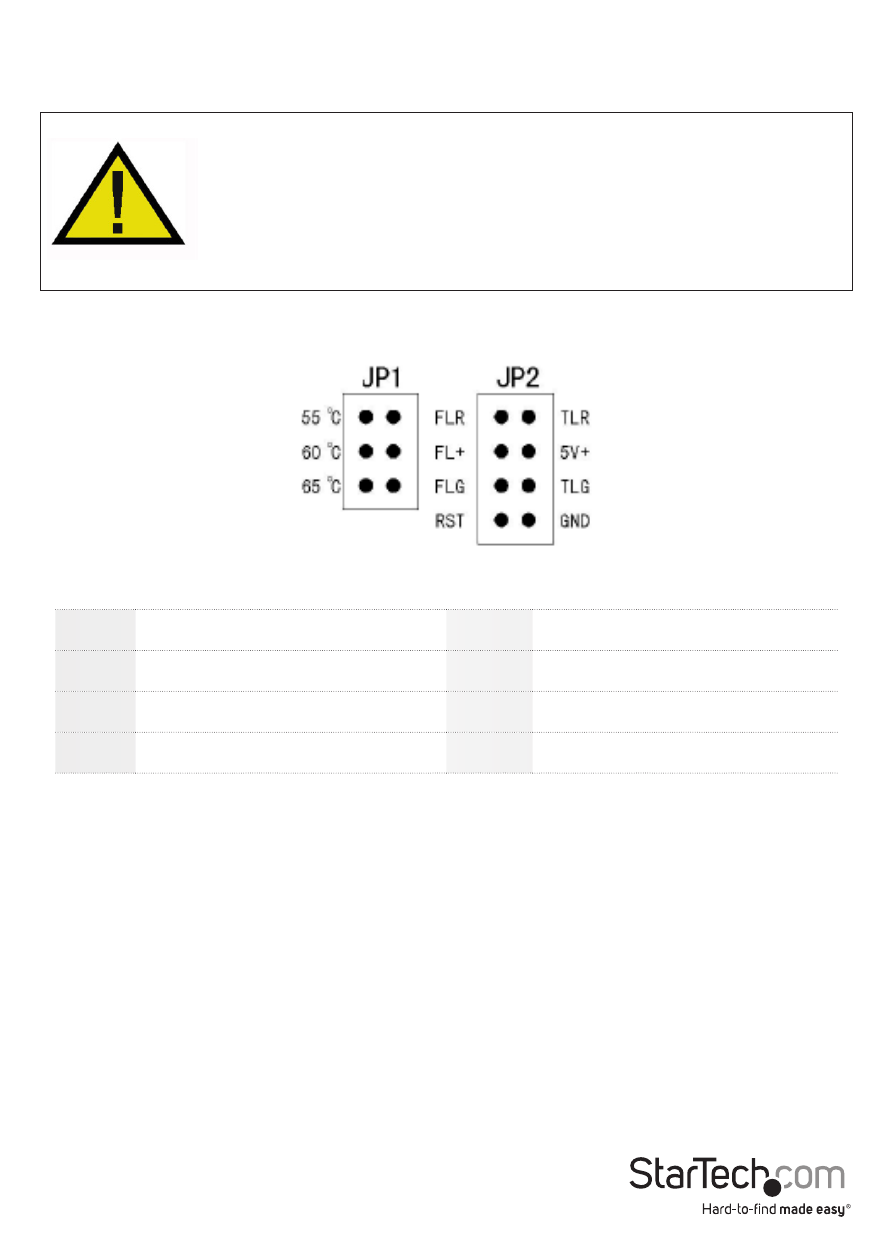
Rear Panel Header
JP2 Header
FLR
Fan Failure Detect (red)
TLR
Temperature Detect (red)
FL+
Fan Failure Detect (+)
5V+
5V power
FLG
Fan Failure Detect (green)
TLG
Temperature Detect (green)
RST
Reset switch
GND
Ground
Hardware Installation
1. Remove one of the drive trays by pressing on the left side of the drive tray. This will
cause the tray’s locking arm to swing out. Hold the arm and pull the tray out.
2. Place the 2.5in or 3.5in hard drive into the tray. Line up the holes in the bottom
of the tray with the holes in the bottom of your drive. Use the provided screws to
secure the hard drive to the tray (2.5in and 3.5in mounting screws provided).
3. Slide the tray back into the slot. When the tray is all the way back into the slot, press
the locking arm back in until you hear a “click” sound. This indicates that the tray and
hard drive are properly installed.
4. Repeat these steps for the other hard drives.