Installation – StarTech.com SAT3520U3SR User Manual
Page 6
Instruction Manual
3
Installation
WARNING! Hard drives and storage enclosures require careful handling, especially
when being transported. If you are not careful with your hard disk, lost data may
result. Always handle your hard drive and storage device with caution. Be sure that
you are properly grounded by wearing an anti-static strap when handling computer
components or discharge yourself of any static electricity build-up by touching a large
grounded metal surface (such as the computer case) for several seconds.
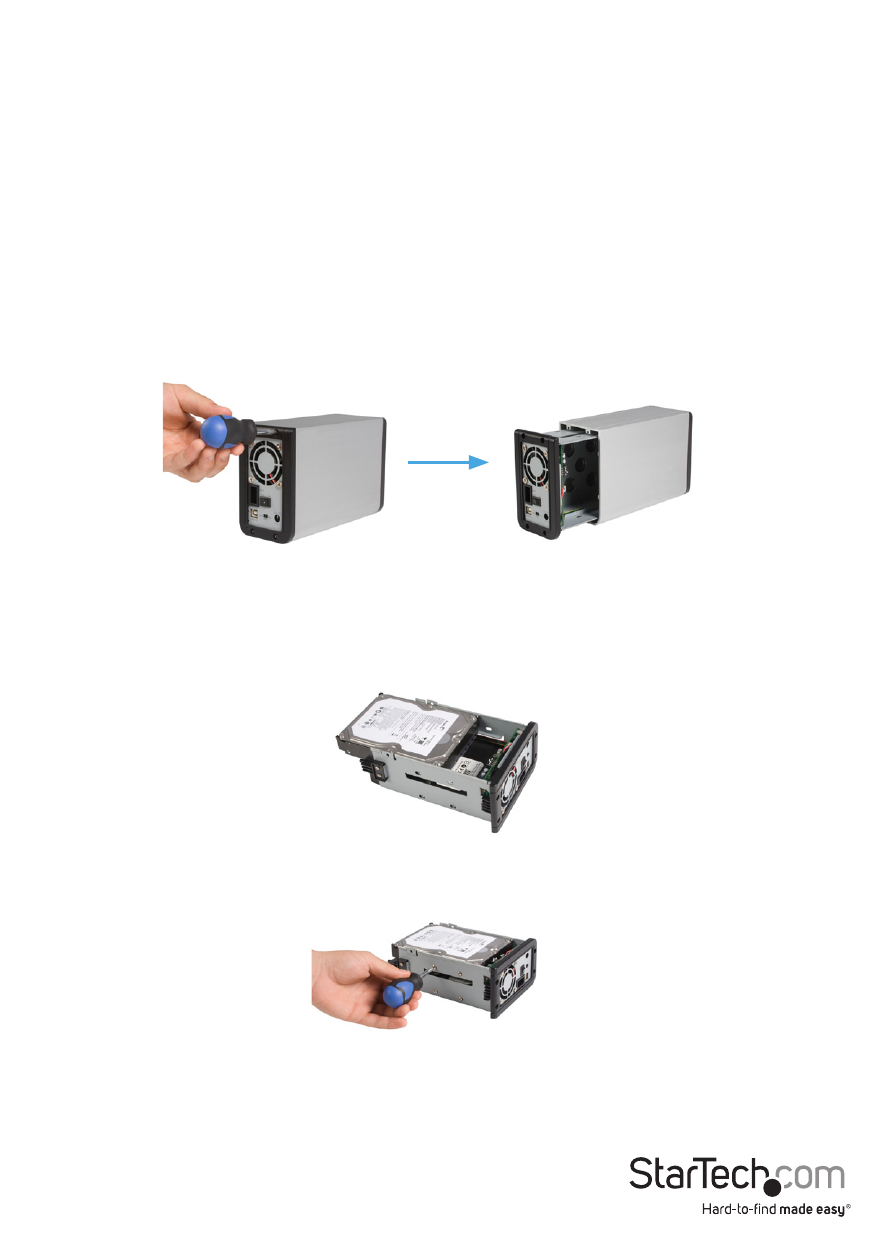
1. Remove the four screws holding the rear panel in place (2x top edge, 2x bottom
edge) then slide the entire rear panel assembly out from the enclosure.
2. Place the first 3.5” SATA hard drive into the top drive bay, then slide it toward the
rear panel until the drive interface is firmly connected to the SATA connector. Repeat
this step with the second 3.5” SATA hard drive, using the remaining bay.
3. Secure the SATA drives to the frame, using the provided screws.
*actual product may vary from photos