Installation, Hardware installation, Tray installation – StarTech.com S2510U33RUSM User Manual
Page 6
Instruction Manual
3
3. Hold the S2510U33RUSM into place, and fix the included 8 screws (4 per side)
through the installation holes on the 5.25” slot, into the side installation holes on the
S2510U33RUSM.
4. Connect a SATA Data cable from your computer motherboard to the SATA DATA port
on the back of the S2510U33RUSM.
5. Connect either a SATA Power Cable or an LP4 Power Cable from your computer
power supply, to the SATA Power port or LP4 Power Port respectively, depending on
your power cable availability.
Installation
Tray Installation
1. Ensure your computer system is powered down, and the power cable has been
disconnected from the Power Supply.
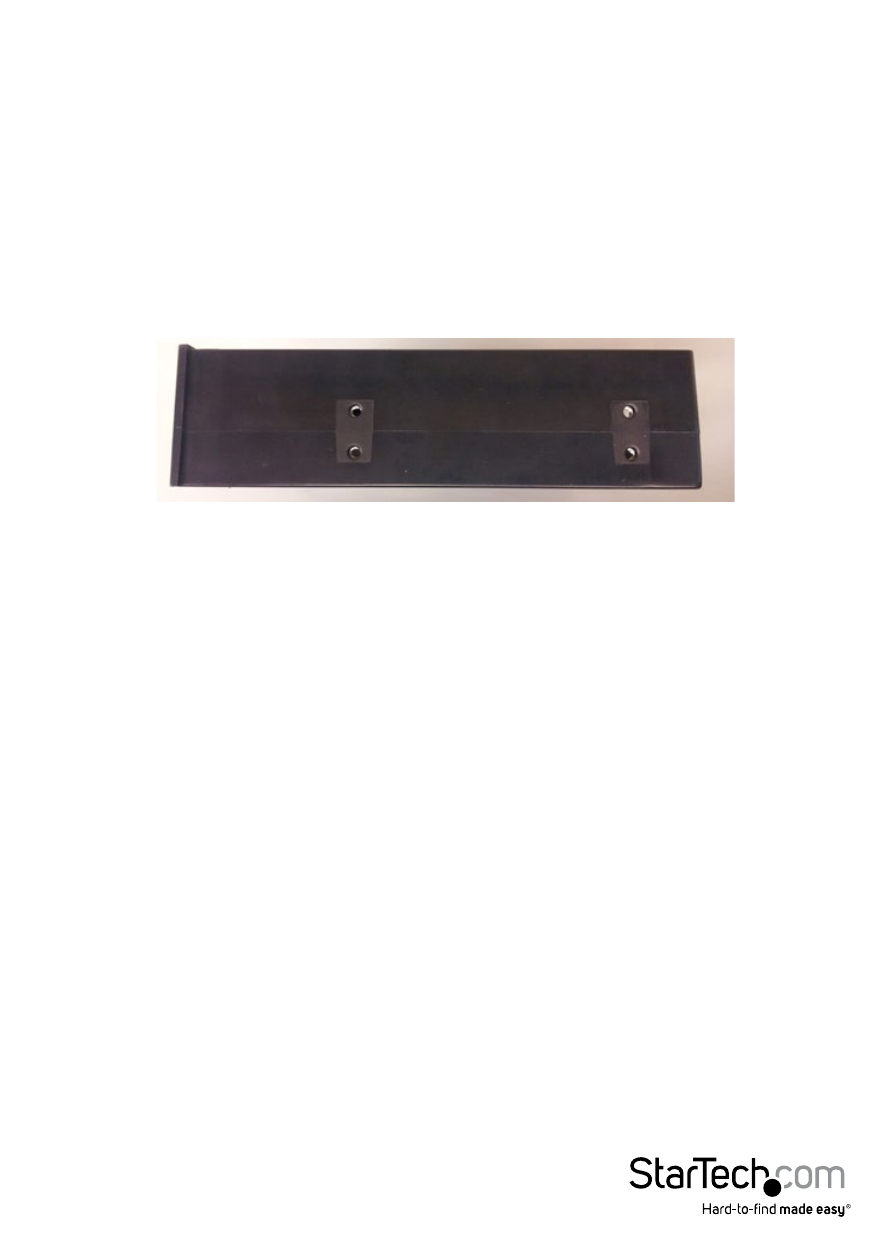
2. Open your computer case (refer to the computer user manual for details), and
place the USM 5.25 Installation Bay into an available 5.25” slot, lining up the side
installation holes on the S2510U33RUSM (pictured below), with installation holes on
the 5.25” slot inside the computer.
- MATRIX SV1654DX4I (72 pages)
- SV231UADVI (10 pages)
- SV431UADVI (12 pages)
- ENTERPRISE CLASS SV3253DXI (74 pages)
- STARVIEW SV830 (27 pages)
- DS254 (1 page)
- SV215MICUSBA (14 pages)
- SV215MICUSBA (13 pages)
- KVM SWITCHBOX VGA DS15H954 (1 page)
- SV221DVI (8 pages)
- StarView SV231 (14 pages)
- SV431DDUSB (12 pages)
- SV831SUN (16 pages)
- StarView SV431H (12 pages)
- DS154 (2 pages)
- ST4200MINI (8 pages)
- StarView SV231USB (15 pages)
- SV221DD (8 pages)
- ST4202USB (11 pages)
- DS15H54 (1 page)
- STARVIEW SV431DVIUAHR (16 pages)
- MSTDP123DP (10 pages)
- MSTMDP123DP (10 pages)
- DP2DVID2 (2 pages)
- DP2DVIS (2 pages)
- MDP2HDVGA (1 page)
- MDP2DPDVHD (2 pages)
- MDP2DVID (1 page)
- SLMPT2VGA (2 pages)
- SLMPT2HD (2 pages)
- DP2HDMIUSBA (2 pages)
- MDP2HDMIUSBA (2 pages)
- DP2DVID (2 pages)
- NOTECONS01 (18 pages)
- NOTECONS02 Quick Start (1 page)
- NOTECONS02 Manual (25 pages)
- SV231DD2DUA (14 pages)
- SV231DVIUDDM (10 pages)
- SV431DVIUDDM (12 pages)
- SV231USBDDM (12 pages)
- SV831DVIU (13 pages)
- SV231USB (13 pages)
- SV231DDVDUA (16 pages)
- SV431DUSBU (20 pages)
- SV831DUSBUK (17 pages)