Installation, Hardware installation – StarTech.com S2510BU3PW User Manual
Page 6
Instruction Manual
3
Installation
Hardware Installation
WARNING! Hard drives and storage enclosures require careful handling, especially when being
transported. If you are not careful with your hard disk, lost data may result. Always handle your
hard drive and storage device with caution. Be sure that you are properly grounded by wearing
an anti-static strap when handling computer components or discharge yourself of any static
electricity build-up by touching a large grounded metal surface (such as the computer case)
for several seconds.
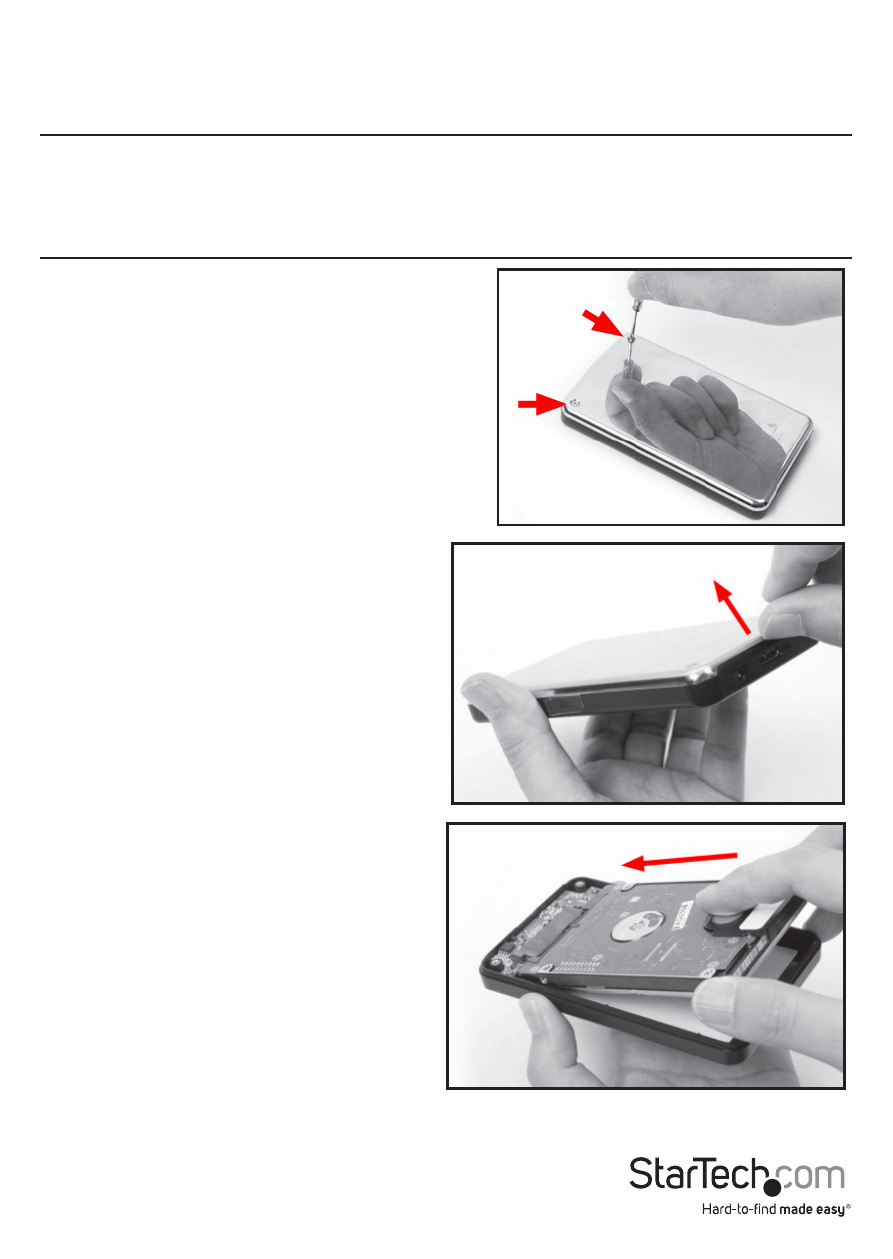
1. The back panel of the enclosure is held
securely in place with two small screws. Use
the provided mini screwdriver to remove the
screws. NOTE: For brand new installations,
the screws are not installed.
2. Using the small groove located along
the top edge of the enclosure, remove
the back panel to expose the interior
drive bay.
3. Place the 2.5” SATA drive into the bay
(label side down) and slide the drive
onto the SATA connector. Make sure
the drive is fully seated.
CAUTION: To use AES encryption, the
drive must be initialized and formatted
after setup. Do not place a drive
containing data you wish to encrypt into
the enclosure. The data must be copied
over after the enclosure has been setup.
*installation photos for reference only