StarTech.com 4POSTRACK36 User Manual
Instruction manual, Packaging contents, Tools required
Instruction Manual
DE: Bedienungsanleitung - de.startech.com
FR: Guide de l'utilisateur - fr.startech.com
ES: Guía del usuario - es.startech.com
IT: Guida per l'uso - it.startech.com
NL: Gebruiksaanwijzing - nl.startech.com
PT: Guia do usuário - pt.startech.com
Manual Revision: 05/25/2012
For the most up-to-date information, please visit: www.startech.com
Packaging Contents
• 2x Front/Rear Frame
• 2x Floor Plates
• 6x Adjustable Horizontal Arm
• 2x Floor Mounting Brackets
• 1x M8 Hex (Allen) Key
• 8x M8x25 Hex Sockey Screws
• 42x M5x15 Truss Head Screws
• 16x Bushing Caps
• 50x Cabinet Screws
• 50x Cage Nuts
WARNING!
To prevent bodily injury, please ensure that the rack
is installed in a structurally sound environment with a level floor
and that all hardware has been assembled securely, and checked for
stability before loading equipment. When installing equipment into
the rack, start from the bottom of the rack first and move upwards,
keeping the heaviest equipment at the bottom to avoid a situation
where the rack becomes top-heavy.
Tools Required
• Philips (crosshead) Screwdriver
4POSTRACK36
36U 4 Post Server Equipment Open Frame Rack Cabinet
*actual product may vary from photos
Installation
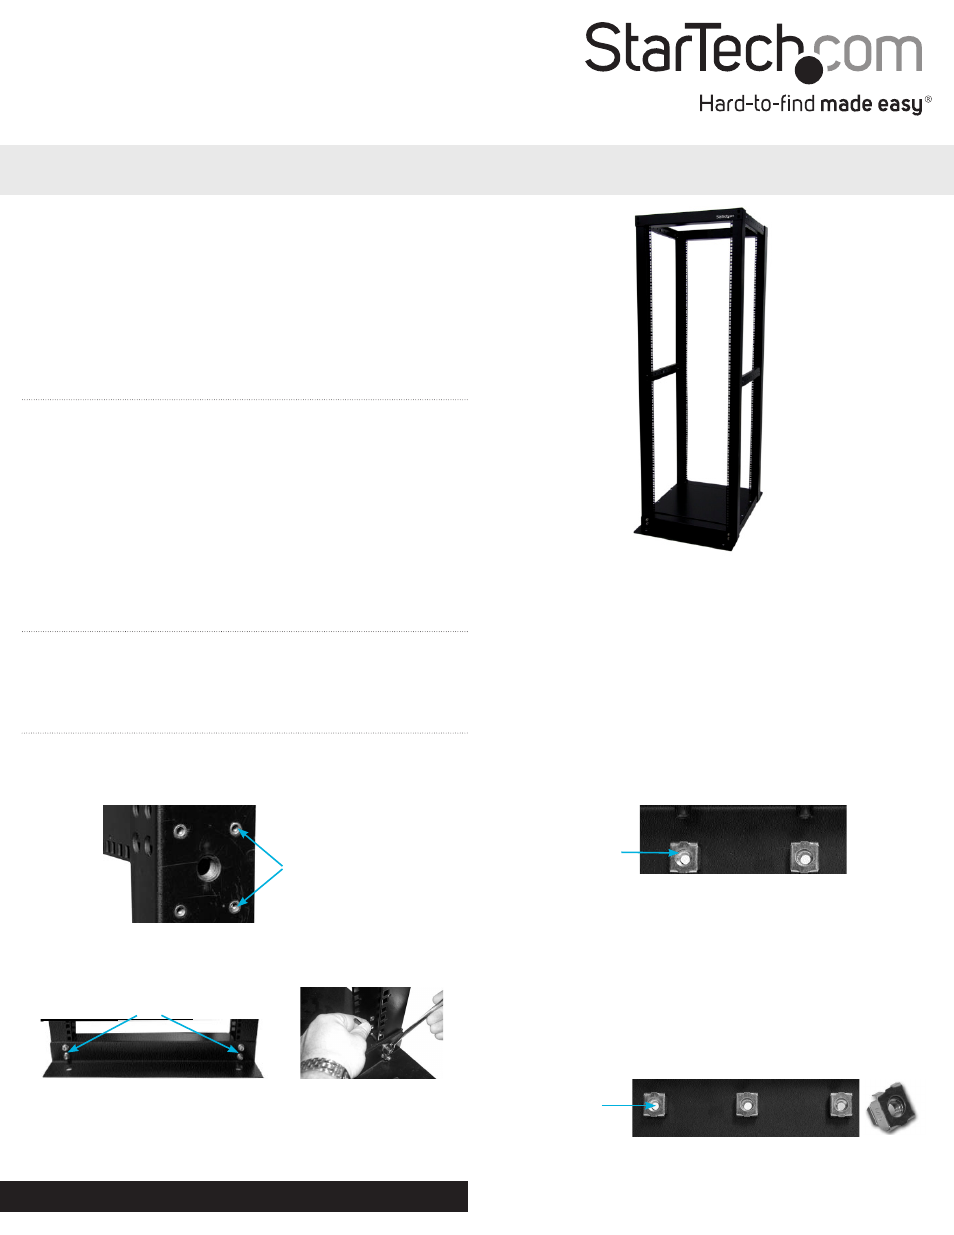
1. Make sure that the front and rear frames are right side up. The
bottom of the frame has holes for the floor mounting brackets
and casters. Make sure that the pictured end is at the bottom.
2. Attach the floor mounting brackets (the L-shaped brackets) to the
bottom of the frames. Using the included hex key, install the hex
socket screws. Install 4 screws per bracket.
Optional Caster mounting
point, on the bottom of
rack frame.
Hex Socket Screws
3. Attach the arms to the frames. Separate your arms into pairs
(consisting of one wide and one narrow arm per pair).You will
have six pairs of arms, three for each side of the rack. The narrow
arms that connect the bottom of the frames can be identified by
the pre-mounted cage nuts on the inside of the arms.
NOTE: When installing the arms, it might be easiest to start with the
top arms for stability reasons.
For the top and middle arms, snap the cage nuts into the back
(inside) of the narrow arms. It is recommended that you install
several cage nuts on each arm. The cage nuts are easier to install
when the rack is not fully assembled.You should install more cage
nuts than may be necessary in case you change the depth of the rack
in the future.
Pre-installed cage nuts
Inside of a
narrow arm
with cage nuts
installed