SmarTek Systems SAS-1 Unpacking SAS Monitor Installation User Manual
Page 5
SmarTek Systems (www.smarteksys.com)
5
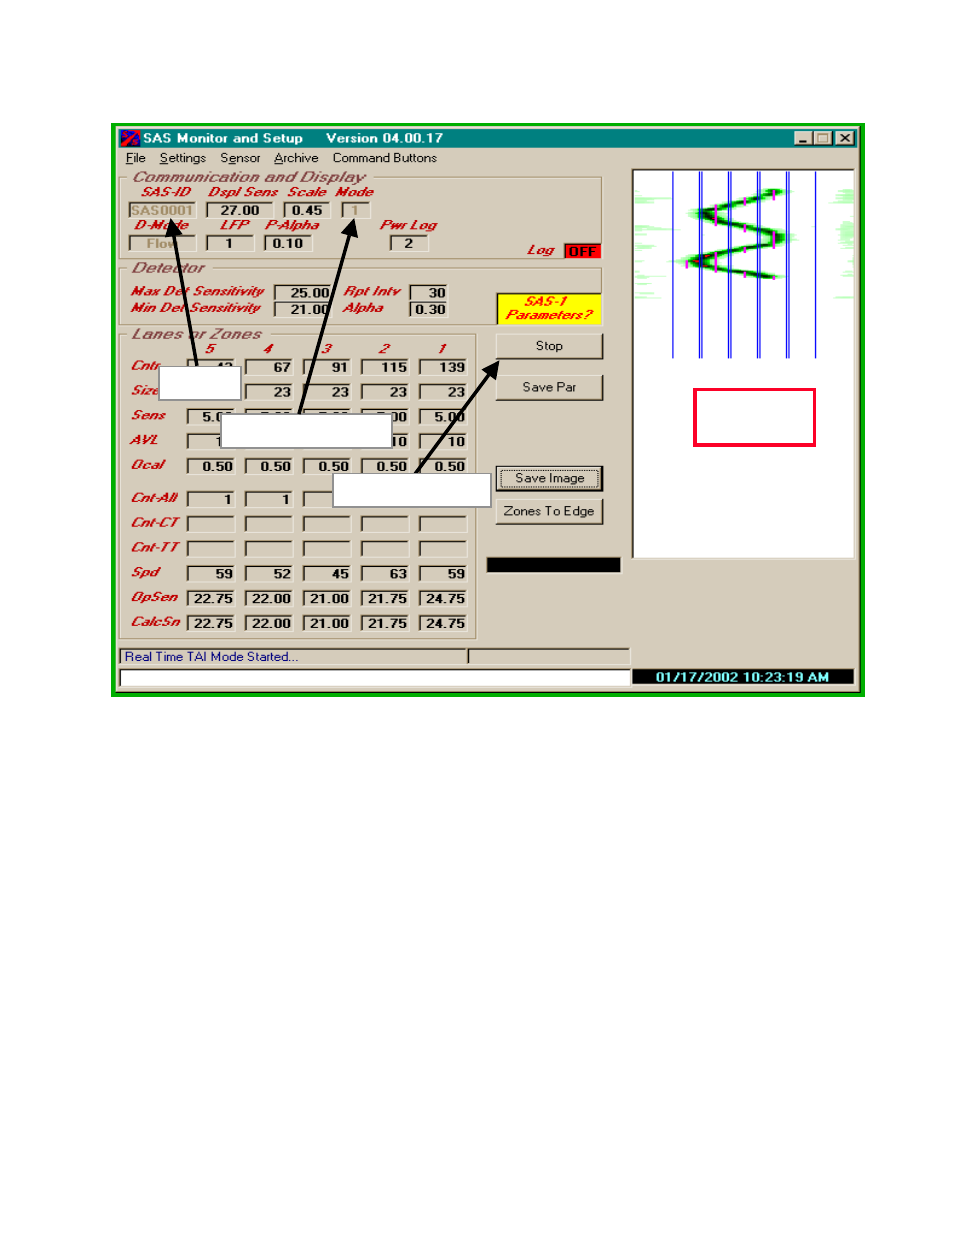
draw from the display top to the bottom. These lines indicate the positions of detection zones set
in the SAS-1. The presence of the Blue Lines indicate that SAS-1 is running and communicating
properly with the PC (SAS Monitor and Setup program). If no Blue Lines are present, click on
the Stop Button in SAS Monitor and then double check all connections, the Mode setting, and
the Comm Port settings. With the power plug connected on the SAS-CT, check the voltage at
the plug. The voltage should be at least 8 VDC. Repeat the above procedure for starting
communications between the SAS-1 and SAS Monitor and Setup.
Once the SAS-1 and the SAS Monitor and Setup program are communicating (Blue Lines are
present and drawing from top to bottom), you may perform a simple noise test to check the SAS-
1 response. Set the Display Sensitivity to 25.00 by left clicking in the Dspl Sens field (clicking
in the upper part of field increments while clicking in the lower part decrements). Stand in front
of the SAS-1 about 10 to 15 ft away and make noise by hissing, crunching paper or plastic, or
jingling keys. Note the green response on the TAI display. Repeat the process while at slightly
different positions (relative to the short dimension of SAS-1) and note the position change of the
response on the TAI display. If you observe the Blue Lines drawing on the TAI and the green
Figure 2 SAS Monitor and Setup Main Display – Quick Checkout
TAI Display
Area
SAS ID
SAS Monitor Mode
Start/Stop Button