Step 6, Step 5, Step 4 – Seville Classics WEB247 User Manual
Page 3: Step 3
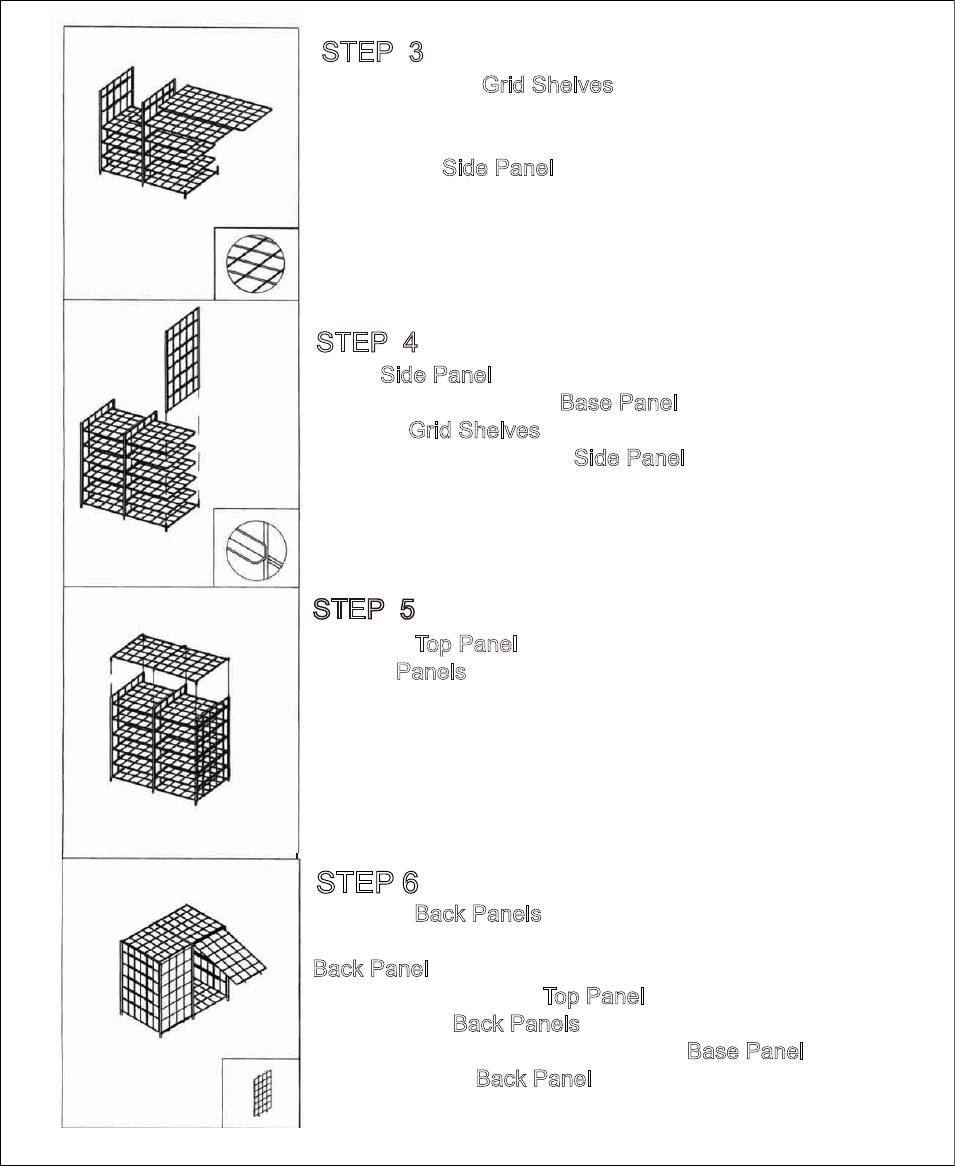
Place the
Top Panel
(F) onto the three vertical
support
Panels
(B, C, E) so that the posts on (F)
slide into all 6 of the upright support holes.
STEP 5
Place
Side Panel
(E) vertical onto the two upright
posts on the left side of
Base Panel
(A), making sure
the wire
Grid Shelves
(D) sit on the inward facing “L”
shaped shelf supports of
Side Panel
(E).
NOTE: The screws holes should be facing the back.
STEP 4
Slide all 4 wire
Grid Shelves
(D) with the grid pattern
wires on top running front to back, through the slots
in
Center Panel
(C) and onto the “L” shaped shelf
supports of Side Panel (B).
STEP 3
STEP 6
Place the Back Panels (G), one right and one left, on the back
side of the organizer (the side with the screw holes). Each
Back Panel (G) has two hooks that should be placed over the
back edge wire on the Top Panel (F). Furthermore, the
bottom of the Back Panels (G) have two “S” shaped hooks
that spring into placed on the wire of Base Panel (A).
Simply push on Back Panel (G) and it will “snap” into place.