Seville Classics WEB182 User Manual
Page 2
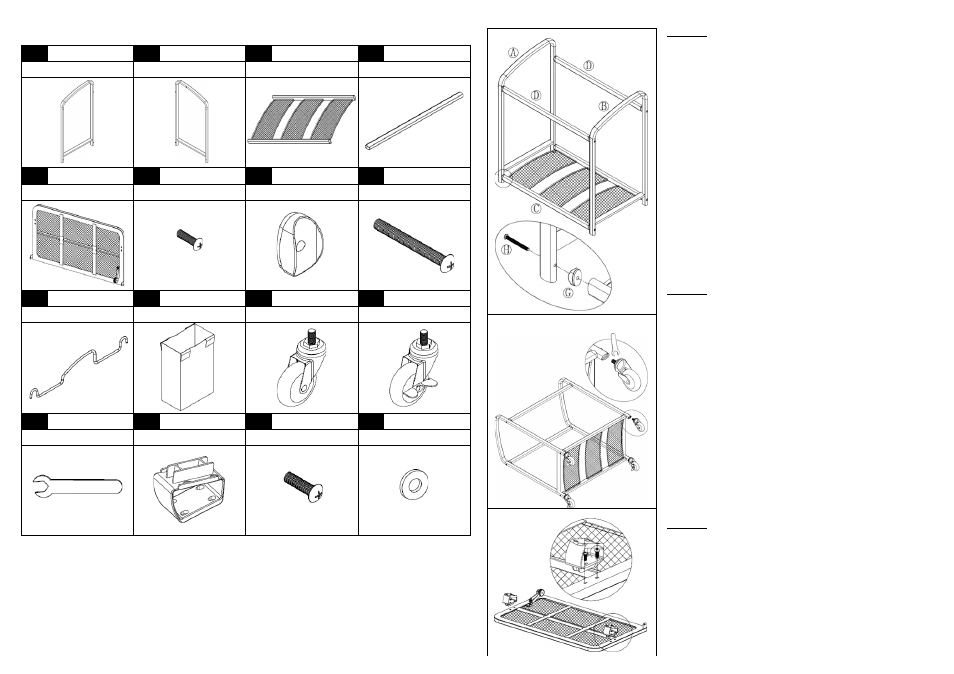
Please make sure you have all the parts before assembly.
A
1 pc
B
1 pc
C
1 pc
D
2 pcs
Left Frame
Right Frame
Bottom Panel
Bars
E
1 pc
F
4 pcs
G
8 pcs
H
8 pcs
Table Top
Small Screws
Connectors
Large Screws
I
6 pcs
J
3 pcs
K
2 pcs
L
2 pcs
Handles
Laundry Bags
Wheels
Locking Wheels
M
1 pc
N
2 pcs
O
3 pcs
P
2 pcs
Wrench
Brackets
Medium Screws
Washer
Step 1: Assemble the Bottom Panel (C)
and Bars (D) to the Left Frame (A) and
Right Frame (B) using Large Screws (H)
and Connectors (G). The bottom panel
curves up for added bag support.
Step 2: Screw the Wheels (K) and Locking
Wheels (L) into the bottom ends of the
frame using the Wrench (M). The locking
wheels are the front wheels.
Step 3: Attach the Brackets (N) to the
Table Top (E) using Small Screws (F). A
screw driver can reach the small screws
through the holes in the bracket.