Pressure balanced shower valve, Parts breakdown – Santec PB-3600 User Manual
Page 2
0 3
0 4
NOTE: Failure to follow these instructions may cause damage or improper operations and nullify the
warranty.
Pressure Balanced Shower Valve
1 . R o u g h - i n & V a l v e I n s t a l l a t i o n
Make sure the water supplies are off.
Rough valve body into wall, connecting piping to 1/2” female copper sockets or 1/2“ male I.P. nipples.
IMPORTANT: NOTE “UP” & “DOWN” MARKINGS ON BACK OF VALVE.
The depth of rough-in should account for thickness of wall materials to be used (combined thinckness
of wall board and finished wall material). The distance between the center inlet of the valve and
the finished wall should be between 1 5/8” and 2”. Face of plastic guard should be flush with
finished wall (see Figure 1).
Anchor installation to bracing between studs (ears on the valve body can be used for this by removing
the plastic guard) - otherwise, anchor the connecting pipe.
Valve should be pressurized and tested for leaks at the connections.
Plastic guard should be left attached to the valve until the finished wall material is installed and until the
trim arrives to be installed.
1.
2.
3.
4.
5.
6.
FIGURE 1
1 5 /8” - 2 .0”
Center
of inlet
Finished wall
Plastic guard
FLUSH
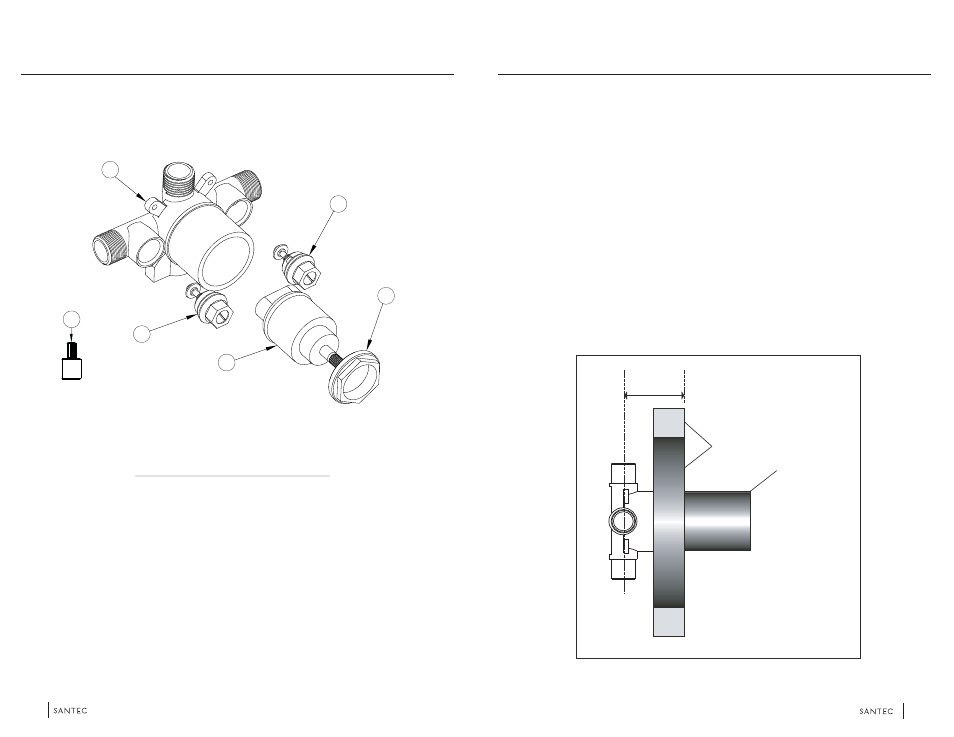
The spare parts list is valid for the valves purchased after February 1, 2010.
*
Parts Breakdown
Service Stop
Service Stop
PB Cartridge
Valve Body
Valve Lock Nut
PB-3600-C
PB-3600-H
PB40R
# P A R T D E S C R I P T I O N
P A R T #
1
2
3
4
5
Extension
SA200
6
1
2
3
4
5
6