Santec 6920MG User Manual
Spout installation
E S T A T E S E R I E S M A G G I O C O L L E C T I O N
W I D E S P R E A D L A V A T O R Y
W I T H “ M G ” H A N D L E S
M O D E L : 6 9 2 0 M G 1 0
6 9 2 0 M G 7 5
KEEP THIS INSTRUCTION BOOKLET FOR FUTURE REFERENCE
I m p o r t a n t : P l e a s e re g i s t e r y o u r p ro d u c t o n l i n e a t w w w. s a n t e c f a u c e t . c o m w i t h i n
3 0 d a y s o f p u rc h a s e . S a n t e c re s e r v e s t h e r i g h t t o re q u e s t a d d i t i o n a l d o c u m e n t s
b e f o re s e r v i c i n g w a r r a n t y re q u e s t s .
0 1
0 2
S p o u t
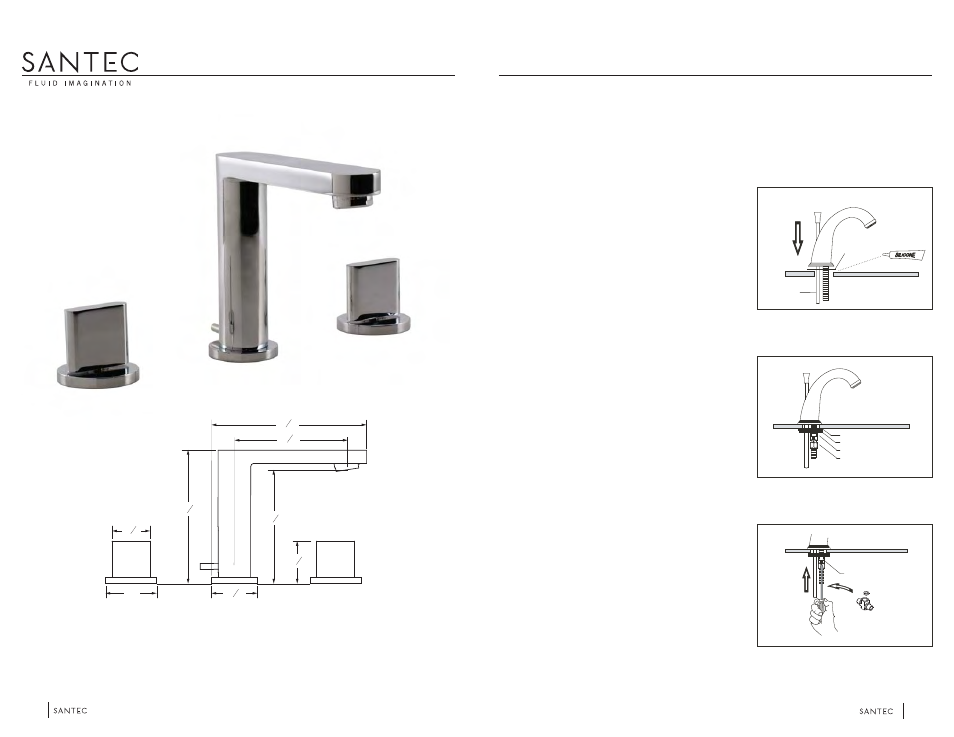
Spout Installation
Remove tee connector, tee connector washer, and
spout mounting hardware from bottom of spout
assembly. Apply a ring of silicone caulking around the
center hole on the top of the sink (do not use plumber’s
putty which can damage the spout finish).
From the top of the deck, insert the spout’s threaded
shank and lift rod through the center hole of the sink or
counter surface.
Flush both supply lines before installation. After flushing shut off both supply lines.
Hole size for the spout and handle trim is a minimum of 1¼” and a maximum of 1½”.
Lift Rod
Notched rubber washer
Tee connector
& Washer
Notched metal washer
Wing nut
Brass lock nut
Rubber
washer
A
Slip the spout mounting hardware back onto the spout.
First the notched rubber washer, then the notched metal
washer, wing nut, and brass lock nut.
Make sure the lift rod operates smoothly. Adjust if
necessary.
Hand tighten the lock nut.
B
Wing nut
Align spout and secure to the sink or counter surface by
tightening the 2 screws on the wing nut.
Place the tee connector washer into the tee connector
and thread the tee connector onto the end of the spout
shank. Hand tighten to seal.
C
Water supply
line
INLET HOSE
Ш2"
5
3
16
"
4
7
16
"
1
5
8
"
1
5
8
"
4
3
8
"
5
3
4
"
1
3
4
"