Handle trim installation (1), Handle trim installation (2), Handle trim installation (3) – Santec 6520VO User Manual
Page 3: Handle trim
Handle Trim Installation (1)
0 5
0 6
HANDLE TRIMS ARE READY FOR SIMPLE DROP-IN INSTALLATION. DO NOT
DISASSEMBLE.
Remove the valve body mounting hardware from the valve body.
Make sure the handle with the “cold” blue label is installed at the right side of the spout
(looking from front) and the handle with the “hot” red label at the left side of the spout.
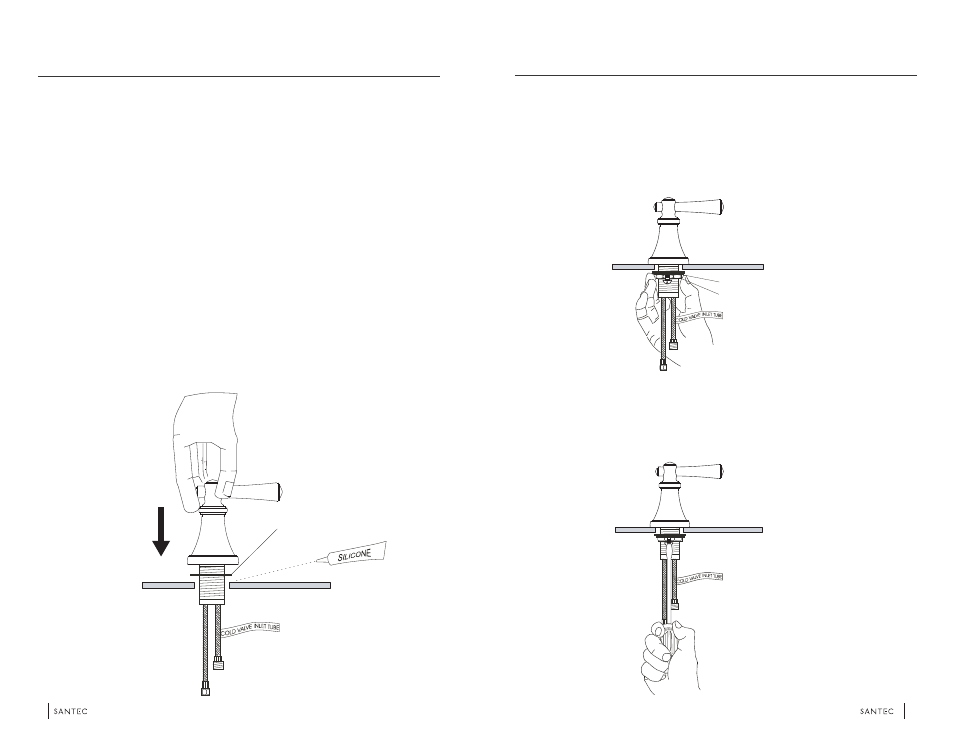
Apply a ring of silicone caulking around the handle hole on the sink or counter top (do
not use plumber’s putty which can damage the finish of your faucet).
Slip the valve body’s flexible hoses from the top of the sink or counter through the
appropriate hole next to the spout. Aim the tee connecting hoses toward the tee
connector.
NOTE: For proper handle turning direction, install the valve with the “cold” blue label at
the right side of sink (looking from front) and the handle with the “hot” red label at the
left side of the sink.
Handle Trim Installation (2)
Align the handle lever properly with respect to the spout.
From under the basin or counter, hand tighten the brass lock nut and fiber washer to
the valve body against the counter.
Rubber washer
SANTEC
SANTEC
Fiber washer
Hexagonal nut
Handle Trim Installation (3)
Secure the valve body by tightening the screws attached to the lock nuts.
SANTEC
HANDLE TRIM
HANDLE TRIM