RED 3-AXIS LENS CONTROL SYSTEM LAUNCH SEQUENCE User Manual
Page 2
RED 3-AXIS LENS CONTROL SYSTEM LAUNCH SEQUENCE
RED 3-AXIS LENS CONTROL SYSTEM LAUNCH SEQUENCE / COPYRIGHT © 2014 RED.COM, INC
845-0017, REV-A1
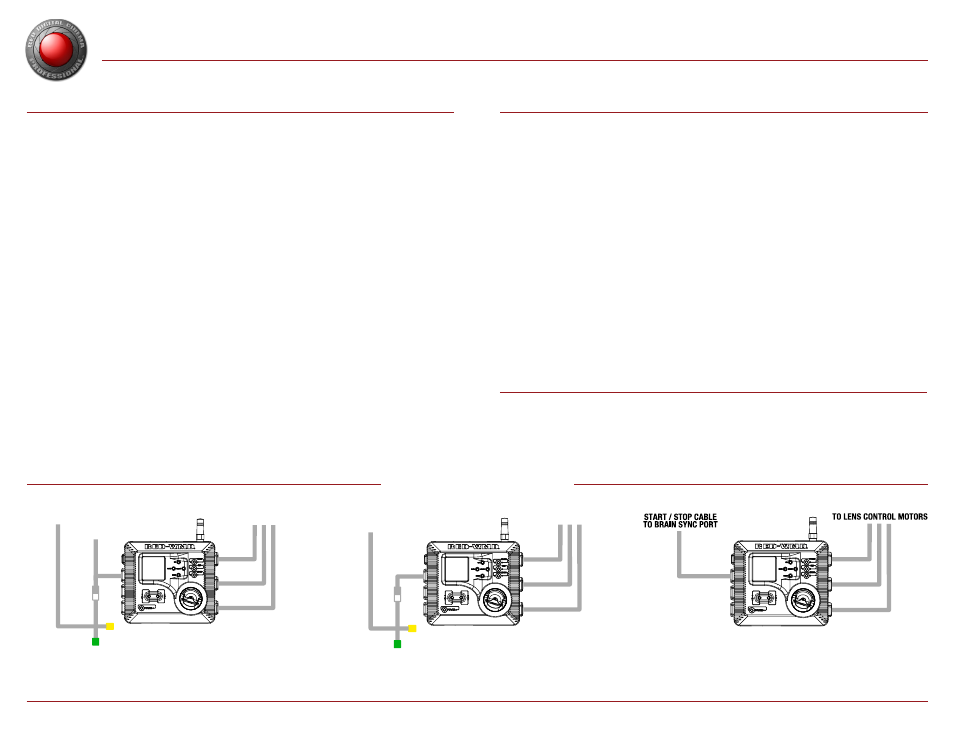
Start/Stop, Tally, Genlock, Timecode.
Start/Stop, Genlock, Timecode.
Start/Stop.
TO LENS CONTROL MOTORS
START / STOP CABLE
TO BRAIN SYNC PORT
BNC TO TIMECODE & GENLOCK
TO LENS CONTROL MOTORS
TO BRAIN CTRL PORT
START / STOP CABLE
TO BRAIN SYNC PORT
BNC TO TIMECODE & GENLOCK
SET A LENS LIMIT
Setting a lens limit provides precision control of Focus, Iris, or Zoom adjustments via the T.H.C.
1. Adjust the desired lens function to the desired min/max position (Example: zoomed out to capture full scene).
2. Press and hold the corresponding
Limit button on the T.H.C.
3. While holding the
Limit button, adjust the corresponding lens function knob/slider to the desired max/min position
(Example: zoomed in on target).
4. Release the
Limit button.
The lens limit is set and ready to use. Press and release the
Limit button again to remove the limit.
SET A LENS LOCK
Set a lens lock to disable a T.H.C. adjustment knob or slider to prevent interference or accidental adjustment.
1. Press and hold the desired
Limit button on the T.H.C. for three (3) seconds. During this time, DO NOT make adjustments to
the corresponding knob/slider.
2. Release the
Limit button after three (3) seconds. The corresponding limit LED flashes green when locked.
The lens lock is now set. Repeat steps 1 and 2 to remove the lens lock.
INITIALIZE THE SYSTEM
Initialize detects the range of motion for each motor and stores the data in the W.M.D. Settings are persistent
and remain stored for approximately 14 hours. W.M.D. LEDs display motor initialization status. Red LEDs indicate
motors that need to be initialized. Solid green LEDs indicate initialized motors that are ready for use. LEDs flash
green during the initialization process.
Press and hold the
Initialize button on the T.H.C. for two (2) seconds to initialize all connected motors.
Press and hold the
B button on the W.M.D. for two (2) seconds to initialize all connected motors.
Press and release the
Initialize or B buttons to initialize only motors with unknown positions.
NOTE: The W.M.D. must be unlocked for buttons to be active. Press and hold the A button for two (2) seconds
to unlock the unit.
CONFIGURE FOCUS, IRIS, AND ZOOM MOTORS
The W.M.D. Focus, Iris, and Zoom menu topics feature a number of adjustments to fine-tune each specific
motor/lens combination. After initializing the system, you may need to adjust the following motor settings:
Torque: Choose from Low, Medium, or High settings. Keep the torque setting as low as possible.
Motor Direction: Choose from CW (Clockwise) or CCW (Counterclockwise) settings.
Type/Model: Choose from a list of compatible motor types and models.
Backlash: Use encoder count range 0 to 3,000 to adjust for anti-backlash.
Endstop: Use encoder count range 0 to 3,000 to adjust endstops.
In the W.M.D. main menu, navigate to the desired Focus, Iris, or Zoom motor and select the topic to adjust.
ADDITIONAL SETUP INFORMATION
T.H.C. CONTROLS
FOR MORE INFORMATION
For more information, refer to the RED 3-AXIS LENS CONTROL SYSTEM Operation Guide
available at
https://www.red.com/downloads
, or check out the short tutorial video on the
3-AXIS product page at
START/STOP CABLE CHART