Series 400, Ac input/thru, Power up procedure – PRG Super Node User Manual
Page 14
12
SUPER NODE™ USER MANUAL
Series 400
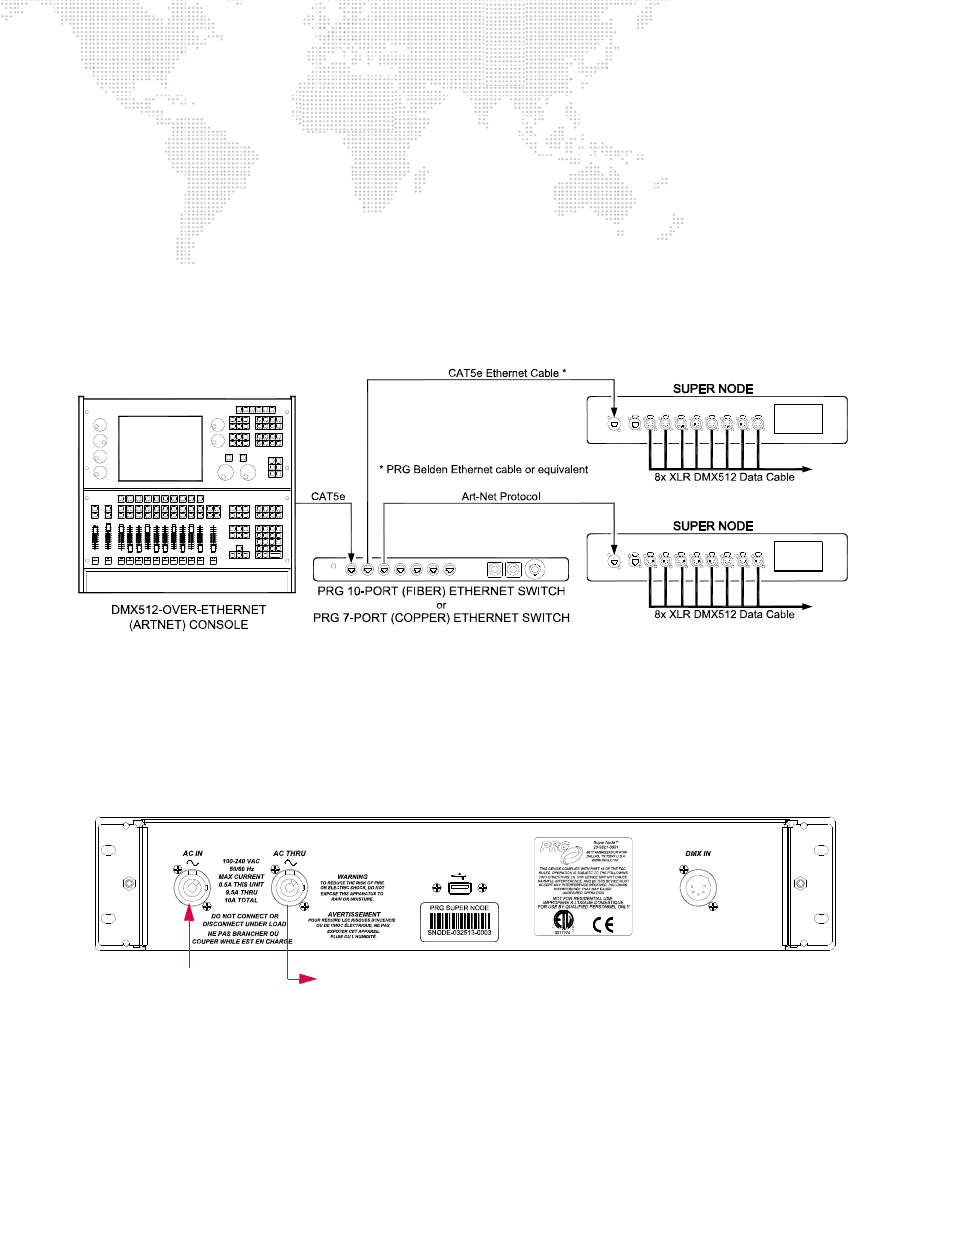
In the Series 400 configuration, an Art-Net compatible control console may be connected to one or more Super
Nodes.
Guidelines:
+
When connecting an Art-Net compatible console and multiple Super Nodes, a 100Mb Ethernet switch or hub
must
be used. Standard CAT5e Ethernet cables should be used in this configuration. Refer to the illustration
below.
+
The Series 400 Mode of operation should be used in this configuration. Refer to
+
When using a Node as an Art-Net-to-DMX device, note that the Art-Net/sACN output does not pass data; it only
mirrors the DMX outputs. It is not possible to place the Art-Net/sACN output on the same network as the Art-Net
input.
Figure 4: Series 400 Configuration Example
AC Input/Thru
At rear panel, connect the AC Line Cord Power Cable to the AC IN outlet.
The AC THRU outlet may be used to tap power for additional Super Nodes or Ethernet Switches using the included
PowerCon Jumper Cable. (Do not exceed the 10A maximum total input current to the device.)
Figure 5: Connecting AC Input and Thru Cables
Power Up Procedure
To power up the Super Node unit and set its address:
Step
1. Once the AC input cable is connected and power is applied, the unit will receive power. (It does not have a
power on/off switch.)
AC Line Input
REAR PANEL
AC Thru to additional devices