Pacific Drums & Percussion FS SERIES User Manual
Page 3
3
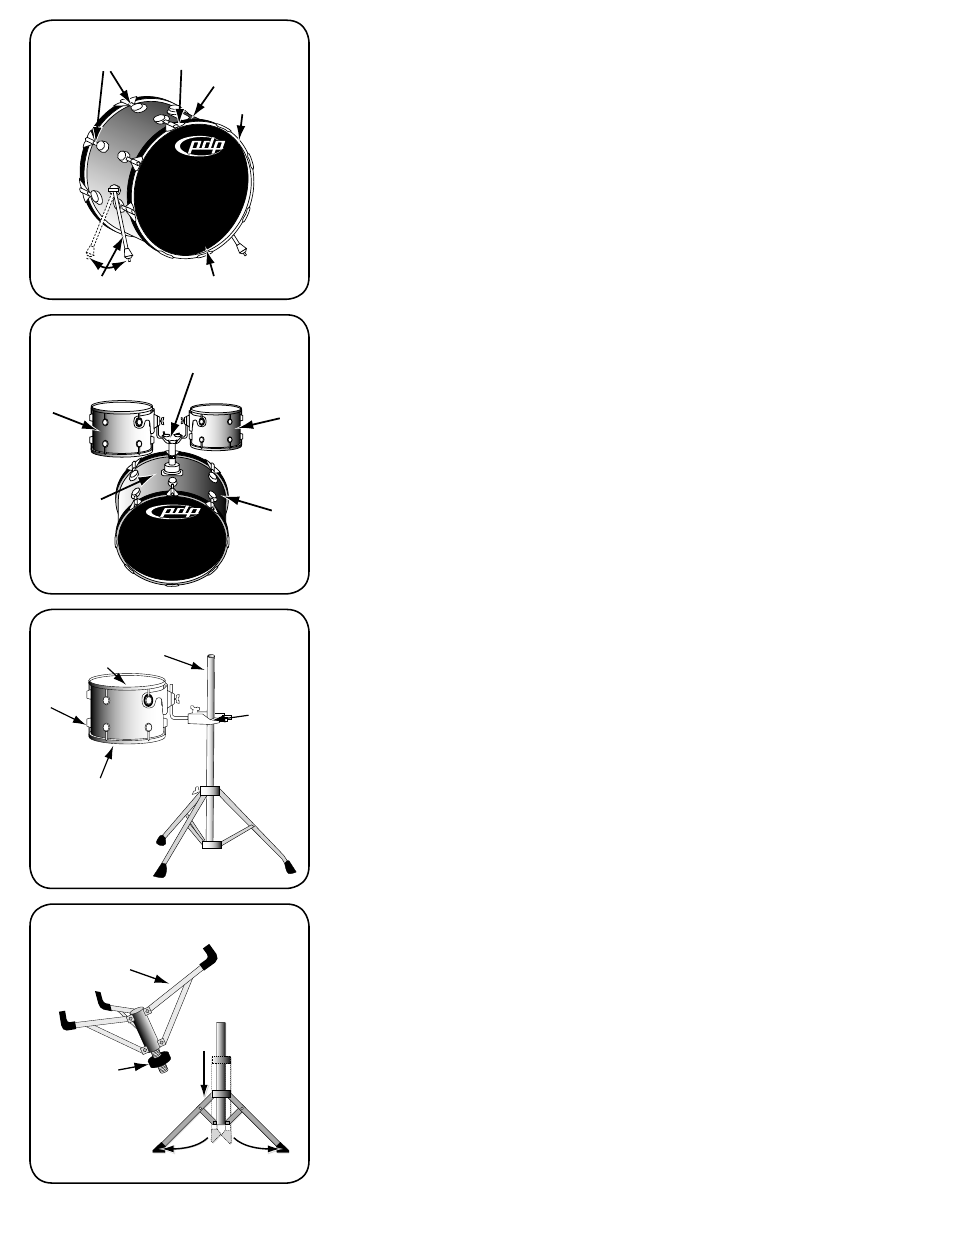
Bass Drum Assembly (continued)
Step 9: Set the shell right-side-up
Step 10: Angle the spurs (legs) forward by loosening the wing nut so they face slight-
ly towards the front of the bass drum.
Step 11: Loosen the spur receiver with the Drum Key (A) and lower the legs so that
the front of the bass drum is lifted about one inch off the ground. Tighten the spurs.
NOTE: For convenience, you may now want to tune your bass drum before attaching
the toms and pedal. Please refer to page 4 for tuning guidelines.
10” and 12” Tom Toms
Step 1: Insert the BDM (J) into the BDM receiver on top of the bass drum.
Step 2: Loosen the wing screw on the bracket of the 10” Tom Tom (L) and slide it
over the tom arm on the left (from a right-handed drummer’s perspective behind the
kit - reverse if you play left-handed). Take care that the tom arm does not touch the
tom shell. Tighten the wing screw on the tom bracket.
Step 3: Loosen the wing screw on the bracket of the 12” Tom Tom (M). Position it on
the right tom arm (reverse if you play left-handed). Take care that the tom arm does
not touch the tom shell. Tighten the wing screw on the tom bracket.
NOTE: Don’t worry about the precise placement of the drums at this point. You will
arrange them all later.
14” Tom Tom and Cymbal Stand
Step 1: Spread open the legs on the bottom section of the Cymbal Stand (S) and tighten
the wing screw. Slide the upper section of the cymbal stand into the base section and
tighten that wing screw.
Step 2: Attach the fixed side of the 991 Tom Arm (K) around the tube of the Cymbal
Stand (S). Position the tom arm so that it is directly over a leg of the cymbal stand and
facing the drummer.
Step 3: Loosen the wing screw on the bracket of the 14” Tom Tom (N). Position it on the
tom arm taking care that the arm does not touch the tom shell. Tighten the wing screw
on the tom bracket.
NOTE: The multi clamp and tom arm will have to sustain the pounding of your drum-
sticks, double-check that all adjustments are tightened securely.
Snare Drum and Snare Stand
Step 1: Spread the legs on the bottom section of the Snare Stand (R) and tighten the
wing screw. Slide the upper section of the snare stand into the base section and tighten
that wing screw.
Step 2: Loosen the basket wing screw on the upper section of the snare stand and tip
the basket up. Pull open the basket arms. To further open or close the arms, use the
knob located at the base of the basket.
Step 3: Place the Snare Drum (O) into the open basket. Tighten the knob under the
basket to make the arms snug around the snare drum.
Shell
Hoop
Tension Rods
Claw Hook
Spurs
Head
BDM Receiver
Bass Drum
M
J
L
Resonant Head
S
N
K
Batter Head
Basket
Knob for Size Adjustment
Bass Drum Assembly
10” and 12” Tom Toms
14” Tom Tom and Cymbal Stand
Snare Drum and Snare Stand