Assembling the puffin sport or puffin saco – KERO Puffin Sport and Saco User Manual
Page 3
Assembling the Puffin Sport or Puffin Saco
NOTE!
We recommend that you study this manual carefully before you start the
assembly procedure! When assembling the Puffin Sport or the Puffin Saco, please refer to
Figure 1 and Figure 2 of this manual.
1.
Roll out the boat skin and assemble all the rods.
2.
Insert both gunwales as far as they will go.
3.
Close the flaps to cover the ends.
4.
Assemble keel and stems.
5.
Position keel and stems inside the boat skin.
•
The sections of the long rods are internally
connected by elastic cords to ensure correct
assembly.
•
The two longest rods are gunwales. They
are to be inserted in channels along the edges of
the boat skin. The channel openings are under
flaps at one end of the skin.
•
The curved pieces without plastic fittings
are stems. The narrow end of the stems fit into the
keel.
• The
keel will now be at an angle.
•
The top of the stems should clip securely
to tube stubs attached to the boat skin at each end.
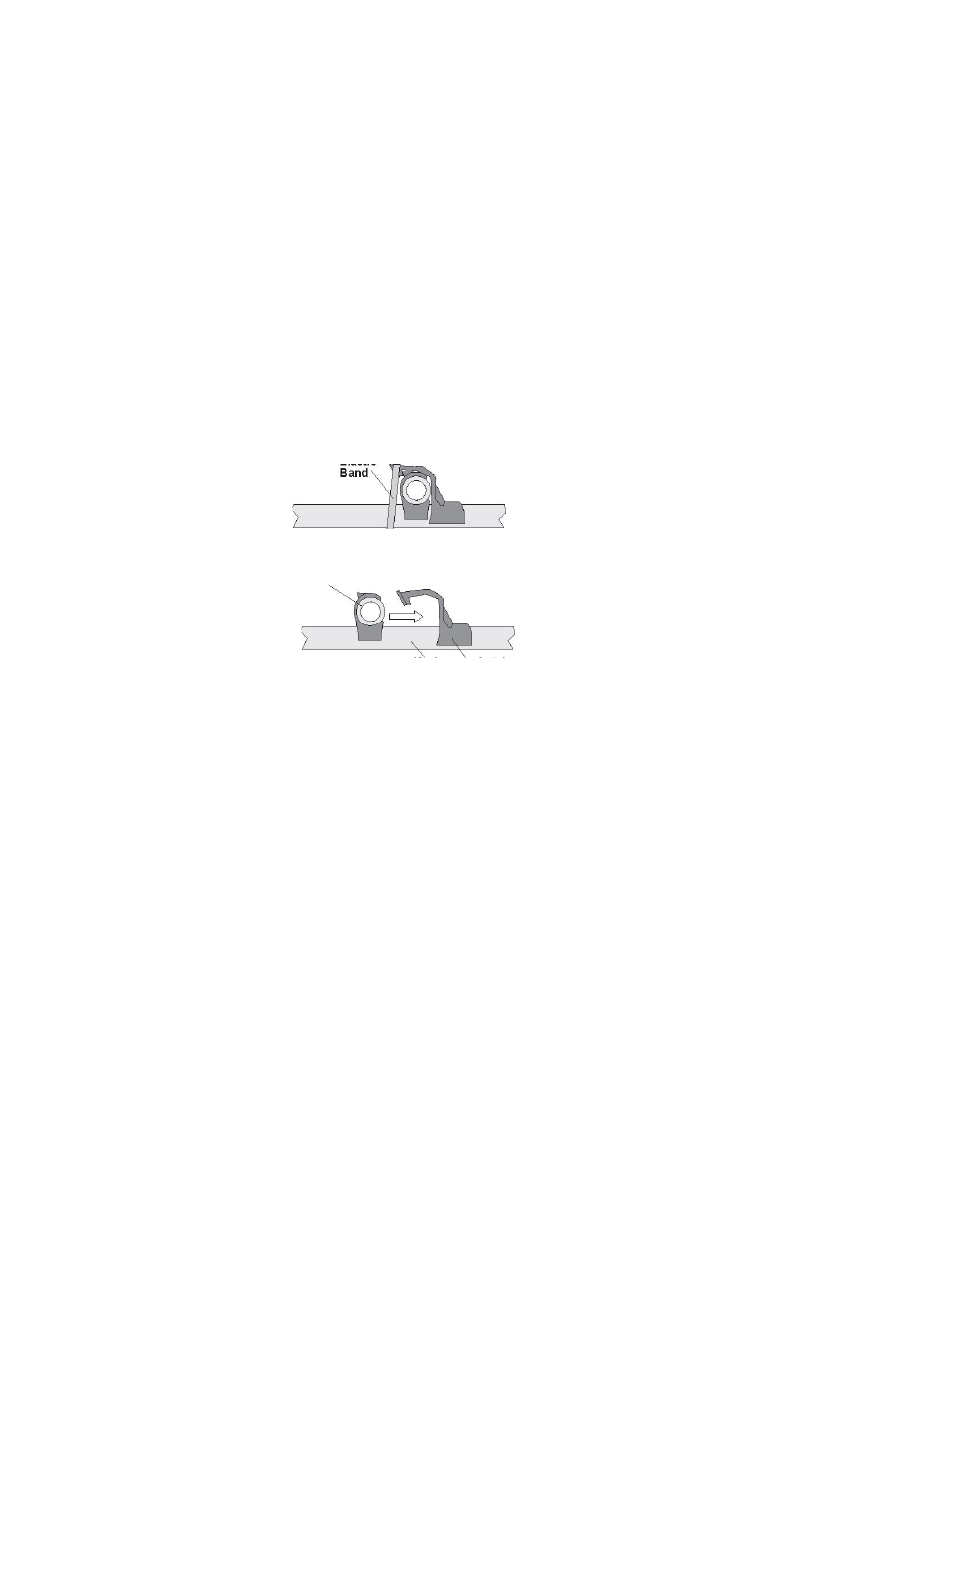
• The
cross ribs are connected to the keel by
means of latch clips. Each cross rib has a plastic
clip at the center. Position this clip on the keel as
shown in Figure 3 and press in the direction of the
arrow until the latch clip locks. Mount the elastic
band to secure the locking.
•
The ends of the cross rib clip to the
gunwales at openings in the gunwale channels.
•
Cross rib (4) is the widest one and will be
installed at the center of the Puffin. To install it the
keel angle is moved to the center of the boat.
•
As the cross ribs are installed the keel
will gradually straighten.
NOTE: The hull is symmetrical. It does not
matter at which end cross ribs (3A) and (3B)
are installed.
• Make
sure
the
stems are centered in the
boat skin.
•
The rear part of the Puffin will now be
where rib (3A) is installed.
• Make
sure
the
keel is straight and the
stems are still centered in the ends of the boat
skin.
Cross Rib
Elastic
Band
Keel
Latch
Clip
Figure 3, Latch Clip
6.
Mount cross rib (4).
7.
Mount cross ribs (3A) and (3B).
8.
Mount the four remaining crossribs,
(1) and (2).