Intex Volleyball Set For Oval Frame Pool 2012 User Manual
Page 3
(99PO) ENGLISH POOL VOLLEYBALL SET MANUAL (FOR OVAL POOL) SIZE: 4.875” X 7.25” PANTONE 295U 07/12/2008
99PO
SAVE THESE INSTRUCTIONS
Page 6
SS
EE
TT
--UU
PP
II
NN
SS
TT
RR
UU
CC
TT
IIOO
NN
SS
POOL VOLLEYBALL SET UP (continued)
(99PO) ENGLISH POOL VOLLEYBALL SET MANUAL (FOR OVAL POOL) SIZE: 4.875” X 7.25” PANTONE 295U 07/12/2008
99PO
SAVE THESE INSTRUCTIONS
Page 5
SS
EE
TT
--UU
PP
II
NN
SS
TT
RR
UU
CC
TT
IIOO
NN
SS
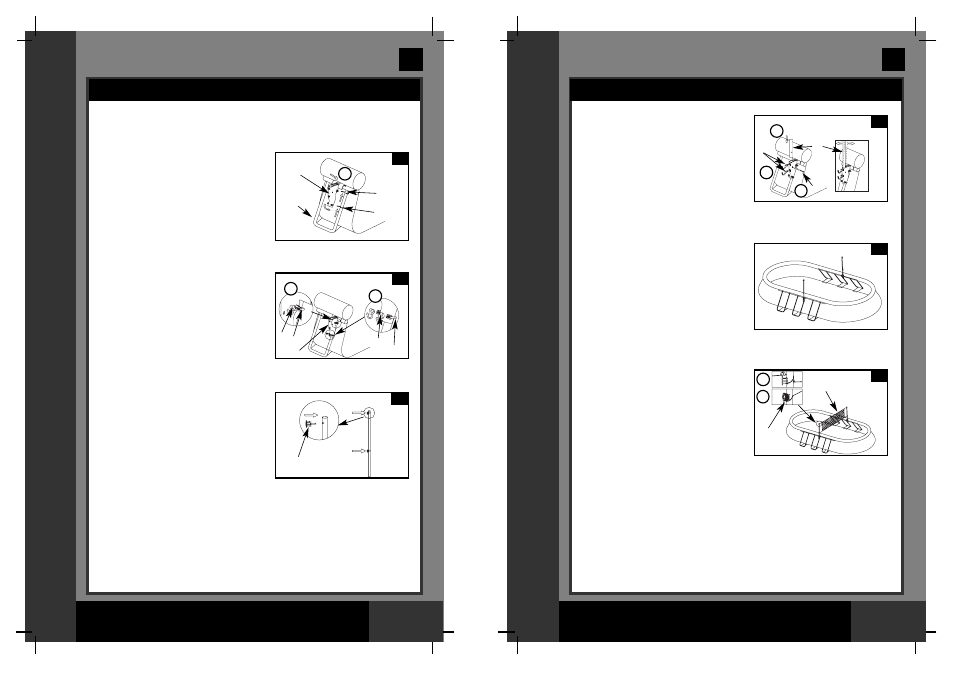
POOL VOLLEYBALL SET UP
IMPORTANT: Before proceeding to the next step ensure the pool is
fully set up and filled with water following the pool owner's manual.
1. Attach a Pole Bracket (2), a
U-Bolt (5) and a U-Bolt A (4) to
the oval pool center "U-shape" leg
along the length of the pool. Make
sure the Pole Bracket (2) is securely
attached to the "U-shape" leg.
2. Secure the Pole Bracket (2) to the
"U-shape" leg with the U-bolt (5),
U-bolt A (4) and four Nuts (6).
3. Attach two Volleyball Net
Fasteners (9) to the Volleyball
Pole (7). Ensure the Volleyball
Net Fasteners (9) are facing outward.
6
4
5
6
2
9
1
2
Pool “U
shape” leg
4
5
2
1
1
2
3
4. Insert the assembled volleyball pole
into the Pole Bracket (2). Secure the
pole to the bracket with a Long
Pin (3). Clockwise screw in the two
Control Screws (1) to adjust the pole
vertically position. NOTE: Adjust the
pole inclination by adjusting the two
Control Screws (1). Do not over
tighten or use tool such as pliers.
5. Locate the opposite "U-shape" leg
and attach the second Pole
Bracket (2) to the "U-shape" leg,
repeat steps #1 to #4.
6. Attach one side of the Volleyball
Net (10) starting from the top
Volleyball Net Fastener (9) and then
the bottom fastener. Loop the rope
around the fastener (9) several
times and secure the end of the rope
to the two notches in the fastener.
NOTE: Adjust the length of the
rope to be looped around the
fasteners depending on the size of
the pool. Repeat this procedure for
the other pole.
1
3
7
1
2
3
Vertical
Adjustment
4
5
6
1
2
9
10