S ave these instructions, Important, Pool setup (continued) – Intex 10 FT X 30 IN OCEAN REEF EASY SET POOL SET User Manual
Page 8: English page 8
86PO
S AVE THESE INSTRUCTIONS
(86PO) EASY SET POOL ENGLISH 7.5” X 10.3” PANTONE 295U 06/13/2013
English
Page 8
POOL SETUP (continued)
2
3
IMPORTANT
Proper inflation of the top ring.
The ambient temperatures of air and water have an effect on the internal pressure of the top ring. To
maintain a correct internal pressure, it is best to leave some room for expansion as the sun heats the
air inside the ring. During very hot weather, you must check to see whether it is necessary to release
some air. This is to avoid any possible damage to the ring.
In no event shall Intex, their authorized agents or employees be liable for damages (such as pin
holes) to the inflatable top ring caused by negligence, ordinary wear and tear, abuse and
carelessness, or external forces.
You may have purchased this pool with the Intex Krystal Clear™ filter pump. The pump has its
own separate set of installation instructions. First assemble your pool unit and then set up the filter
pump.
Estimated assembly time 10~30 minutes. (Note the assembly time is only approximate and
individual assembly experience may vary.)
1. Liner preparation
• Find a flat, level location that is free and clear of stones, branches or other sharp objects that may
puncture the pool liner or cause injury.
• Open the carton containing the liner, etc., very carefully as this carton can be used to store the pool during
the winter months or when not in use.
• Take out the ground cloth
(3) and spread it over the cleared area.
Then take out the liner
(1) and spread it out over the ground cloth,
with the drain valve directed towards the draining area. Place the
drain valve away from the house.
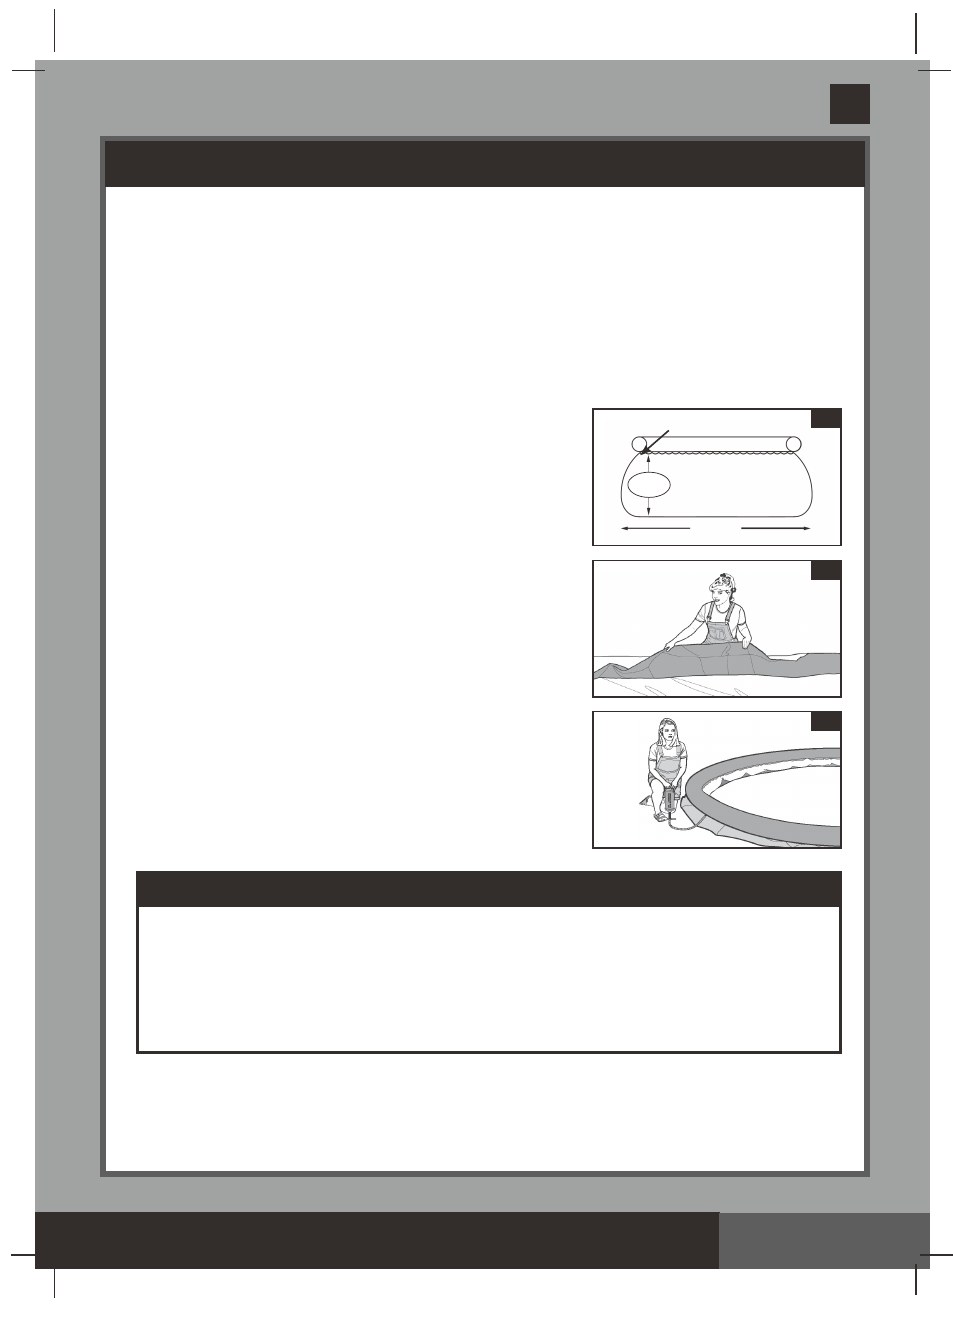
IMPORTANT: Always set up the pool unit with at least 2
persons. Do not drag the liner across the ground as this can
cause liner damage and pool leakage (see drawing 2).
• During the setup of the pool liner, point the hose connections or
openings in the direction of the electrical power source. The
outer edge of the pool should be within reach of the pump’s
electrical connection.
• Lay out the pool. Spread out the plain blue sides and make the
pool floor as smooth as possible
(see drawing 2).
2. Ring inflation
• Flip the top ring out and check that it is fully outside of the wall
lining and facing up. Inflate the ring with a manual air pump
(see
drawing 3). Keep the top ring centered in the middle of the pool,
while doing this.
IMPORTANT: Prevent bursting by not using a high-pressure
pump, such as an air compressor. Do not over inflate.
Preferably use an Intex manual inflation hand pump
(not included).
3. Hose connectors
• The following applies to pool liners
with hose connectors (16" (488 cm) & below pools). If the pool was
purchased
without a filter pump, insert two black plugs (2) into the black filter pump outlets. Do this
from the inside of the pool so that water will not run out when filling it.
• If the pool was purchased
with a filter pump, read the Krystal Clear™ Filter Pump Manual first and then
proceed to next installation step.
1
WATER
LEVEL
Level
FILL LINE