Heckler&Koch MR556A1 User Manual
Page 14
26
27
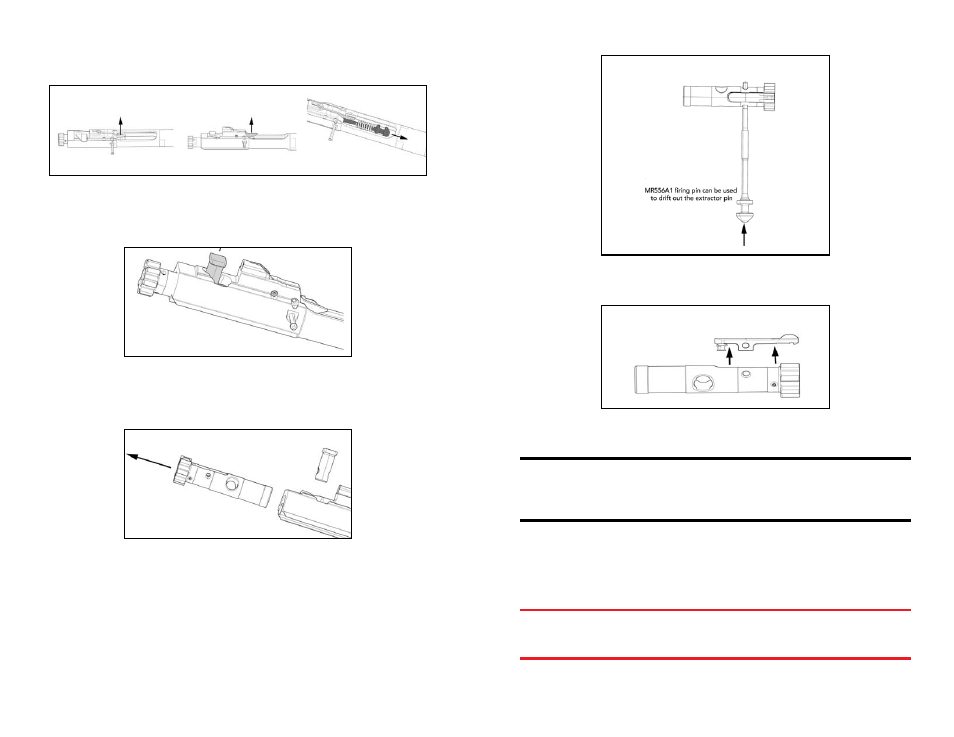
d. Lift up on the spring loaded drop safety and remove the firing pin and firing pin spring
(Fig. 39).
Fig. 39 – Drift out the Firing Pin Retaining Pin
e. Lift up and remove the cam pin from the shaft of the bolt head (Fig. 40).
Fig. 40 – Remove the Cam Pin
f. Slide the bolt head from the front of the bolt carrier (Fig. 41).
Fig. 41 – Slide the Bolt Head out
g. Depress the rear of the extractor to equalize pressure and then drift out extractor pin
utilizing the small tip of the disassembly tool. The rifle’s firing pin can also be used
The extractor pin can be removed from either direction (Fig. 42).
Fig. 42– Drift out the Extractor Pin
h. Separate the extractor from the bolt head (Fig. 43).
Fig. 43 – Separate the extractor form the bolt head
CAUTION: Only remove the extractor spring and buffer from the extractor if worn,
or damaged. Note that both the extractor spring and buffer features a slight taper to
help mount these items onto the extractor. Constant removal and installation of the
spring and buffer could lead to decreased service life of these parts and could impair
the function of the MR556A1.
4. Upper Receiver
a. Insert a 5mm hex (Allen) wrench into the retaining screw located on the lower right
hand side of the Free Floating Rail System (handguard) and rotate counter clockwise
(Fig. 44). Once loosened, drift out the retaining screw from left to right until the
retaining screw reaches its limit of lateral travel.
WARNING: The retaining screw for the Free Floating Rail System (FFRS) handguard
is held captive by a small shaped spring located on the lower right hand side of the
handguard. Attempting to completely remove the retaining screw could lead to
damage of the handguard, shaped spring, and/or retaining screw.