Haltech HT059900 User Manual
Page 7
Wiring Harness (optional)
The Haltech I/O Expander 12 can be supplied with a 24 pin wiring harness,
Connections are outlined in detail below:
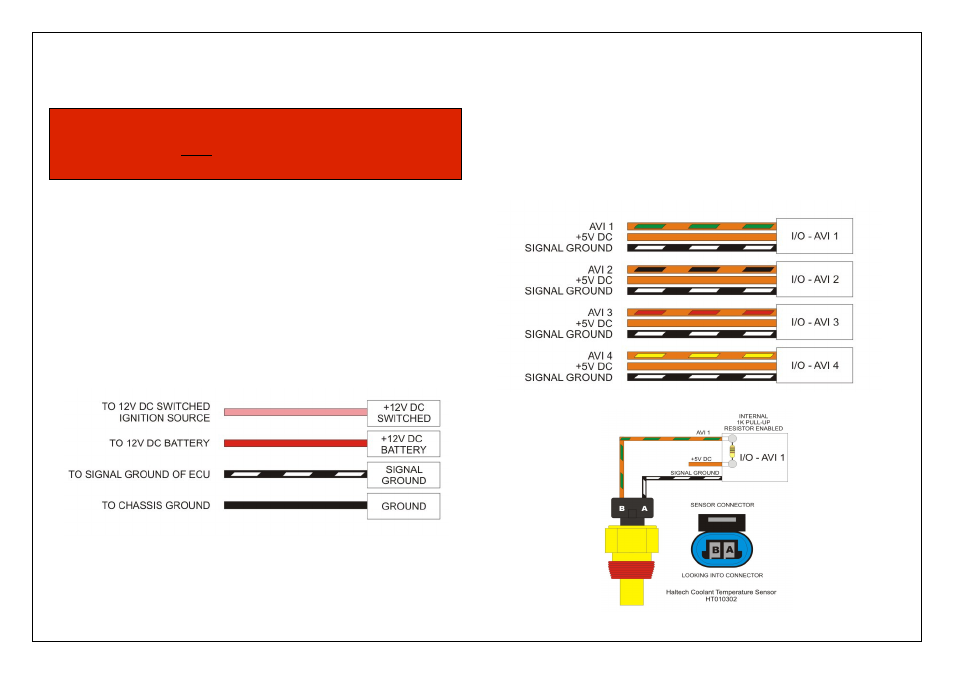
Main Inputs
There are four main inputs to the Haltech I/O Expander 12
+12V DC Switched (Pink)
Connect this wire to a +12V DC Switched ignition source
+12V DC Battery (Red)
Connect this wire to a constant +12V DC battery supply
Signal Ground (Black / White)
Connect this wire to the signal ground on the ECU
Ground (Black)
Connect this wire to a chassis ground point on the vehicle
Figure 4 - Main inputs
Analogue Voltage Inputs ( AVI )
The Haltech I/O Expander 12 features 4 Analogue Voltage Inputs.
Analogue Voltage Inputs accept variable voltage inputs from 0V to 5V.
AVI inputs can also accept switch inputs that change between two different voltage
levels. The On Voltage and Off Voltage define the thresholds between the On and Off
states. The input voltage can be viewed as a channel in the software to determine the
thresholds for a switched input.
Each AVI has a selectable 1K Pull up resistor which can be enabled or disabled in the
software allowing quick connection of temperature sensors.
The Haltech I/O Expander 12 harness supplies connections for 5V power and signal
ground outputs allowing quick and easy connection of 5V powered sensors.
Figure 5 - Analogue Voltage Inputs
Figure 6 - Haltech HT010302 Coolant Temperature Sensor wiring to AVI 1
WARNING!
Please make sure you configure your I/O Expander 12 with your ECU using
ECU Manager Software before you plug in the wiring harness, as outputs may
turn on undesirably when power is applied if not configured.