Apply the decals final setup – Great Planes Yak-55 EP 3D ARF - GPMA1190 User Manual
Page 11
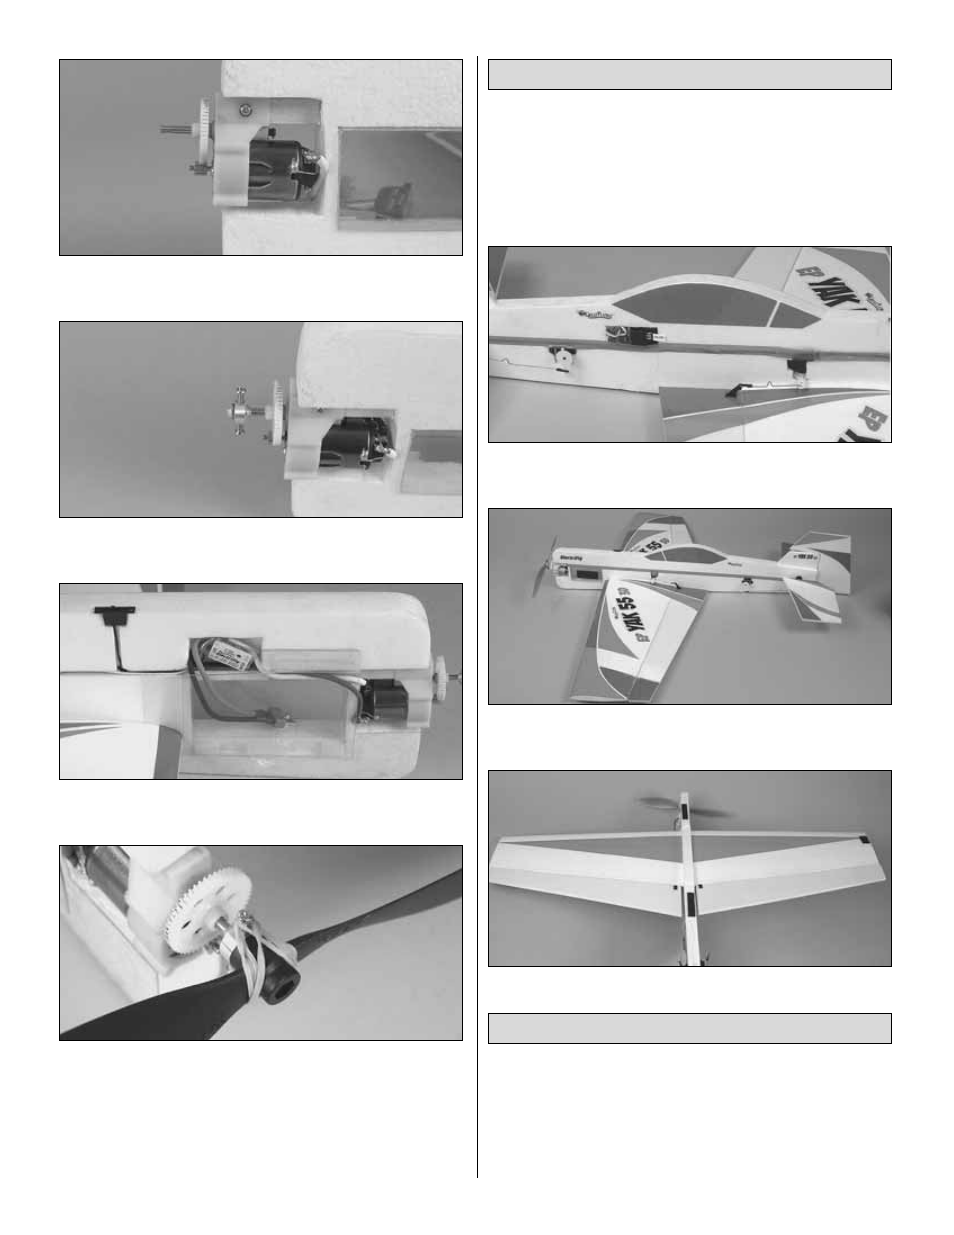
❏
2. Slide the gearbox onto the 10mm square stick in the
nose. Secure it with a screw.
❏
3. Install the prop saver onto the gearbox output shaft.
The screws should seat down into the flat spots on the shaft.
❏
4. Install the ESC as shown. If your ESC has a BEC
switch, install it in the provided cutout.
❏
5. Attach the propeller to the prop saver with two
rubber bands.
❏
1. Connect the servos and ESC to their channels on the
receiver. You may need to use extensions to allow the
aileron servo and ESC lead to reach the receiver. Power up
your radio system and center the servos. If necessary,
adjust the center point of the control surfaces by tightening
or enlarging the “V” bend in each pushrod.
❏
2. Tape the receiver into its cavity on the fuselage, and cover
the servo wires in the groove with the red trim tape provided.
❏
3. Apply the other piece of trim tape to the other side of
the fuselage to match.
❏
4. Apply the red triangle trim to the bottom of the wing
1. Use scissors or a sharp hobby knife to cut the decals from
the sheet.
2. Be certain the model is clean and free from oily fingerprints
and dust. Prepare a dishpan or small bucket with a mixture of
liquid dish soap and warm water–about one teaspoon of soap
Apply the Decals
Final Setup
11