Install the servos – Great Planes Wright Flyer ARF - GPMA1110 User Manual
Page 8
❏ ❏
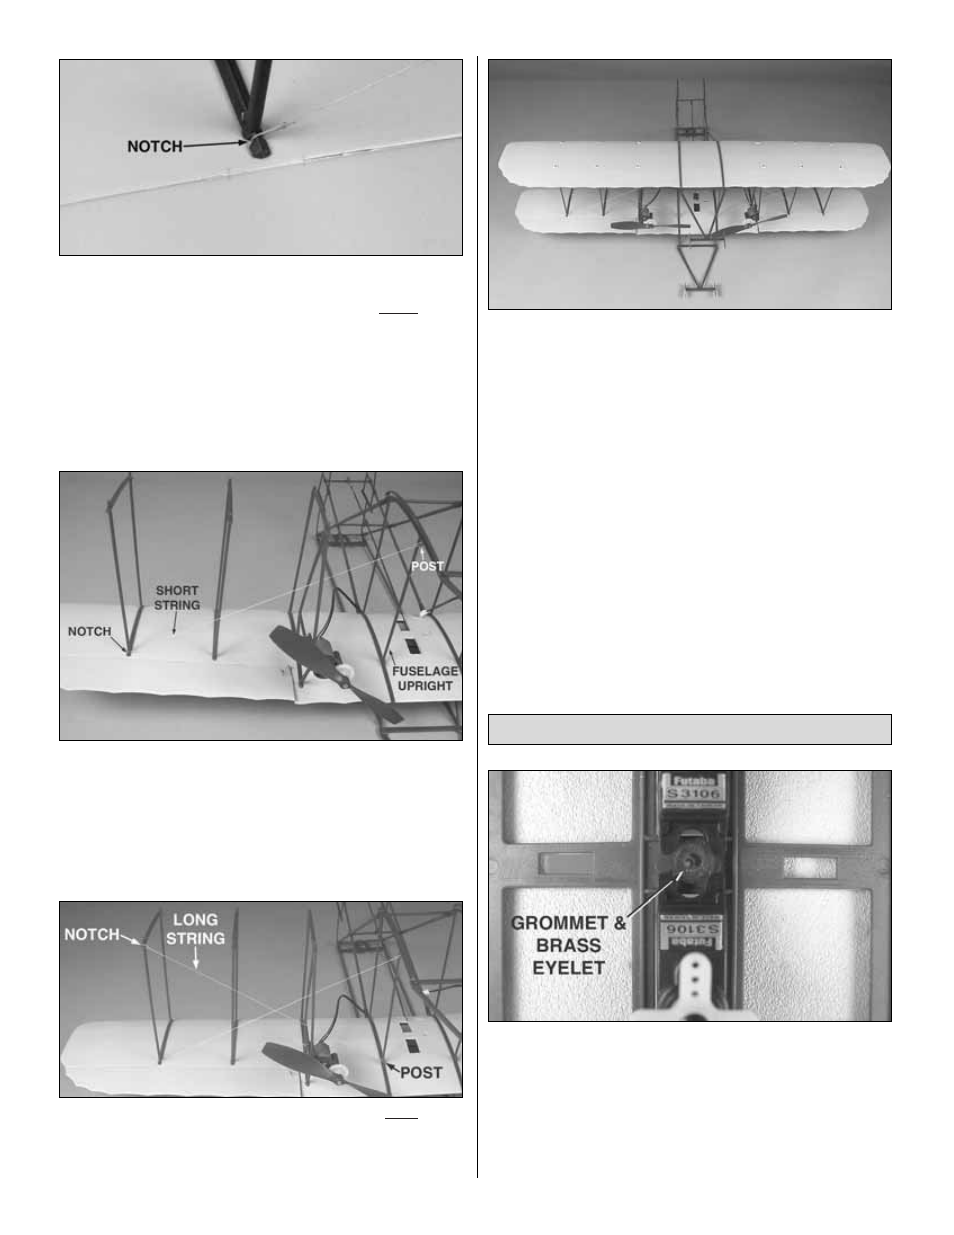
3. The above photo shows the outer strut on the left
bottom wing where it attaches to the wing at the trailing
edge. Notice the notch in the strut. Locate a short string
and slide one end under the rear edge of the strut and onto
the notch. The other end of the string will be attached in the
next step.
❏ ❏
4. Guide the other end of the string through the motor
strut and onto the post at the top of the fuselage upright.
In the same manner, attach the other short string to the right
side of the wing.
❏ ❏
5. Using the same technique, install a long string
from the notch at the top of each outer strut to the post at
the bottom of the fuselage uprights on the left and right
sides of the wing.
❏
6. Install the top wing by sliding it into the slots in the top
of the fuselage uprights. Be careful to guide it along the top
of the wing struts. When the top wing is in place, check that
it is centered in the fuselage. The bottom of the wing has the
centerline marked on it.
❏
7. Insert the tops of the wing struts in the proper holes in
the top wing. Once certain the top wing is installed correctly,
use white plastic strut clips to hold the ends of the struts to
the wing. Two clips are required for each strut.
❏
1. Install the servos in the fuselage frame from the
bottom of the bottom wing using the grommets, brass
eyelets and screws supplied with your servos.
Note: Where the two servos meet, you will be able to use
only one grommet, brass eyelet and screw. A white plastic
cover is included to hold the grommet and servos in place
(as shown in the photo that follows).
Install the Servos
8