Balance the model (c.g.), Set the control throws – Great Planes Wright Flyer ARF - GPMA1110 User Manual
Page 12
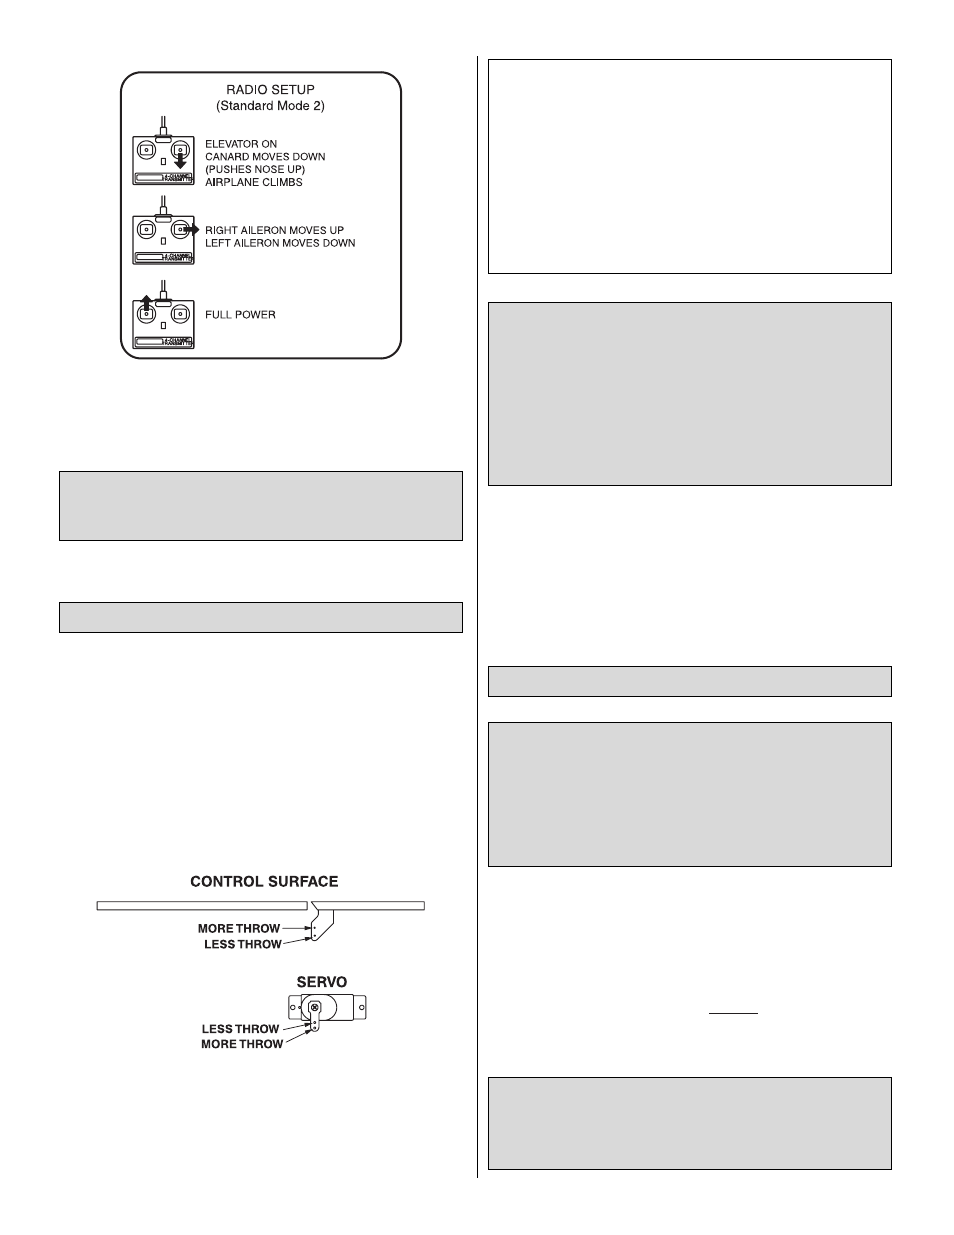
IMPORTANT: Remember that this model is equipped with
canards. When the elevator stick is pulled back toward you,
the canard elevator will deflect downwards.
Use a ruler to accurately measure and set the control
throws of each control surface as indicated in the chart that
follows. If your radio does not have dual rates, we
recommend setting the throws at the high rate setting.
Use the ATV function in the transmitter or adjust the position
of the pushrods on the servo arms or the control horns on
the elevators and ailerons to get the control surface throws
shown in the chart that follows. The throws are measured at
the widest part of the control surface.
To increase the control surface throw, move the pushrod to
the hole that is closer-in on the control horn on the control
surface, or move the pushrod to the hole that is farther out
on the servo arm. To decrease the control surface throw, do
the opposite.
The C.G. (center of gravity) must be checked with the model
in ready-to-fly condition with all of the systems in place and
the battery installed.
❏
1. Use a felt-tip pen or narrow strips of tape to accurately
mark the C.G. on the bottom of the lower fuselage rails. The
C.G. is located 1-1/8" [28.6mm] in front of the bottom wing.
Remember, this is a model with lifting canards, so the
balance point will be in front of the wings.
IMPORTANT: This model is very sensitive to the proper
C.G. It must be balanced exactly as shown or the model
may not fly well. The C.G. range of this model is very
limited and only very minor changes should be made.
IMPORTANT: The C.G. (center of gravity), or balance
point has the greatest effect on how a model flies. Do not
overlook this important procedure. Modelers who do so
often find that the airplane is difficult to control, or out of
control after it is too late. Preserve your model and insure
that the first flight won’t be the last by balancing the model
according to the following instructions.
Balance the Model (C.G.)
IMPORTANT: The Wright Flyer has been extensively
flown and tested to arrive at the throws at which it flies
best. Flying your model at these throws will provide you
with the greatest chance for successful first flights. If, after
you have become accustomed to the way the Wright Flyer
flies, you would like to change the throws to suit your
taste, that is fine. However, too much control throw could
make the model difficult to control, so remember, “more is
not always better.”
Set up the Wright Flyer so it has the following control
surface throws:
ELEVATOR:
High Rate
5/8" [16mm] up and down
Low Rate
1/4" [6.4mm] up and down
AILERONS:
High Rate
5/8" [16mm] up and down
Low Rate
3/8" [10mm] up and down
Set the Control Throws
Note: Unless you are specifically checking the operation
of the motor, for safety remove the propellers from the
model while setting it up on your workbench.
12