1 rack mounting the emc38-12, Screws (4) rack mounting brackets (2) – Cabletron Systems EMC38-12 User Manual
Page 16
CHAPTER 2:
INSTALLATION
Page 2-2
EMC38-12 USER’S GUIDE
2.2.1
Rack Mounting the EMC38-12
Before installing the EMC38-12, care must be taken to ensure that the
rack used will support the unit and that the rack remains stable with the
EMC38-12 installed. In order to allow for proper cooling within the rack,
there must be a two inch clearance on either side of the unit. Refer to
Chapter 1
for power and enviromental requirements.
The following procedure explain how to install the EMC38-12 in a
19-Inch rack.
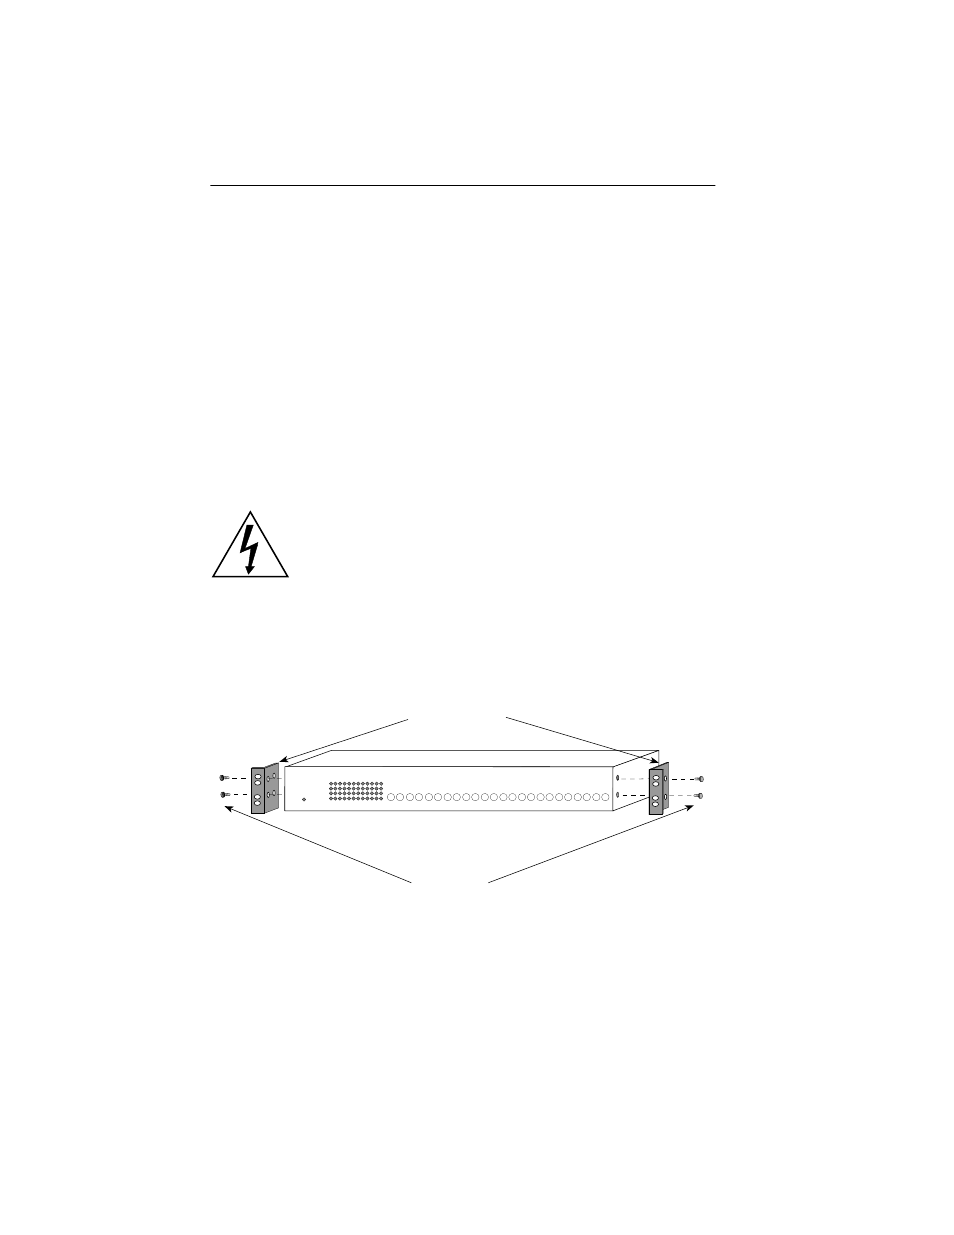
1. Remove four cover screws (two from each side) located along the
front edges of each side of the EMC38-12. Figure 2-1 shows the
location of the screws.
2. Using the four cover screws removed in step 1, attach the rack
mounting brackets to each end of the EMC38-12.
Figure 2-1. Installing the Rack Mount Brackets
Do not remove the cover from the EMC38-12.
Screws (4)
Rack Mounting
Brackets (2)
EMC38-12
Ethernet Media Converter
WITH
LANVIEW
TPLINK
XMT
RCV
FOLNK
12 11 10 9 8 7 6 5 4 3 2 1
PWR
12
10
9
8
7
6
5
4
3
2
1
RX
TX
RX
TX
RX
TX
RX
TX
RX
TX
RX
TX
RX
TX
RX
TX
RX
TX
RX
TX
RX
TX
RX
TX
11