Join the tail fairings – Great Planes Ryan STA 1.20 ARF - GPMA1345 User Manual
Page 14
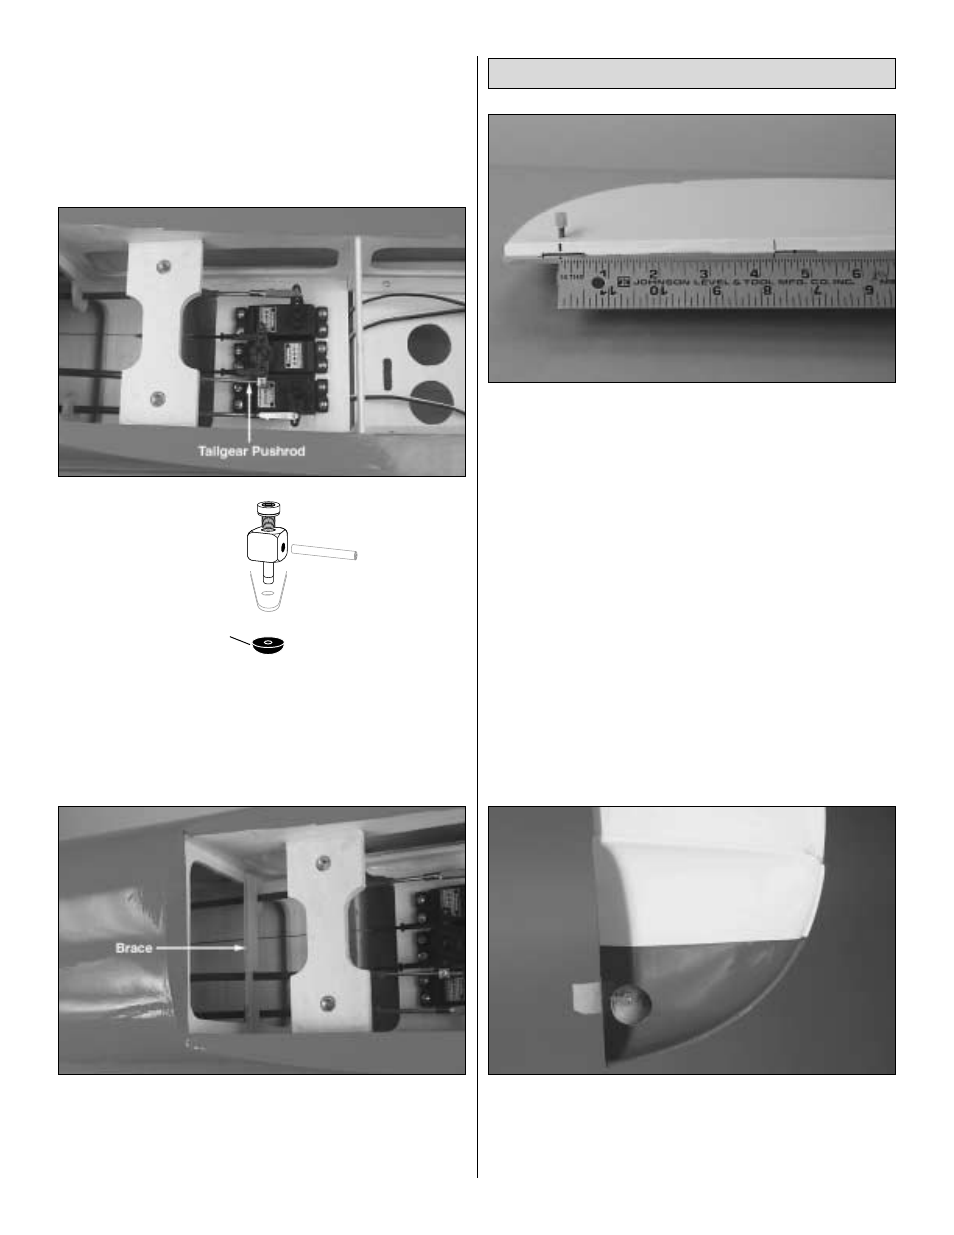
wire by bending the threaded end to join the steering arm on
the right side of the tail gear. Connect the pushrod to the tail
gear with a nylon ball link, a 0-80 threaded ball and a 0-80
nut and a small drop of threadlocker.
❏
5. Cut the other end of the wire to the correct length and
connect it to the rudder servo arm as shown in the sketch
with a brass Quick Connector body, a nylon retainer and a
4-40 x 1/8" screw.
❏
6. Make a balsa or plywood brace for the front end of the
tail gear guide tube. Temporarily disconnect the pushrod
from the servo and slide the brace over the guide tube.
Connect the pushrod, then glue the brace into position as
shown in the photo.
❏
1. Disconnect the clevises from the rudder and remove
the rudder from the fin. Measure the distance from the
bottom of the third hinge slot to the threaded rod that goes
through the rudder. As you can see in the rudder in the
photo, the distance is about 4-1/4".
❏
2. Remove a torque rod horn and the threaded rod from
the rudder. Temporarily fit the rudder fairing over the rudder.
Using the measurement taken in the previous step, trim the
rudder fairing as necessary to accommodate the threaded
rod, torque rod horns and the clevises.
❏
3. Making certain the leading edge of the rudder fairing
is parallel with the leading edge of the rudder, glue the
rudder fairing into position. Install the threaded rod. Add a
few drops of thin CA and allow to harden. Thread on the
torque rod horns.
Join the Tail Fairings
RETAINER
14