Install the landing gear and wheel pants – Great Planes Little Toni ARF - GPMA1320 User Manual
Page 12
❏
8. Insert the rudder onto the fin, installing the hinges into
the fin and inserting the tail wheel wire into the hole you
applied the epoxy in. Position the rudder and then apply thin
CA onto the hinges.
This completes the installation of the tail surfaces. You will
finish the installation of the control horns and pushrods
when you perform the radio installation.
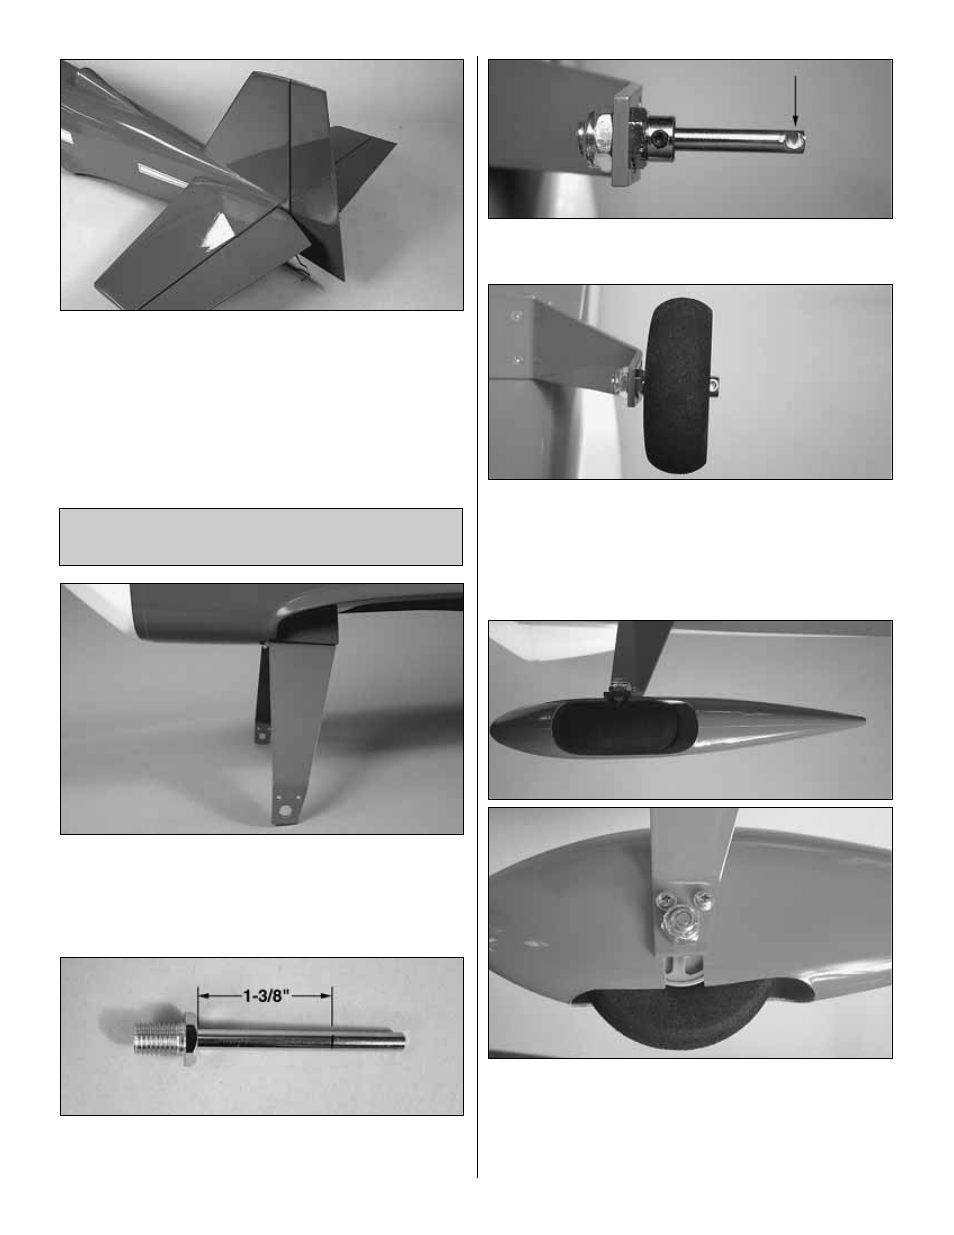
❏ ❏
1. Bolt the landing gear to the fuselage with four 8-32
x 3/4" [19mm] flat head machine screws. Apply a drop of
thread lock to the threads before screwing them into the
fuselage. When installing the gear, the taper should be to
the back of the fuselage.
❏ ❏
2. Cut both axles to a length of 1-3/8" [35mm]. A high
speed rotary tool with a cut-off wheel works well for
this application.
❏ ❏
3. File a flat spot on the end of the axle. A high speed
rotary tool works well for this also.
❏ ❏
4. Insert a 6-32 set screw into a 5/32" [4mm] wheel
collar. Slide it onto the axle. Slide the wheel onto the axle
and then slide on another 5/32" wheel collar. Screw a 6-32
x1/4" [6mm] socket head cap screw into the wheel collar
with a drop of threadlocker. Center the wheel, then tighten
the set screws on the wheel collars.
❏ ❏
5. Slide the wheel pant over the wheel. Attach the
wheel pant to the landing gear with two 4-40 x 1/2" [13mm]
machine screws, #4 flat washers and #4 lock washers.
Apply a drop of threadlocker to each screw.
❏
6. Repeat step 1-5 for the other wheel pant.
Install the Landing Gear
and Wheel Pants
12