Great Planes Combat Mustang ARF - GPMA1475 User Manual
Page 12
❏
2. Locate a 4-1/2" [114mm] balsa stick. Cut it as needed
to fit in the fuselage to hold the fuel tank in position. When
you have completed the installation of the fuel tank and the
engine, this stick will be permanently glued in place. You
may wish to tack glue it in place as you continue with the
rest of the installation.
❏
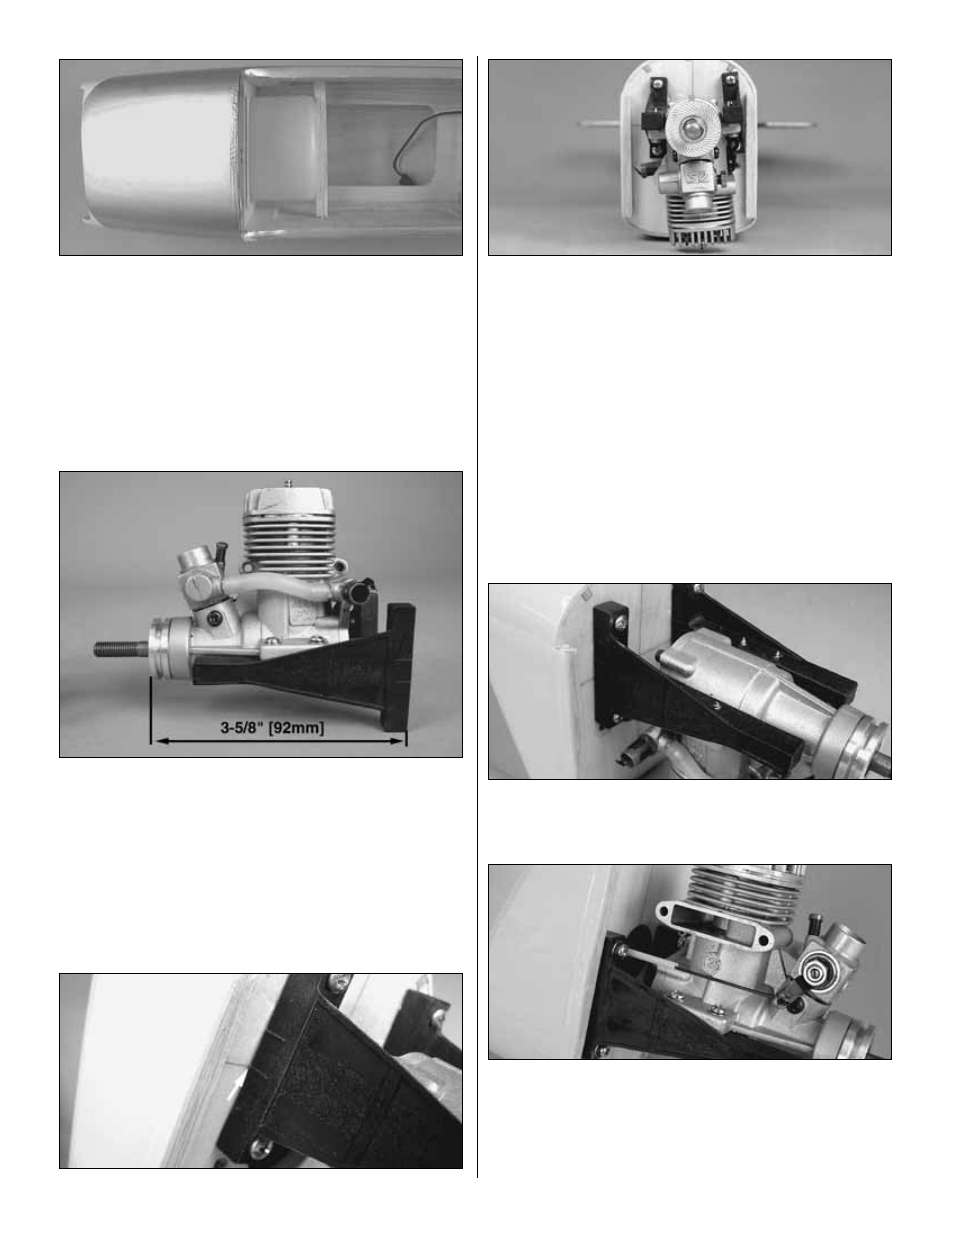
3. Position your engine on the engine mount so that the
distance from the back of the mount to the front of the thrust
washer is 3-5/8" [92mm]. Drill a 3/32" [2.4mm] hole through
each of the mounting holes of the engine into the engine
mount. Mount the engine to the mount with four 3 x 15mm
self-tapping screws and 3mm flat washers.
❏
4. On the side of the engine mount are reference marks.
Align the marks that are in line with the engine mounting
rails with the lines on the firewall. Align the center of the
engine with the lines on the firewall. Tack glue the mount to
the firewall.
❏
5. Mark the location of the mounting holes onto the
firewall. Remove the engine mount from the firewall. Drill
four 5/32" [4mm] holes though the firewall on each of the
four marks.
❏
6. Install a 3mm blind nut on the back side of the firewall
in each of the four holes.
❏
7. Mount the engine mount to the firewall with four 3 x
19mm screws, 3mm lock washers and 3mm flat washers.
❏
8. Drill a 3/32" [2.4mm] hole through the firewall, in line with
the throttle arm on the carburetor. Slide the white nylon
guide tube into the hole in the firewall feeding it back to the
throttle servo. Glue it to the firewall. Insert a 1 x 508mm wire
pushrod into the tube. Attach the throttle arm to the Z-bend on
the end of the wire.
12