Build the fuselage – Great Planes Combat Corsair ARF - GPMA1470 User Manual
Page 9
❏
3. Glue the plates to the wing. Allow the glue to harden.
❏
4. From the top of the wing, drill a 1/4" [6mm] hole
through the wing bolt hole and through the wing bolt plates.
Attach the wing to the fuselage with two 1/4-20 x 2" [51mm]
nylon wing bolts.
❏
5. Cut the covering from the holes in the belly pan. Place
the belly pan in position on the wing. Trace the outline of the
belly pan onto the wing with a felt tip pen. Remove the belly
pan from the fuselage.
❏
6. Cut away the covering 1/8" [3mm] inside the lines you
have drawn. Glue the belly pan to the wing with 6-minute
epoxy.
Important: Do not use CA. It will melt the foam!
❏
1. Cut the covering from the slots for the stab and fin and
the pushrod and antenna exits.
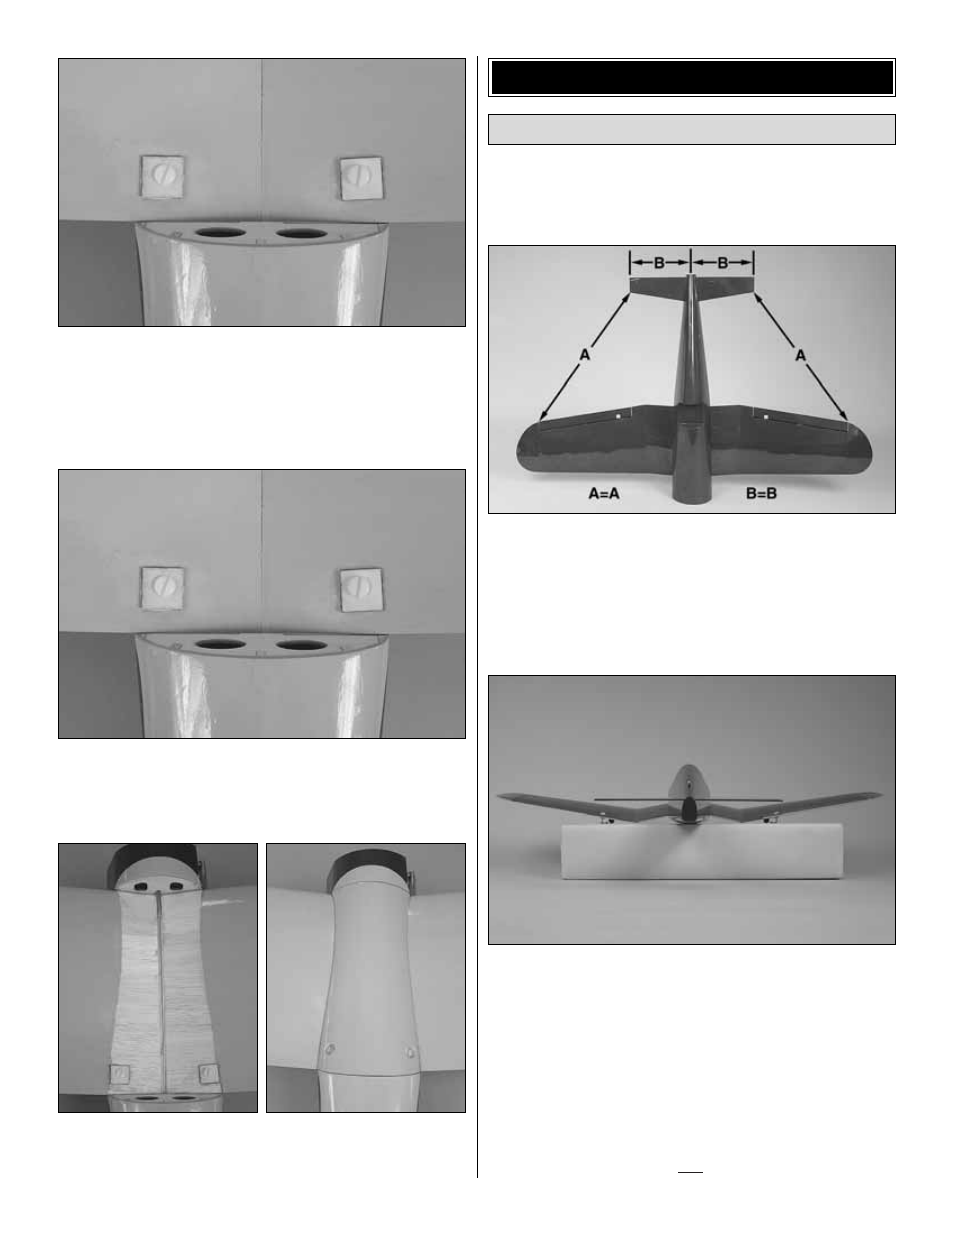
❏
2. If the wing is not mounted to the fuselage, install the
wing to the fuselage. Insert the horizontal stab into the slot
in the side of the fuselage. Make sure the stab is centered
and the distance from the tip of the stab to the tip of the wing
is an equal distance.
❏
3. Stand back approximately 6' [2m] from the back of the
airplane. Check to be sure the stab is aligned with the wing.
If not, sand the high side of the stab saddle to bring the stab
into alignment.
❏
4. Trace the outline of the fuselage to the top and the
bottom of the stab. Remove the stab, then carefully cut away
the covering inside of the lines you have drawn using the
same technique used for the belly pan. Do not cut the
surface of the wood. This
will weaken the stab.
Install the Stab and Fin
BUILD THE FUSELAGE
9