Fuel tank – Great Planes Combat Corsair ARF - GPMA1470 User Manual
Page 11
❏
1. Place the servo into the servo tray, positioning it on the
right side of the fuselage. Drill 1/16" [1.6mm] holes for the
servo screws. Install the servo into the servo tray with the
hardware provided with your radio system.
❏
2. Install the screw-lock connector and 2mm washer into
the outermost hole of the servo arm. Apply a drop of thread-
locker to the threads. Then tighten the 2mm knurled nut onto
the connector.
❏
3. Install the elevator pushrod wire through the hole at the
back of the fuselage, sliding it into the servo compartment
and through the hole in the screw-lock connector.
❏
4. Install a nylon control horn onto the Z-bend of the
pushrod wire. Install the control horn the same way as was
done with the ailerons.
❏
5. Center the servo. Then tighten the set screw onto the
pushrod wire.
❏
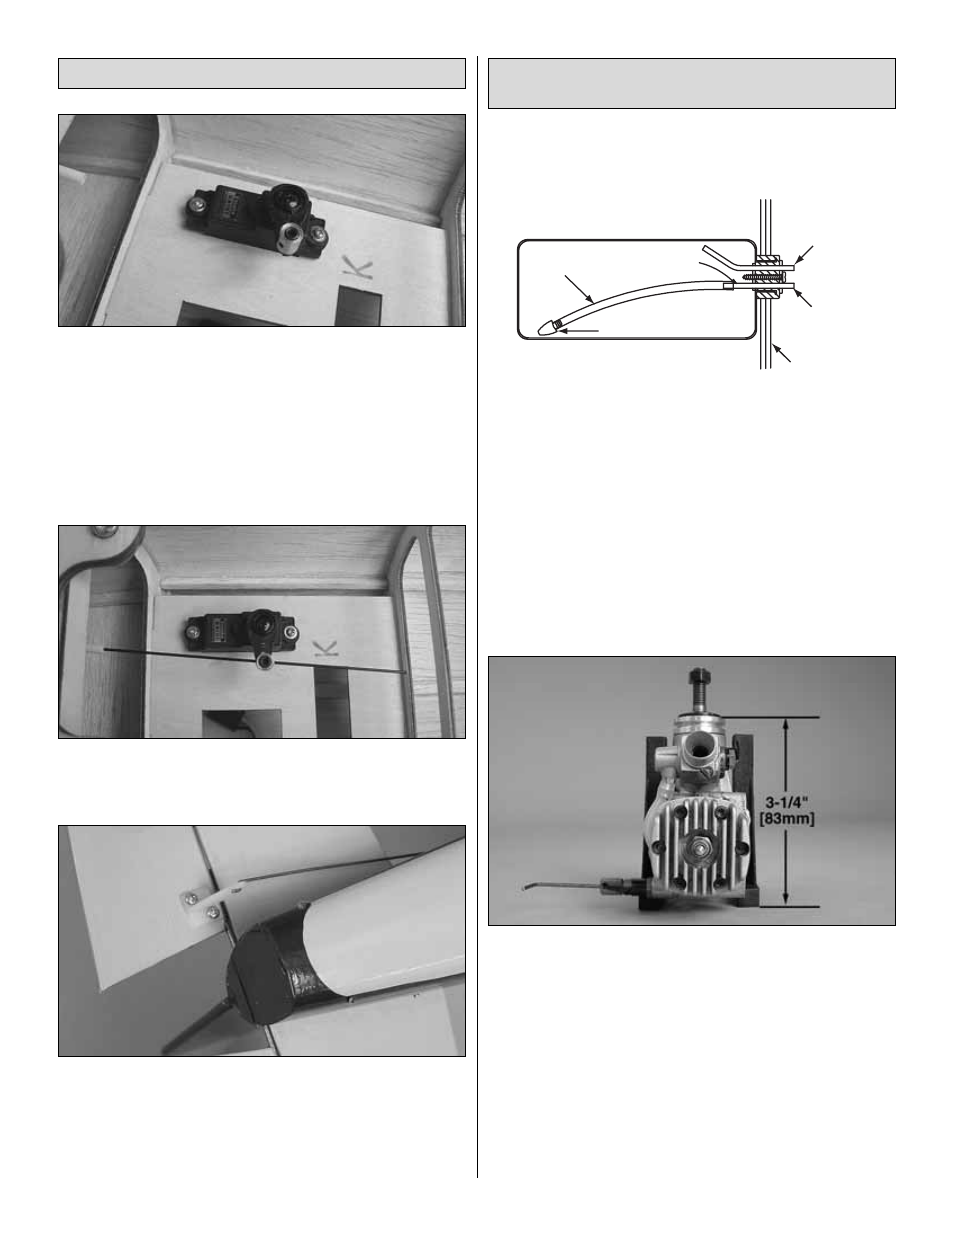
1. Assemble the fuel tank as shown in the sketch. When
tightening the center screw be sure not to over tighten it. You
just want it snug enough to pull the rubber stopper tight
against the tank.
❏
2. Position your engine on the engine mount so that the
distance from the back of the mount to the front of the thrust
washer is 3-1/4" [83mm]. Drill a 3/32" [2.4mm] hole through
each of the mounting holes of the engine into the engine
mount. Mount the engine to the mount with four 3 x 15mm
self tapping screws and 3mm flat washers.
FUEL TANK
SILICONE
FUEL LINE
FUEL
PIPE
FUEL CLUNK
PRESSURE
TAP TO
MUFFLER
TO NEEDLE
VALVE
FIREWALL
Install the Fuel Tank, Engine,
Throttle Servo and Pushrod
Install the Elevator Servo and Pushrod
11