Great Planes CAP 580 Matt Chapman EP FlatOuts ARF - GPMA1112 User Manual
Page 14
❏
3. Refer to the parts list in the front of the manual and
select the correct double-sided servo arm for the aileron
servo you will be using. There are three arms to choose from:
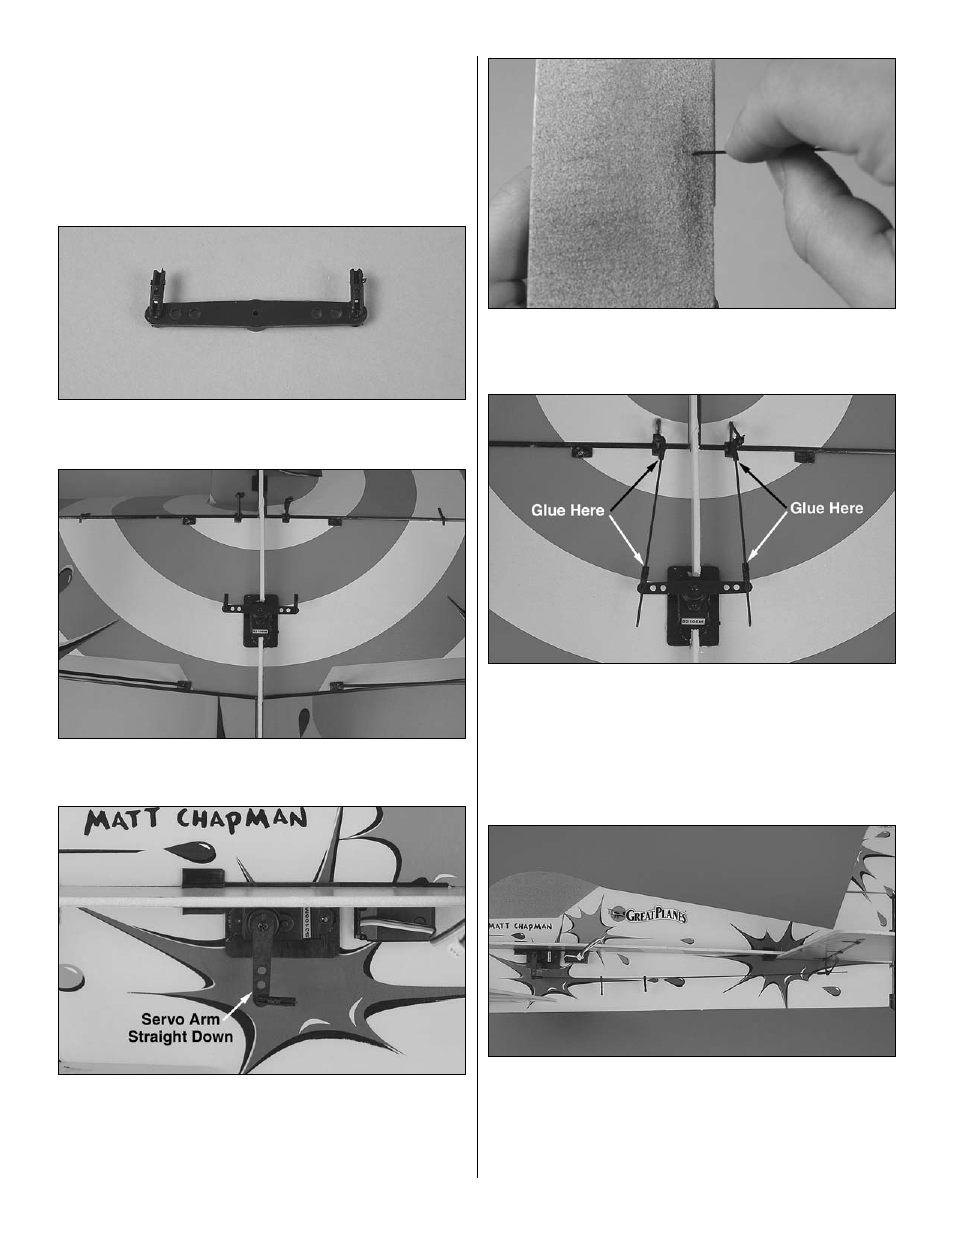
Servo arm A
Hitec HS-55, Hitec HS-50, Futaba 3108M
Servo arm B
Futaba S3103, Airtronics 94091
Servo arm C
JR 241
❏
4. Connect two A1 Z-bend clevises to the outer holes of
the servo arm you have selected.
❏
5. Use your radio to center the aileron servo. Mount the
double-sided servo arm to the aileron servo.
❏
6. Select two single-sided servo arms to fit the elevator
and rudder servos you are using. Insert an A1 Z-bend clevis
into the outer hole of each arm. Use your radio to center the
servos, and mount the servo arms so that they point straight
down with the servos centered.
❏
7. Using a 220-grit sanding block, sharpen the ends of all
the 1mm carbon pushrods. This will make it much easier to
install them through the Z-bend clevises.
❏
8. Slide a 1 x 80mm [.040" x 3-1/8"] aileron pushrod
through the clevises in the aileron horns and servo arms.
Adjust the clevises until the ailerons are centered with the
servo centered. When you have the alignment correct,
secure the pushrod with a drop of glue where the pushrod
enters the clevis. Keep glue away from the end of the clevis
where it pivots in the arm or horn.
❏
9. Slide two E3 pushrod guides onto the 1 x 290mm
[.040" x 11-1/2"] elevator pushrod and slide the pushrod
through the clevises on the elevator servo arm and control
horn. Adjust the clevises until the elevator is centered with
the servo centered. Secure the clevises with a drop of glue
on each clevis where the pushrod enters it.
14