Great Planes Pete 'n Poke 40 Kit - GPMA0493 User Manual
Page 14
14
❏
1. Use a bar sander with 80-grit sandpaper to sand the
top of the center-section so all the ribs, spars, joiners and
sub LE are even. Relocate or remove any T-pins that will be
concealed under the sheeting when it’s glued into position.
❏
2. Use thick CA or Great Planes Pro Wood Glue to glue
the top center-section sheeting into position.
❏
3. Remove the center-section from the building board.
Trim the edges of the top sheeting even with the ribs and the
sub LE. Cut the center-section LE from the 3/8" x 7/8" x 36"
balsa stick and glue it into position. Trim the LE even with the
ends of the center-section and the top sheeting, but do not
round the LE until instructed to do so.
❏
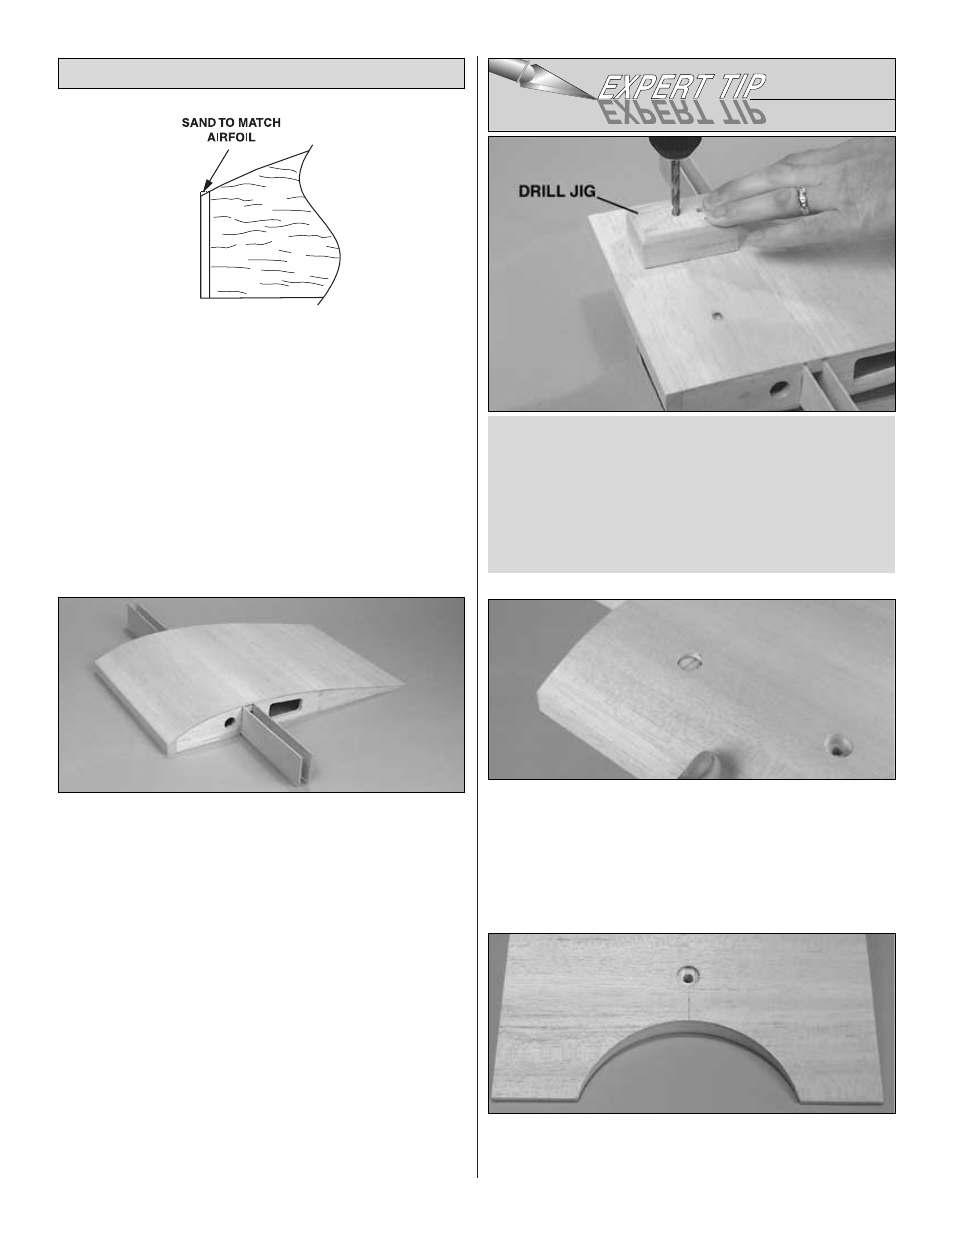
4. Taking measurements from the plan, use a hobby knife
with a #11 blade to cut a hole in the bottom sheeting over
the die-cut hole in the middle of the aft wing bolt plate.
❏
5. Refer to the Expert Tip that follows. Using the holes in
the wing bolt plates as a guide, drill three 1/4" holes through
the center-section of the wing.
❏
6. Temporarily fit the 1/4-20 nylon wing bolts into the
holes in the center-section. Use a ballpoint pen to draw a
circle on the sheeting around the heads of the bolts.
Remove the wing bolts, then use a hobby knife to cut the
sheeting to accommodate the heads so they will be inset
below the sheeting. Hint: Use a dowel with sandpaper on
the end to sand the bottoms of the holes smooth.
❏
7. Use a small razor saw or a hobby knife to cut the circular
opening in the trailing edge of the center-section. Sand the
edges of the opening smooth.
How to drill perpendicular holes.
To be certain the holes are perpendicular to the bottom
surface of the wing, make a drill jig by using a drill press
to drill a 1/4" hole through a hardwood block. Set up the
drill press to drill the hole vertically. Use the drill jig to guide
the drill, thus ensuring that the holes are perpendicular.
Finish the Center-Section