Great Planes Seawind EP ARF - GPMA1169 User Manual
Page 6
6
ASSEMBLY
Mount the Motor & Cowl
❏
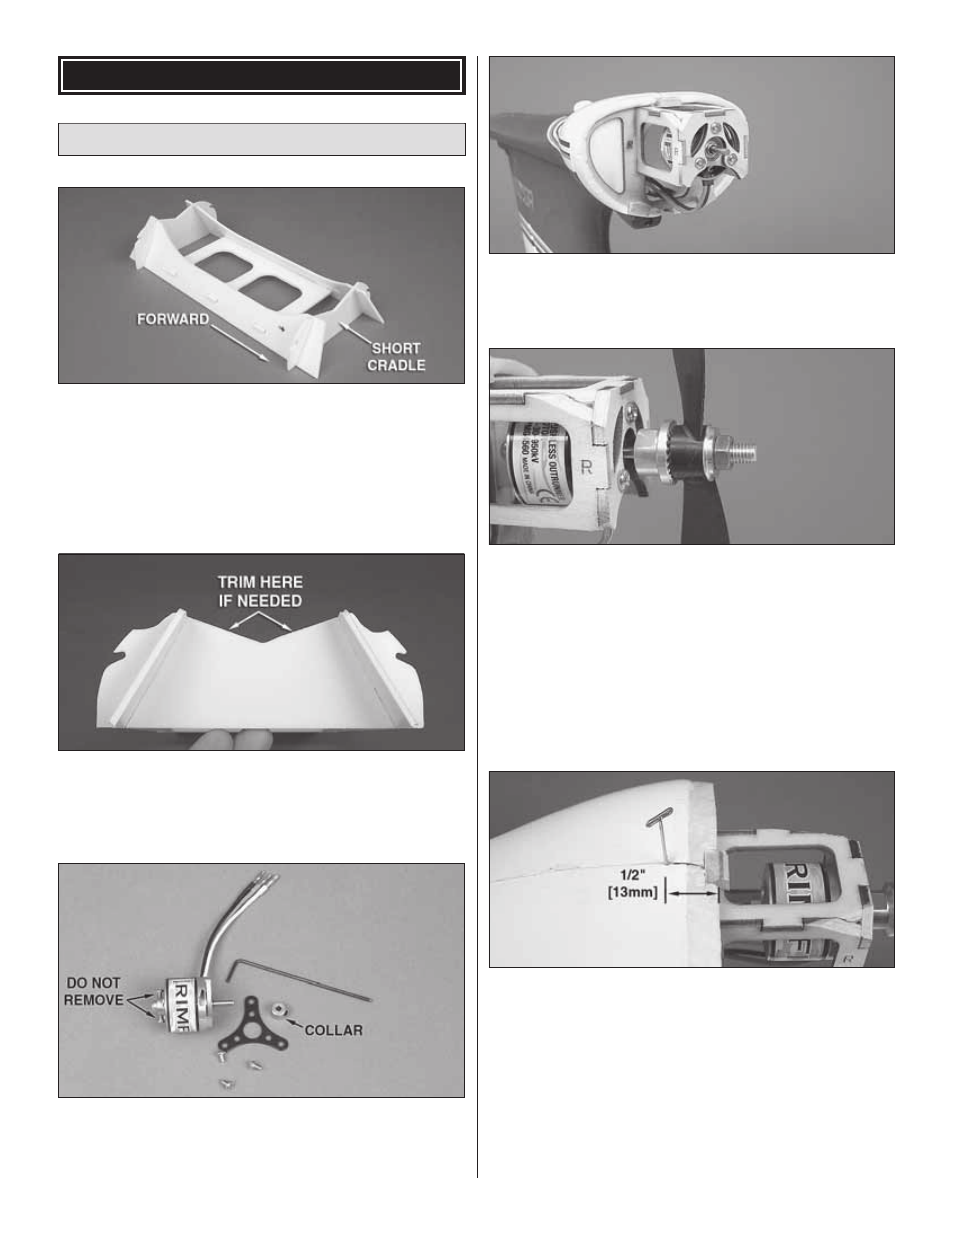
1. Fit together the assembly/transport stand. Note that the
arrows on the sides point toward the front cradle which is the
one that is shortest. Use foam-safe CA, epoxy or white glue
to glue it together.
❏
2. Test fi t the model in the stand. If necessary, use a hobby
knife to trim the short cradle where shown to fi t the fuse.
❏
3. Use a 1.5mm Allen wrench to loosen the set screw in
the collar on the front of the motor (not included) and remove
the collar. Also remove the mounting plate, but leave the prop
saver screws in place because they hold in the drive shaft.
❏
4. Connect the wires on the motor to the wires in the fuse.
Mount the motor with the three 3mm x 6mm Phillips screws that
came with this kit and a drop of threadlocker on the threads.
❏
5. Temporarily mount the prop adapter and the propeller
to the motor shaft. Use an 8mm wrench to tighten the prop
nut while holding the collet with a 10mm wrench to lock the
prop adapter onto the shaft.
❏
6. Loosen the prop nut and remove the prop and washer.
The collet should remain locked to the motor shaft. If the collet
does not remain locked, use a small drop of CA on the collet
to hold it to the propeller shaft. Then lock it down again.
❏
7. Insert a pin into the motor pod 1/2" [13mm] behind the
middle of the wood block for the top cowl mounting screw.
❏
8. Insert two more pins into the engine pod 1/2" [13mm]
behind the middle of the other two cowl mounting blocks
around the bottom of the motor pod.
❏
9. Fit the cowl to the pod. Mount the propeller with the
prop washer and prop nut.