Great Planes Giant Super Sportster ARF - GPMA1044 User Manual
Page 20
❏
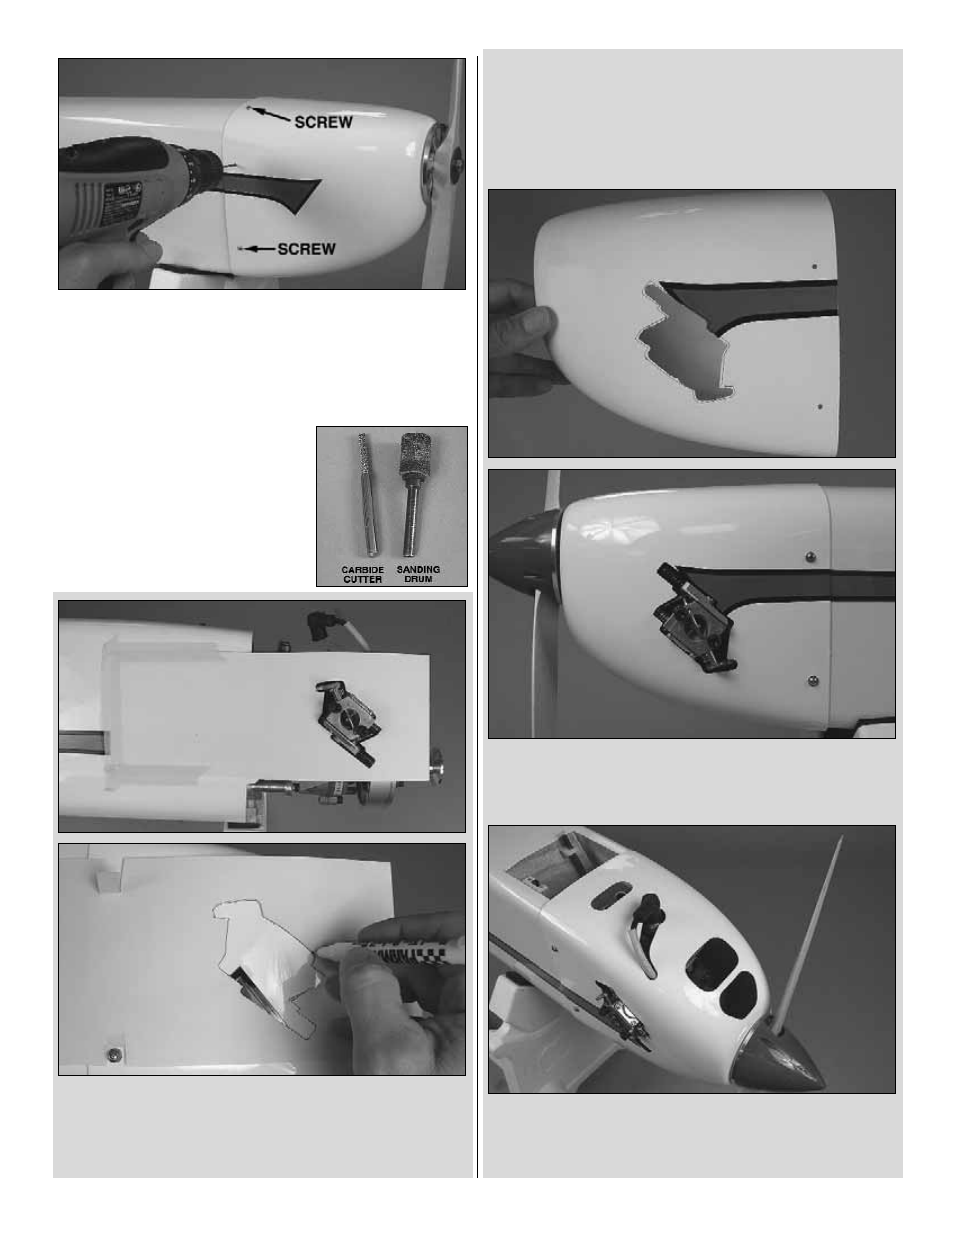
7. Still holding the cowl, drill another hole into the
fuselage through the next cowl screw hole and use another
#4 x 5/8" [16 mm] screw to hold the cowl in place. One at a
time, drill the remaining four holes and mount the cowl with
four more #4 x 5/8" [16 mm] screws. Note: When it’s time to
mount the cowl for flying, use #4 flat washers and #4 lock
washers on the screws.
A Dremel carbide cutter and a
sanding drum are key tools for
cutting out the cowl.
❏
8. Now that the cowl is mounted, cut any other holes
necessary for engine cooling, head/spark plug clearance,
carburetor access, etc. For the Fuji 32, a template for the
carburetor cutout, air cooling inlet and spark plug clearance
has been provided in the back of the manual. Starting with
the carburetor, cut out the template, and then transfer the
cutout to a piece of thin cardboard or vanilla folder. Align the
cardboard template with the carburetor. Next, tape the
template to the fuselage. Remove the carburetor from the
engine and mount the cowl. Use a fine-point felt-tip pen to
draw the carb cutout onto the cowl.
❏
9. Remove the cowl and rough-cut the hole. Mount the
carburetor back onto the engine before test-fitting the cowl.
Adjust the cutout as necessary to fit around the carburetor.
❏
10. Use the spark plug template and the air inlet template
to cut the other holes. If using an engine different than the
Fuji 32, make your own templates and use them to cut the
holes in the cowl the same way.
20