Install the hatch – Great Planes Extra 300SP Performance Series ARF - GPMA1022 User Manual
Page 15
15
screws. Using a 1/16" [1.5mm] drill bit, drill a guide hole at
the marks you just made. Install the elevator servo. Remove
the elevator servo and place 2 drops of thin CA in each of
the elevator mounting screw holes. Wait for the CA to fully
cure. Install the elevator servo with the hardware provided
with the servo.
❏
4. Center the elevator servo using the radio and install the
servo arm. Align the servo arm perpendicular to the elevator
pushrod. Center the elevator and make a mark on one of the
elevator pushrods even with the servo arm. Slide two 5/32"
wheel collars onto the two elevator pushrods and make a 90°
bend to one of the pushrods at the location of the mark.
❏
5. Enlarge the hole in the servo arm using a 5/64" [2mm]
drill bit. After trimming away its excess length, run the bent
pushrod through the hole. Keep the pushrod in place using
a nylon FasLink.
❏
6. Trim the non-bent elevator pushrod so that it is
approximately 1" [25.4mm] shorter than the bent pushrod.
Place some thread locker on to the 6-32 x 1/4" [6mm] socket
head screws. Level the two elevator halves and tighten the
socket head bolts.
❏
7. Double-check to be sure the two elevator halves are
level, snap the clevises shut, and slide the silicone clevis
keepers over the clevises.
❏
8. Using 6 minute epoxy, secure the nylon pushrod guide
to the pushrod guide former. Be careful not to get any of the
epoxy into the nylon pushrod guide.
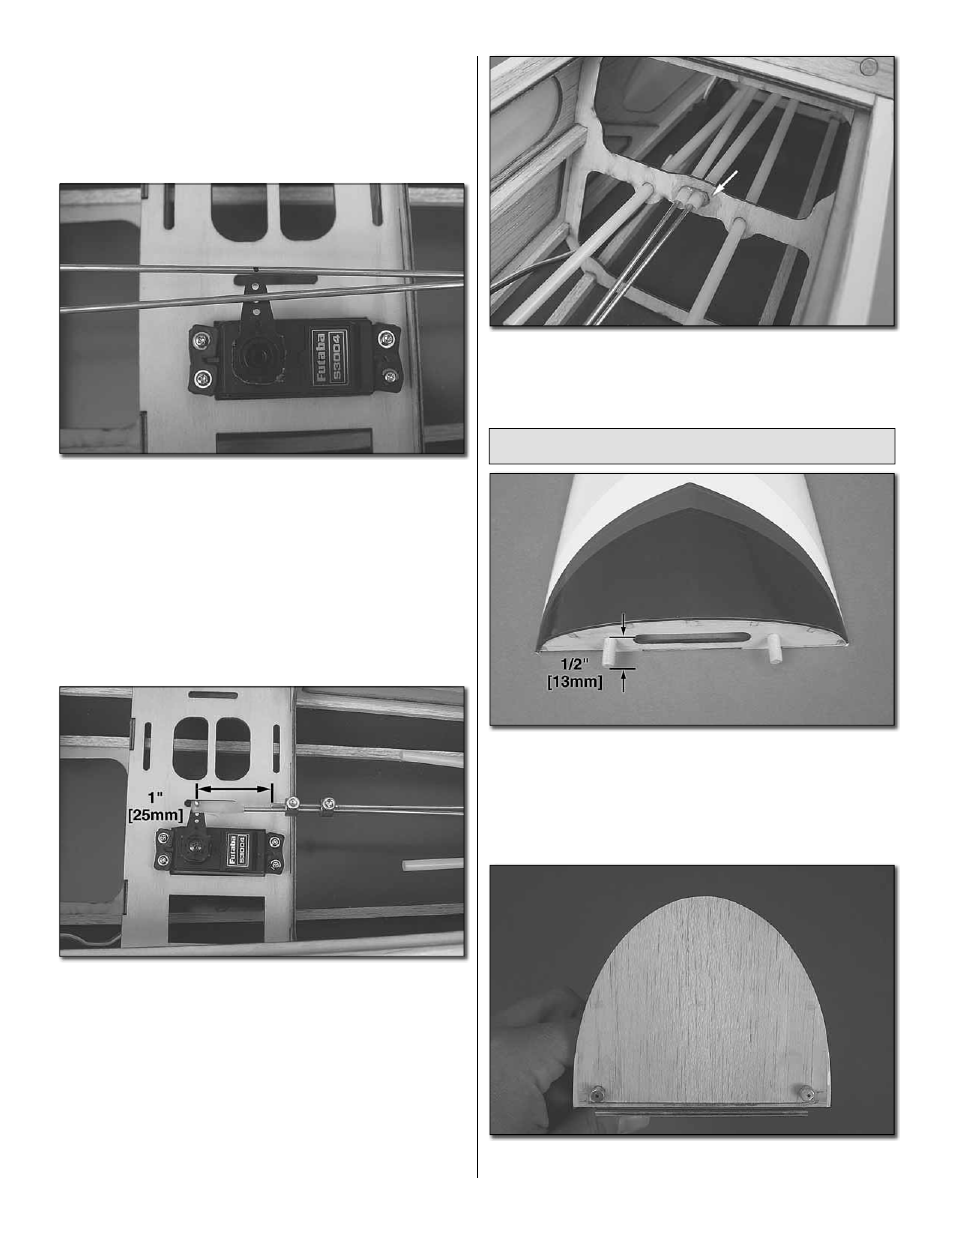
Install the Hatch
❏
1. Locate the two 3/4" [19mm] long, 1/4" [6mm] diameter
wood dowels. Test fi t the dowels by inserting them into the
holes located at the front of the hatch. The dowels should
stick about 1/2" [13mm] out from the face of the hatch.
Remove the dowels and glue them in place using a small
amount of 6 minute epoxy or thick CA.
❏
2. Locate four small magnets. Glue two of the magnets
into the magnet mounting holes located at the rear of the
15