Hinge the rudder and elevators – Great Planes Extra 300SP Performance Series ARF - GPMA1022 User Manual
Page 13
13
❏
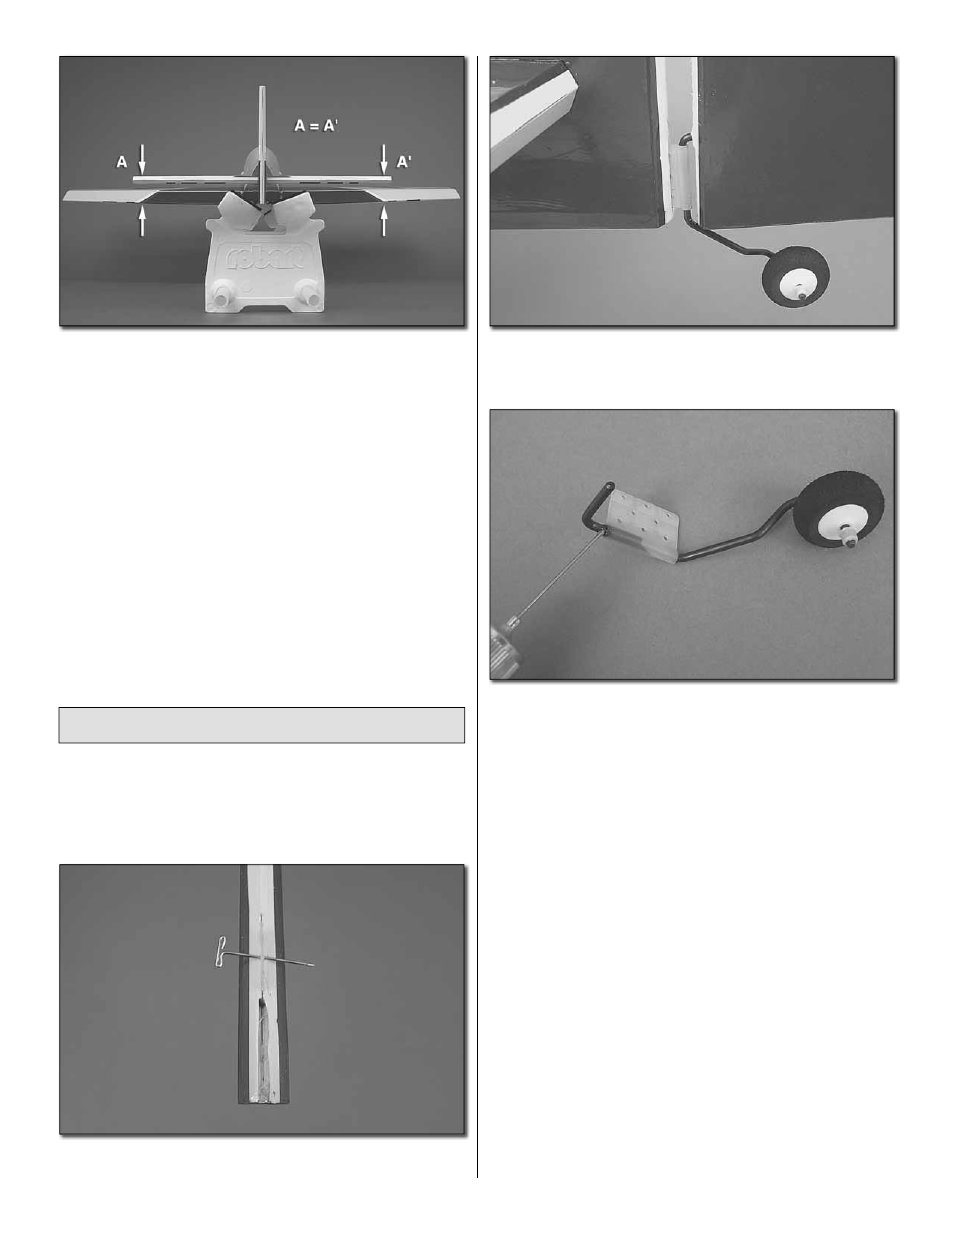
7. View the stabilizer standing approximately 6' [2.5m]
behind the airplane. Make sure the horizontal stabilizer and
the wing are aligned. If they are not, add weight to the high
side of the horizontal stabilizer.
❏
8. To make sure nothing has shifted, re-measure the
trailing edge of the stabilizer (Step 3) to make sure it is still
centered. Also re-measure from the trailing edge of the
stabilizer to the trailing edge of the wing (Step 4). Adjust the
horizontal stabilizer as necessary. Once you are satisfi ed that
everything is aligned, view the horizontal stabilizer again,
from the rear, to be sure it is still aligned with the wing. If
everything is aligned properly, do not disturb the model until
the epoxy has cured.
Hinge the Rudder and Elevators
❏
1. First, locate 3 CA hinges for the rudder and place a
T-pin through the middle of each hinge. Test fi t the hinges in
the rudder to be sure there are no obstructions in the hinge
slot. If a hinge does not go in properly, use a hobby knife to
clear the slot until the hinge slides snugly in place.
❏
2. Clear away the covering from the bottom of the rudder
as shown.
❏
3. Test fi t the tail wheel into both the fuselage and the rudder
as shown. If the tail wheel does not fi t properly, use a hobby
knife to modify the mounts so the tail wheel fi ts snugly.
❏
4. Place a small amount of oil in the tail wheel hinge. Wipe
away any oil that gets on the nylon tab. Add a few drops of
thin CA to the tail wheel mounting hole in the rudder. Allow
the CA to fully cure before continuing.
❏
5. Place all the hinges in the rudder up to the T-pins. Place
the tail wheel into the rudder. Mix up a small amount of 6
minute epoxy and apply it to the nylon tab on the tail wheel.
Insert the nylon tab and the hinges into the fuselage. The
bottom of the rudder should be aligned with the bottom of the
fuselage. Remove the T-pins and place 6 drops of thin CA to
both sides of the three hinges. Wipe any excess epoxy or CA
away from the hinge.
❏
6. Allow a few minutes for the epoxy to harden. Once the
epoxy has hardened fl ex the hinge to be sure it moves freely.
❏
7. Locate 6 CA hinges and place a T-pin through each
one. Place 1 hinge in each slot of the elevators. Slide the
other side of the hinge into the horizontal stabilizer. Make
certain the tip of the elevator sits fl ush with the tip of the
stabilizer. Remove the T-pins and place 6 drops of thin CA on
both sides of each hinge.