Great Planes Escapade .61 GP/EP ARF - GPMA1201 User Manual
Page 10
10
❏
8. Thread the nylon clevis onto the pushrod wire 20 turns.
Slide the elevator and rudder pushrods into the guide tubes
in the fuselage. Connect the clevises to the second-from-
the-outer holes of the horns. Slide the silicone retainers over
the clevises.
❏
9. Place the rudder servo in the servo tray in the fuselage.
Same as you did with the aileron servos, connect the rudder
servo to your receiver and battery and turn on the radio. Center
the trims and fi nd the correct orientation for the servo arms
that will be 90-degrees. Cut off the unused arms.
❏
10. Mark, cut, bend and connect the pushrod to the servo the
same way you did for the ailerons. After you mark the pushrods,
it will be easier to bend and cut them if you disconnect the
clevises from the horns on the other end.
❏
11. The same way you mounted the aileron servo(s), mount
the rudder servo with the servo screws that came with them.
Don’t forget to harden the screw holes with a few drops of thin
CA after installing, then removing the screws.
❏
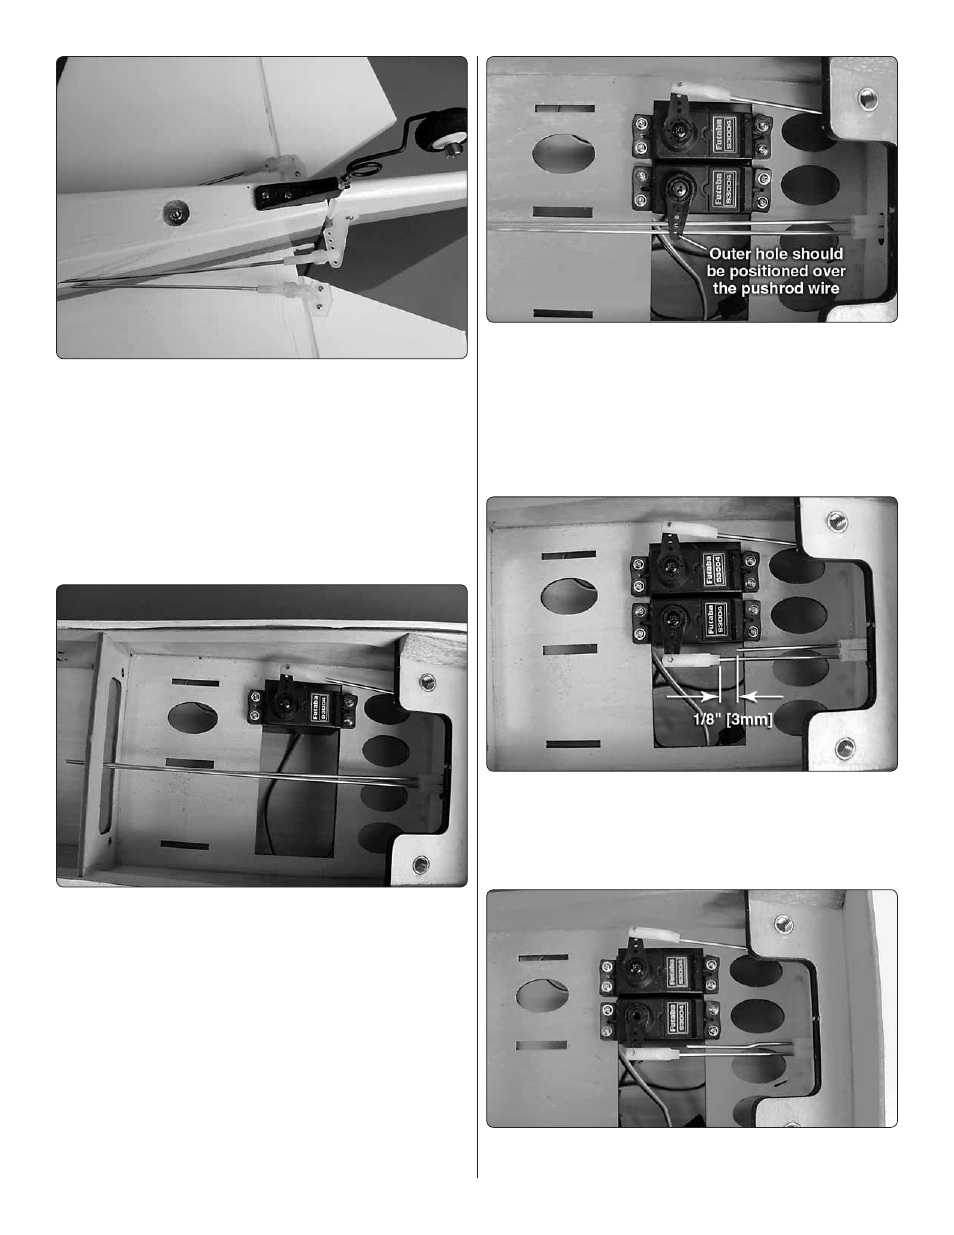
12. Place the elevator servo into the servo tray in the
fuselage. Orient it as shown in the photo. Same as you did
with the rudder servo, connect the elevator servo to your
receiver and battery and turn on the radio. Center the trims
and fi nd the correct orientation for the servo arms that will be
90-degrees. Cut off the unused arms. Position the servo arm
so that the outer hole of the servo arm is positioned over the
elevator pushrod for the right elevator half.
❏
13. Center the right elevator half. Mark, cut, bend and
connect the pushrod to the servo. Secure the pushrod to the
servo arm with a nylon Faslink. Center the left elevator half.
Cut the left elevator pushrod wire 1/8" [3mm] from the back
of the Faslink.
❏
14. Bend the left pushrod wire as shown in the photo.