Chamberlain EL25 User Manual
Page 14
Page 13
1 Press
2 Enter the Relay Number (1-4). Then (
#
)
3 Enter Activation Time (1-300 Seconds). Then (
#
)
Then
1 Press
2 Enter Door Number (1-4). Then (
#
)
3 Enter Relays to be Activated (0000-1111). Then (
#
)
Then
Example:
1
2
3
1
2
3
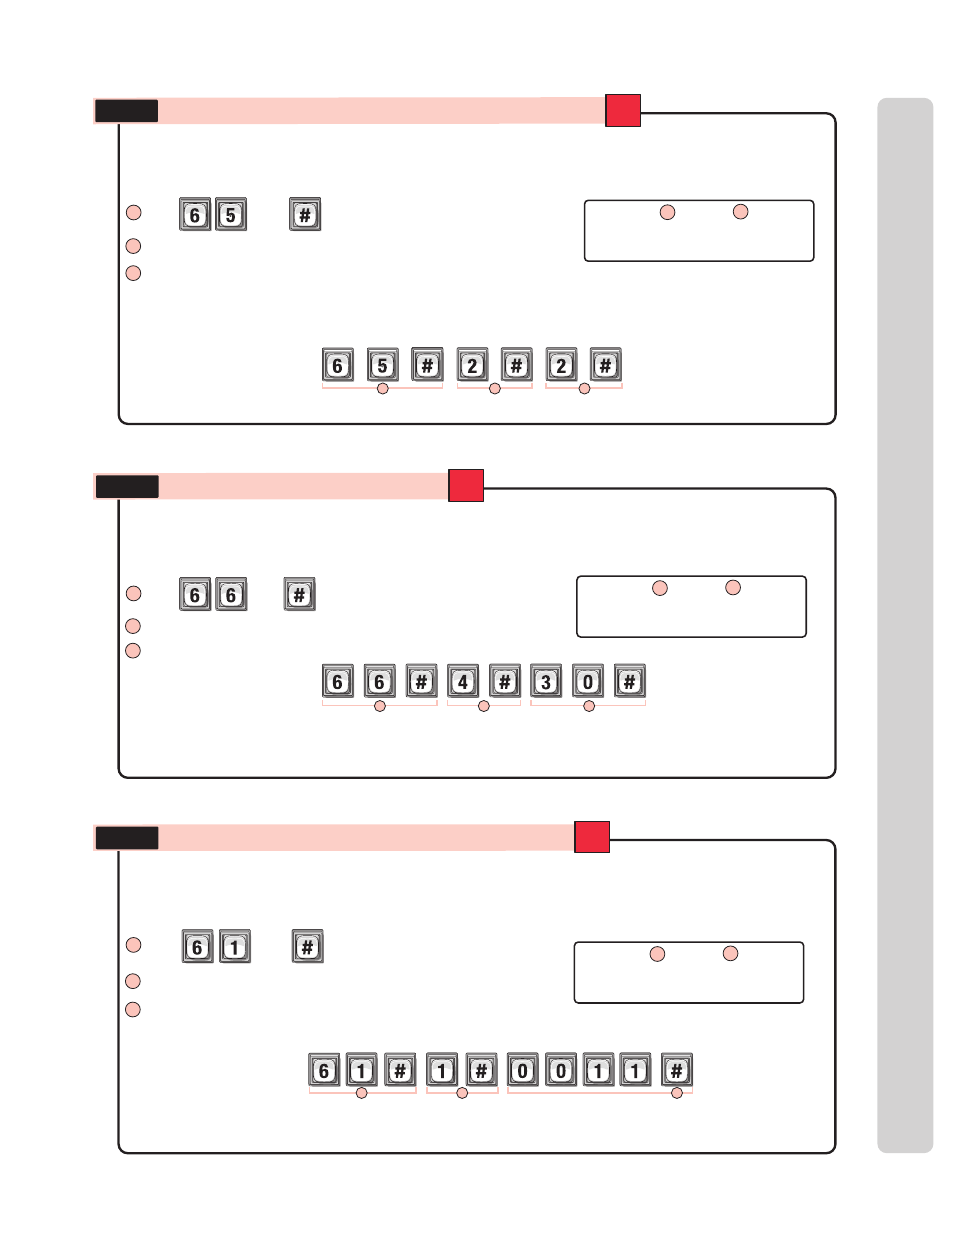
Assigns Relay “2” as a Shunt Relay
When Activated, the Relay Number “4” will activate for “30” seconds.
When a Resident uses a Valid Code at “Door 1”, Relay “1” and Relay “2” will Activate.
Example:
Example:
1
2
3
1 Press
Then
Set Each “
Relay Mode
” to get the Appropriate Response:
2 Enter the Relay Number (1-4). Then (
#
)
This is the amount of time (in seconds) the relay remains activated. This will define the amount of time a
door cycles (unlocks, then relocks) or how long the CCTV camera remains on after being activated.
Factory Setting: All Relays are set at 10 seconds
EL25 SetUp “Y
our Settings”
EL25 SetUp “Y
our Settings”
Set Each Relay's “
Activation Time
”:
3 Enter Relay Mode (0-5). Then (
#
)
0 =
Not Used
1 =
Strike
- controls a door/gate by unlocking/opening it.
2 =
Shunt
- bypasses the alarm under normal circumstances.
3 =
CCTV
- activates system's optional camera.
4 =
Alarm
- activates another device (siren).
5 =
Control
- controls another device (on/off light).
65
There are
5 different relay modes. The Relay Mode determines what the response will be when a valid access
code is entered (open a door, turn on an alarm, turn on a light then turn it off, turn on a CCTV, etc.).
Factory Setting: All Relays are Set at “1 - Strike”
Step 2
Step 3
66
When a
valid access code is used at an external access control device (Door), the EL25 can be set to activate
one or more relays.
Factory Settings: Door 1 Activates Relay 1; Door 2 Activates Relay 2;
Door 3 Activates Relay 3; Door 4 Activates Relay 4
Assign “
Each
” Door Number to One or More Relays:
Step 4
61
Note: A relay that controls a gate operator must be set to activate for 2 seconds.
0 = Deactivate , 1 = Activate (1st digit=Relay 4, 2nd digit=Relay 3, etc.)
Relay 4 Relay 3 Relay 2 Relay 1
Deact
Deact Activate Activate
Important:
All
through
eps
must be
performed for
EACH Door Number
assigned to the unit.
1
3
Important:
All
through
eps
must be
performed for
EACH Relay assigned
to the unit.
1
3
Important:
All
through
eps
must be
performed for
EACH Relay assigned
to the unit.
1
3