GME TX3500S User Manual
Page 19
T X 3 5 0 0 S
I N S T R U C T I O N M A N UA L
PA G E 1 9
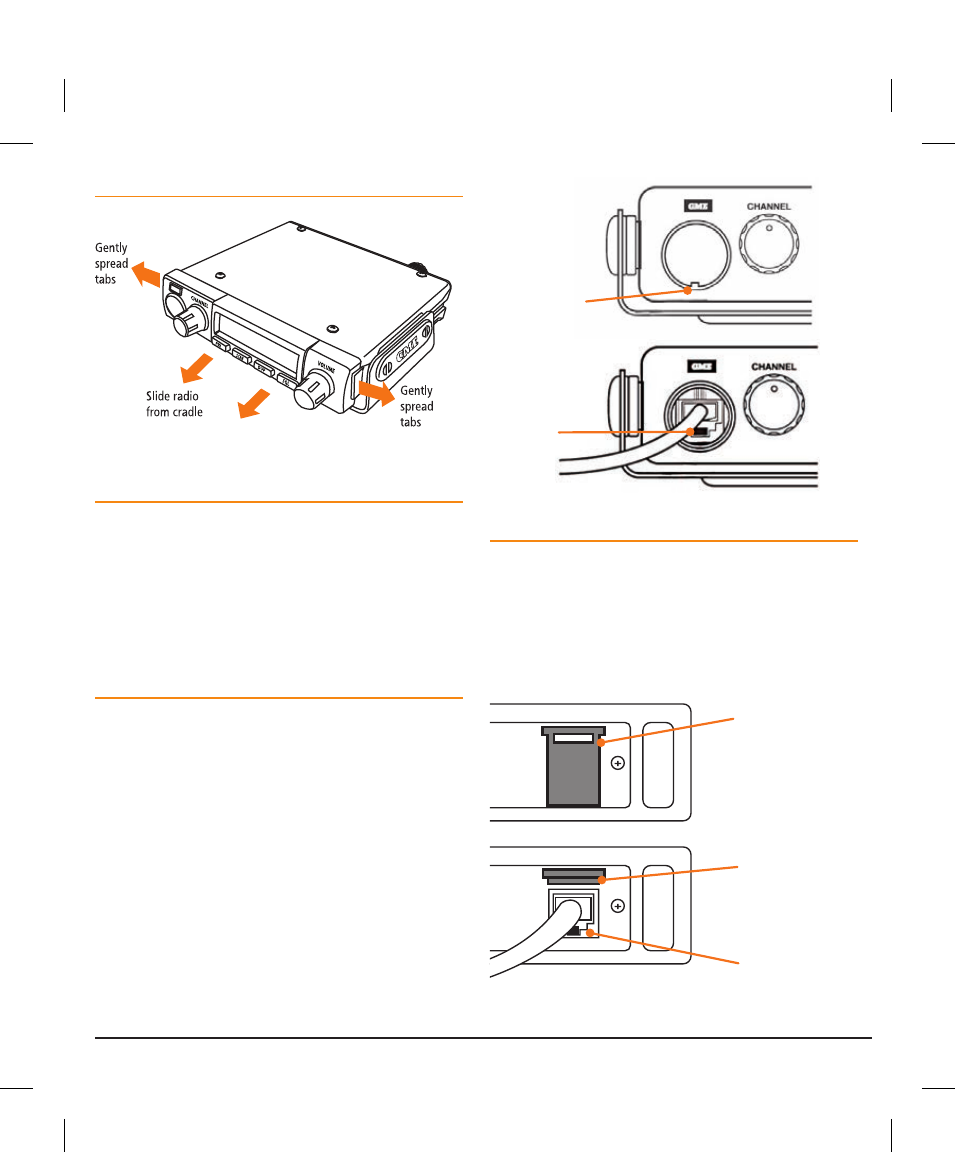
Removing the radio
Fitting the microphone
The microphone uses a miniature 6 pin telephone style plug
which fi ts the TX3500S’ microphone socket. The TX3500S
has two microphone sockets – one on the front panel and
one on the rear panel. The microphone can be plugged
into either socket. If connecting the microphone to the rear
socket, an optional extension cable LEM6P is available
to bring the microphone connection to a more accessible
location.
To fi t the microphone: Front
1. The front microphone cover is a press fi t. To remove, simply
insert the end of a paper clip or similar into the small slot
in the edge of the cover and lift the cover away from the
panel.
2. Place the microphone plug so the plastic tab faces
downwards, then press plug into the socket until it
‘clicks’.
3. Gently press the rubber strain relief into the hole
surrounding the socket so that the slot around the strain
relief fi ts neatly inside the lip of the hole.
Lift panel here
Plastic tab
v
Rear
1. The rear microphone cover hinges from the top. Simply
lift the cover from the bottom. The cover will remain
connected to the chassis.
2. Place the microphone plug so the plastic tab faces
downwards, and press the plug into the socket until it
‘clicks’.
Rear microphone
cover
Lift microphone
cover
Plastic tab
44913-5_TX3500S_IM.indd 19
5/09/13 2:07 PM