GME GD9640B User Manual
Page 6
PA G E 6
i n s t r u c t i o n m A n uA l
G D 9 6 0 0 s E r i E s
*
use the rubber mounting gasket supplied. Place the gasket
between the plastic housing and the mounting surface. this will
improve the contact between the mounting surface and
stereo housing.
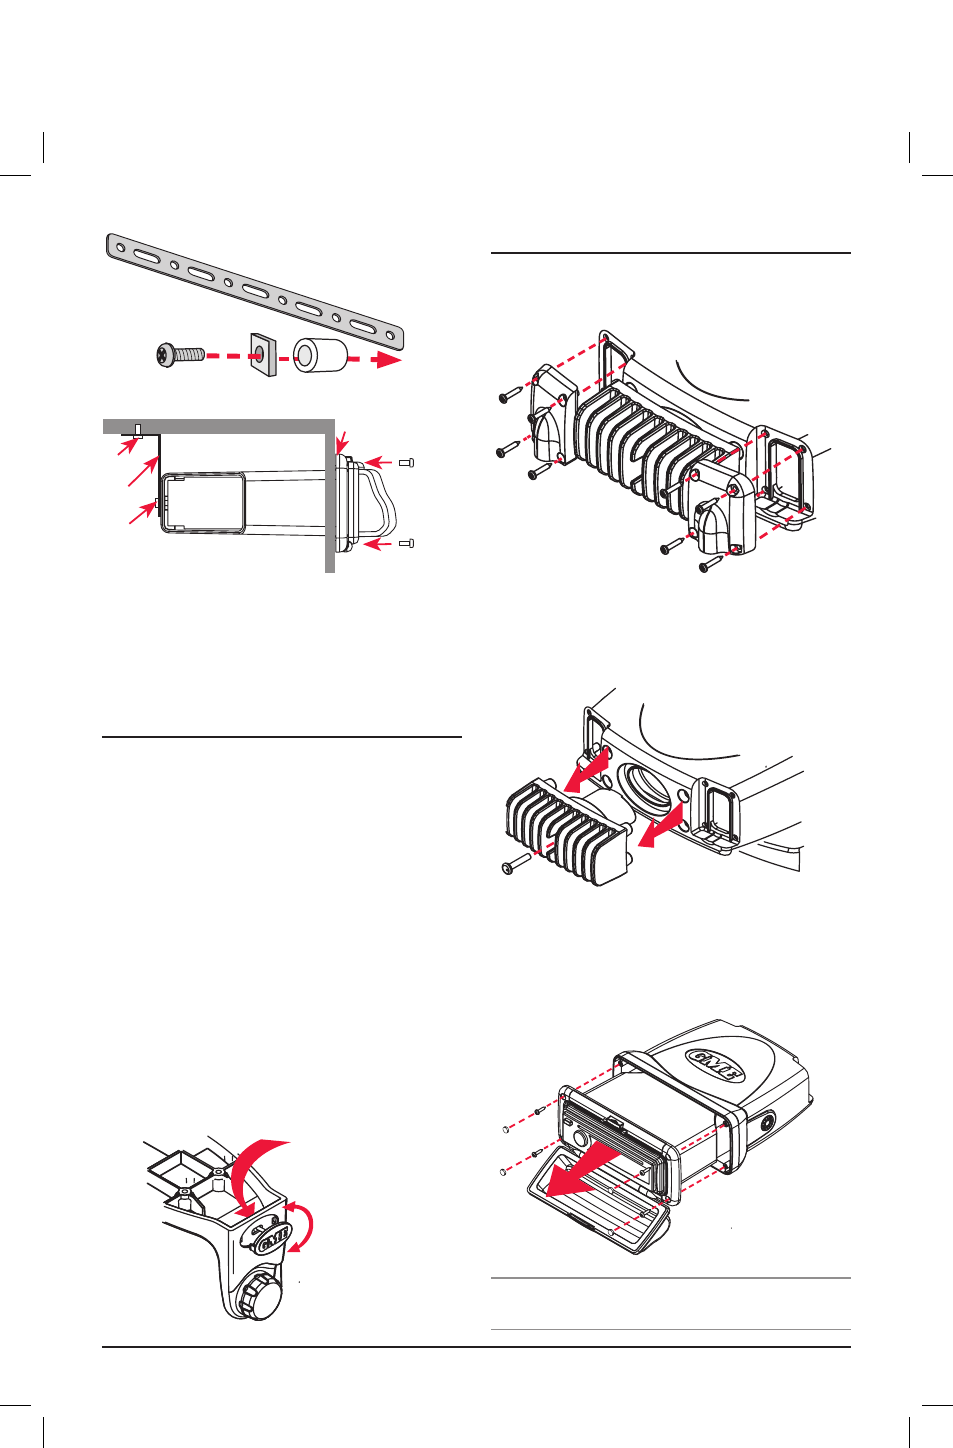
Bracket mouNtINg - gd9640
1. Attach the GD9640 to the mounting bracket using the
two gimbal knobs.
2. temporarily position the GD9640 in the desired location
and roughly mark the location of the bracket edges.
now, remove the unit from the bracket and reposition
the bracket at the desired location to mark the
mounting hole positions.
3. screw or bolt the bracket into position. the mounting
method will depend on the material to which the
bracket is being attached.
4. refit the GD9640 into the bracket and adjust to the
desired angle before tightening the gimbal knobs.
5. complete the antenna lead and electrical wiring
as described later.
For overhead mounting, the GmE logos on the side of
each bracket can be rotated as shown right.
flush mouNtINg - gd9640
Although the GD9640 is a bracket mounted unit, it can be
flush mounted by following the disassembly
instructions below.
1. remove the 4 screws from each cable clamp
panel at rear.
2. remove the screw from the centre of the heat
dissipater and remove.
3. remove the 4 screw caps and 4 screws from the front
case and slide the unit out completely.
Your GD9640 can now be flush mounted. replacement
screw caps have been provided to cover the exposed
screw heads.
* note rubber mounting gasket not supplied with
GD9640 unit.
screw
strap
screw
screw
screw
rubber gasket
Flush mount
support strap
rear centre screw with spacers
Press from
back
turn