Operation, First steps, Operating modes – EVE audio TS112 - User manual User Manual
Page 4: Powering on/off: standby mode, Volume mode
TS
108
TS
110
TS
112
TS
107
EVE
Audio product manual
First Steps
Volume Mode
6
7
OPERATION
OPERATION
3.
OPERATION
3.1.
First Steps
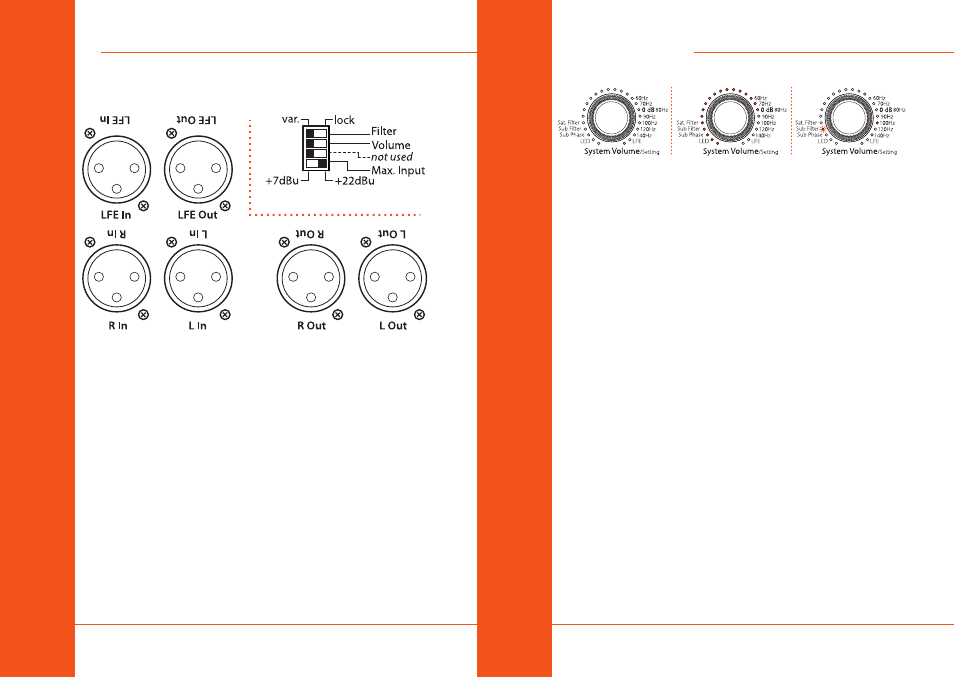
Rear Connections & DIP Switches
Check the package components (loudspeaker, remote control + batteries,
user’s manual, power cord).
Check the voltage setting (see “Mains Voltage Selector”).
Check the setting of the DIP Switches (variable).
Connections: there are XLR input and output connectors on the rear side
that allow the connection of balanced and unbalanced devices (signal
sources, active monitors, etc.).
•
Balanced XLR pin assignment XLR: 1 = Shield, 2 = hot (+), 3 = cold(-).
•
Unbalanced XLR pin assignment XLR: 1+3 = Shield, 2 = Signal.
Depending on the setting of the Max. Input DIP switch on the rear panel,
the maximum level of the source signal should not exceed +7 dBu or +22
dBu (see Max. Input). If the input is overloaded the LED ring will start
blinking.
3.2.
Operating Modes
Standby mode | Volume mode (-10 dB) | Settings menu (Sub Filter @ 100 Hz)
3.3.
Powering on/off: Standby Mode
Press and hold the System Volume control three seconds in order to put the
subwoofer in Standby mode. The total volume (subwoofer + satellites) will
decrease gradually while the LED ring lights up once around the System
Volume control. Afterwards, the LED on the right end will remain dimly lit
and the power consumption is reduced to 1 watt.
!
To exit the Standby mode press briefly the System Volume control once
again. The level will increase gradually until it reaches the previously
selected volume.
3.4.
Volume Mode
•
Level Adjustment
The maximum input level for balanced and unbalanced signals is +7 dBu
or +22 dBu, depending on the position of the Max. Input switch on the rear
panel (see DIP Switches). Higher levels at the input produce distortion due
to the overloading of the analog to digital converter.
Given that some professional studio devices can produce in excess of
+22 dBu, the LED ring will start blinking whenever the AD converter is
overloading. Generally speaking, the +7dBu setting ought to be suitable. If
that is the case, the output level of the source should be reduced.
•
Total Volume Adjustment
Turn the System Volume control to adjust the total volume (subwoofer
+ satellites). Depending on the LED mode selected (see LED mode), the
volume will be displayed as a dim/bright circle or as a dim/bright point.
•
Subwoofer Volume Adjustment
Turn the Subwoofer Volume control to adjust the volume of the subwoofer
independently from the satellites. This allows you to strike the right
balance between subwoofer and satellites. The LED ring indicates the
volume setting.