Centro G41204 User Manual
Page 8
12
13
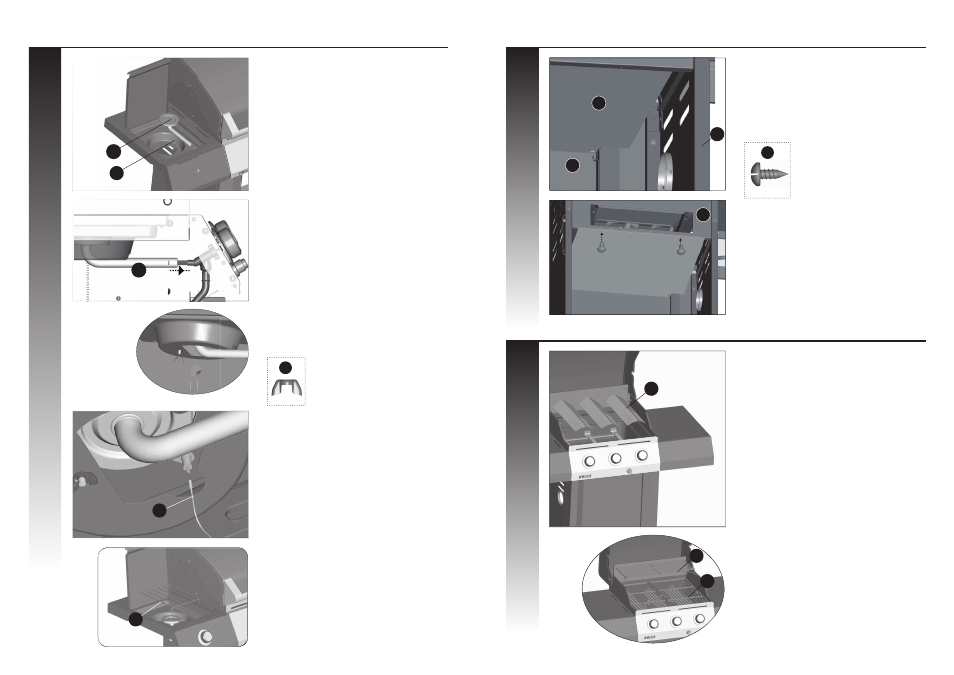
Place the heat shield (CG) into the groove which
is located at the back side of the front panel as
shown in fi gure A. Next, attach the heat shield
(CG) to the upper back panel (BI) by using the self
tapping screw (x2), as shown in fi gure B.
First place the fl ame tamers (BF) and then the
cooking grates (BG) into the burner box.
Place the warming rack (BH) onto the burner box.
BF
CG
DH
DE
BI
BH
BG
Back view
A
B
ASSEMBLY INSTRUCTIONS
13
14
YOU WILL NEED:
9
ASSEMBLY INSTRUCTIONS
12
a. Position the side burner (CN) through the
opening in the left side burner drip pan (CL).
Underside view
CN
b. Make sure that the burner (CN) engages the
side burner valve (CM) as shown in fi gure B.
c. Using the wing nut provided, assemble the side
burner (CN) to the side burner drip pan (CL), as
shown in fi gure C.
A
B
C
CL
d. Attach the end of the side burner electrode
wire (CO) to the underside of the side burner
electrode, as shown in fi gure D.
Ensure that the wire is pushed in fi rmly.
CO
CP
D
E
e. Place the side burner cooking grate (CP) into
postion on the side burner shelf, as shown in
fi gure E.
YOU WILL NEED:
13
X 2
X 1
C
CN