Using split, Using layer and split together – Casio PL-40R User Manual
Page 22
Basic Operations
E-20
With split you can assign two different tones (a main tone and
a split tone) to either end of the keyboard, which lets you play
one tone with your left hand and another tone with your right
hand.
1.
Select the main tone.
2.
Press the SPLIT button.
This causes the indicator lamp of the button to
light.
The current split tone name appears on the
display. You can use the TONE buttons to change
the split tone if you want.
3.
Select the split tone.
4.
Now try playing something on the keyboard.
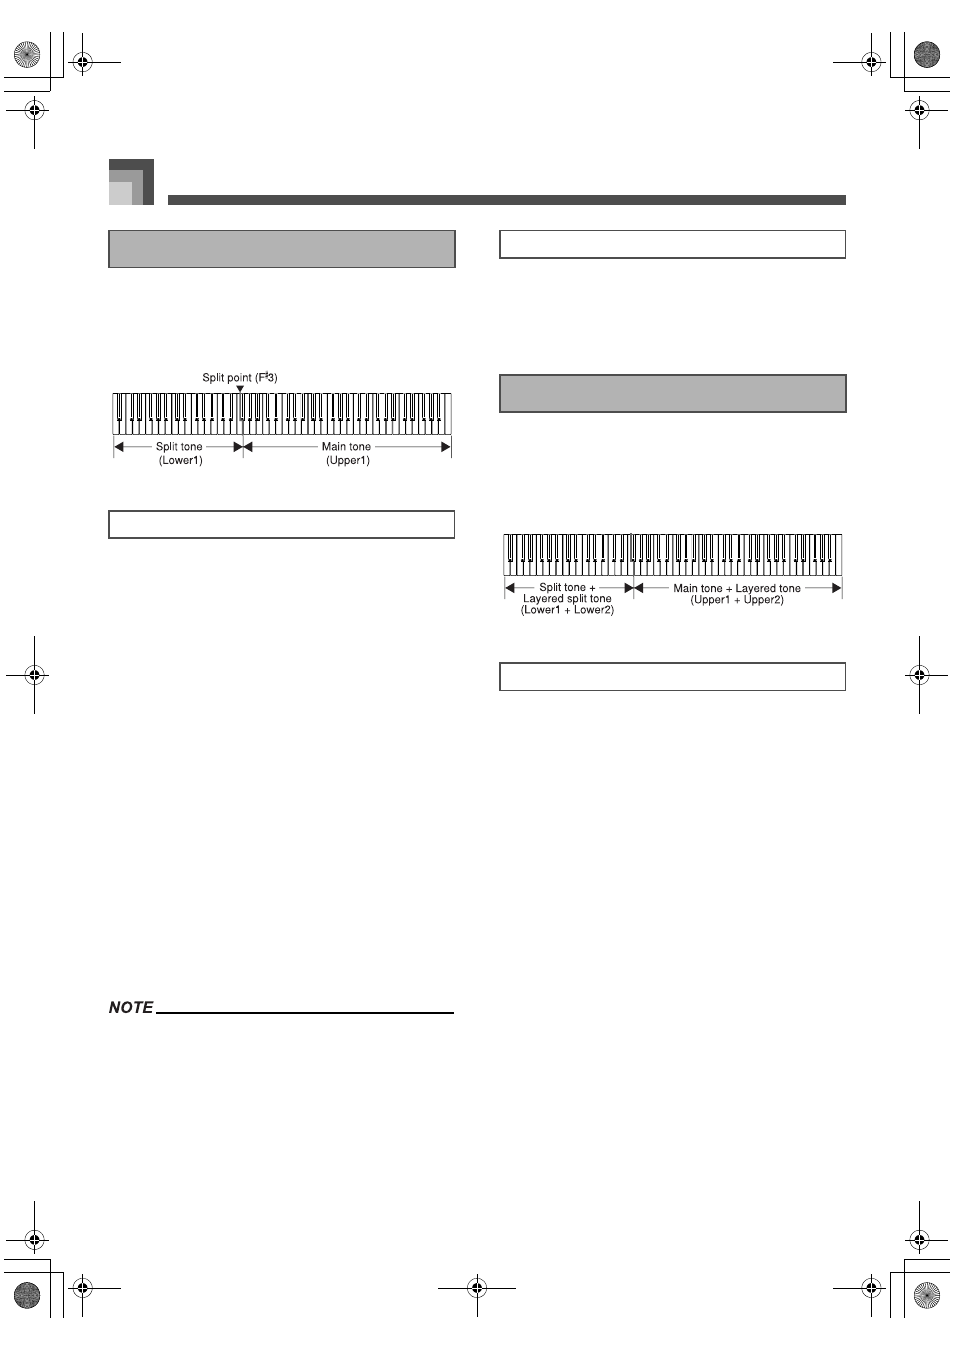
The lower range (left side) of the keyboard is
assigned the split tone, while the upper range
(right side) is assigned the main tone.
The location on the keyboard where the
changeover between the two tones occurs is
called the split point. See “To change the location
of the split point” on this page for details on
changing the location of the split point.
5.
Press the SPLIT button again to unsplit the
keyboard and return it to normal.
This causes the indicator lamp of the button to go
out.
Split is disabled during demo tune play and in the Music
Library Mode (while Music Library Mode lamp is lit).
Split is achieved by sounding Upper1 and Lower1 of mixer
Group A. This means you can use the mixer to change the
volume balance and stereo pan position parameters for
both the main tone and split tone. See “Using the Mixer” on
page E-46 for details.
While holding down the SPLIT button, press the keyboard
key where you want the lowest note (the leftmost key) of the
upper range (right side range) to be.
No sound is produced when the keys are pressed.
You can use layer and split together to create a layered/split
keyboard. When you use layer and split in combination, the
high range of the keyboard is assigned two tones (main tone
+ layered tone), and the low range two tones (split tone +
layered/split tone).
1.
Select the main tone, layered tone, split tone,
and layered/split tone.
Use the mixer to select the tones, following the
procedure under “Changing the Parameters of a
Part” on page E-47. The main tone is Upper1, the
layered tone is Upper2, the split tone is Lower1,
and the layered/split tone is Lower2.
2.
Turn on both layer and split to layer/split the
keyboard.
Press the LAYER/(GROUP A/B) button once to
turn on layer.
Press the SPLIT button to turn on split.
This causes the indicator lamps of both the
buttons to light.
The layered/split tone name appears on the
display. You can change the layered/split tone if
you want.
3.
Now try playing something on the keyboard.
4.
Press the LAYER/(GROUP A/B) button and the
SPLIT button again to unlayer/unsplit the
keyboard and return it to normal.
Using Split
To split the keyboard
To change the location of the split point
Using Layer and Split Together
To layer/split the keyboard
426-E-022A
PL40NE01-1.book 20 ページ 2002年7月23日 火曜日 午後6時52分