Dial needle installation caution, 1^10. dial cord stringing – Pioneer sx-450 User Manual
Page 12
Attention! The text in this document has been recognized automatically. To view the original document, you can use the "Original mode".
SX-450
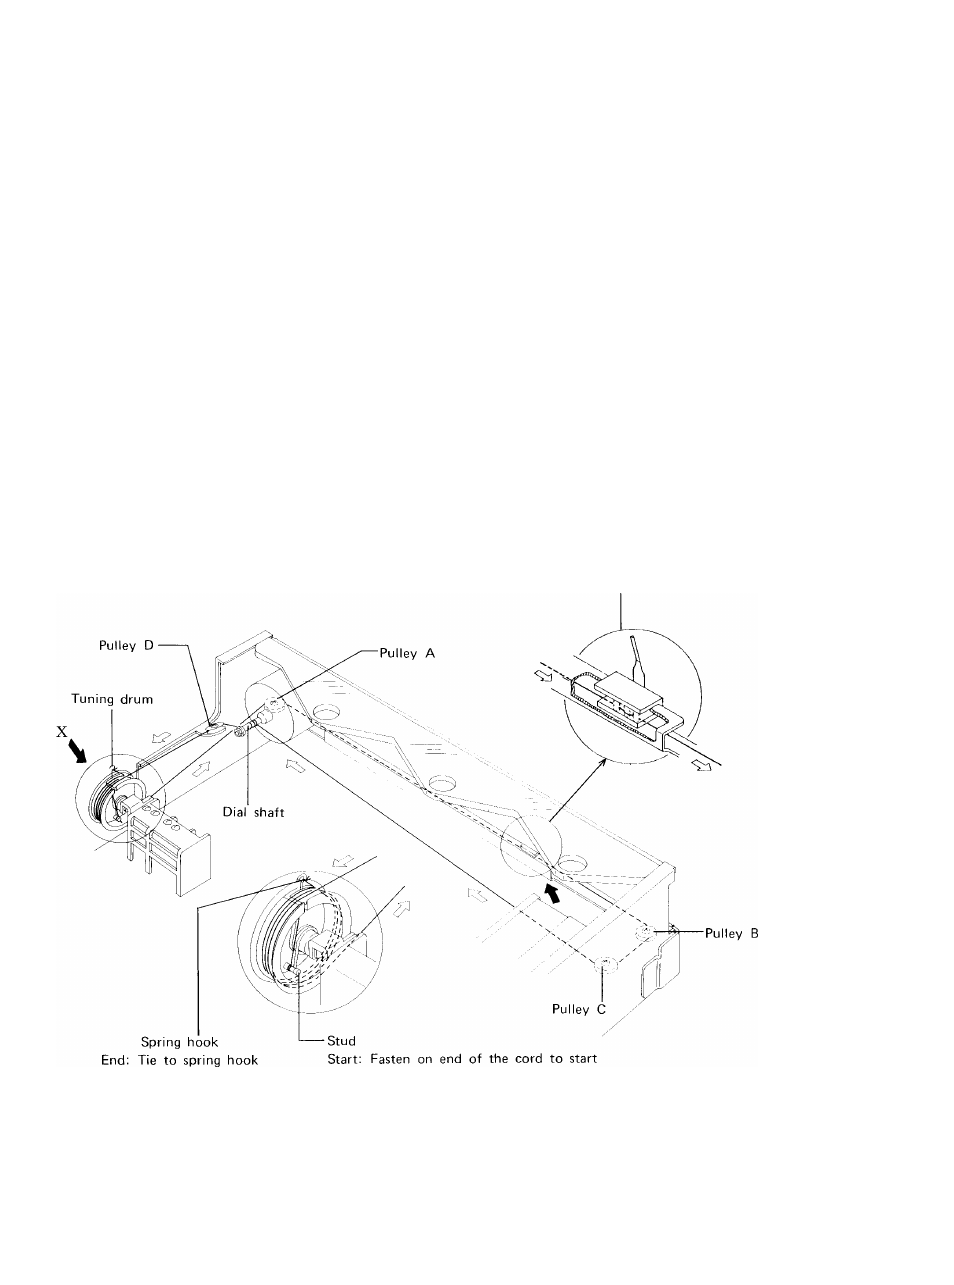
1^10. DIAL CORD STRINGING
Remove the Front panel (See page 14, 15).
1. Turn tuning drum fully clockwise (as viewed
from X direction in Fig. 13).
2. Tie one end of cord to stud on inner section of
tuning drum (more easily performed by loosen
ing setscrew and temporarily removing tuning
drum from shaft).
3. Pass cord through pulley opening, make a half
turn around the pulley, then route in the
sequence: pulley A-Dial needle-pulley B-C.
4. Wind cord clockwise (as viewed from rear panel)
3 turns around dial shaft, then route to pulley D.
5. Wind 3 turns around dial pulley and tie to spring
so that the cord is under tention.
6. Turn TUNING knob and confirm normal cord
motion, then trim off excess cord.
|| 7. With tuning capacitorblades fully closed, move
dial needle to starting point (left edge of scale).
8. Apply laquor to tied ends of cord.
DIAL NEEDLE INSTALLATION CAUTION
Metal portion of dial pointer is plated.
If this section is touched directly by hand or
fingerprints and other impurities, it is difficult to
remove dirt from aventurine finish. As this is not
desirable in terms of both appearance and anti
corrosion, take exteme care not to touch the
metal section when handling the dial needle.
Dial needle
Fig. 13
S3