Dual ring burner head assembly, Bridge burner head assembly, Before setting surface controls – Kenmore ELITE 3233 User Manual
Page 7
Attention! The text in this document has been recognized automatically. To view the original document, you can use the "Original mode".
Burner Cap
Before Setting Surface Controls
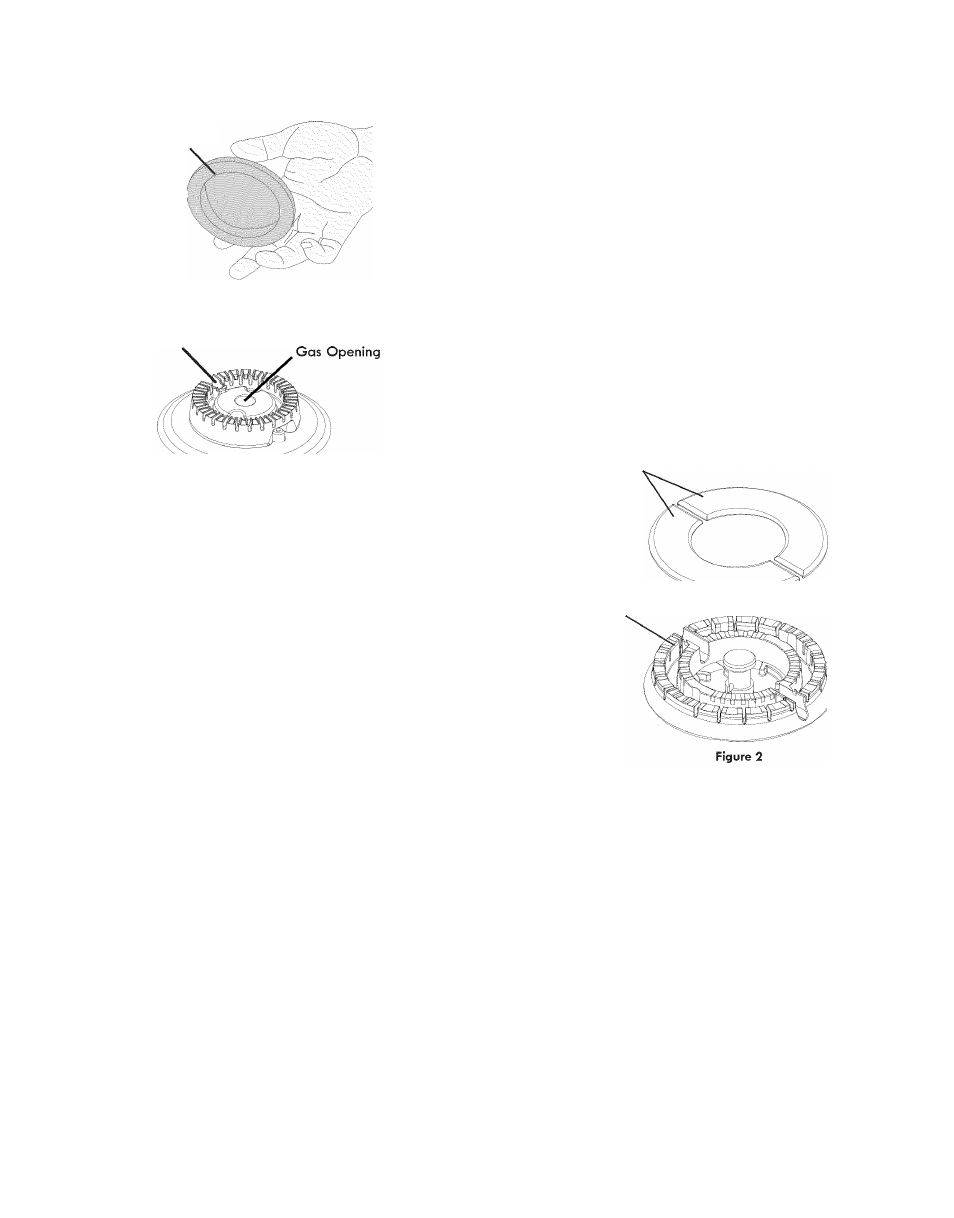
Fixed Burner Head
Assembly of the simmer, regular, power and turbo boil
surface burner caps and burner grates
It is very important to make sure that all of the Surface Burner Caps
and Surface Burner Grates are installed correctly and at the correct
locations.
1.
Remove all packing material from cooktop area.
2.
Discard all packing material (if applicable).
3.
Position the burner caps in the correct position.
4.
Unpack Burner Grates and position on the cooktop.
Note: Burner heads are fixed. Do not try to remove them.
REMEMBER — DO NOT ALLOW SPILLS, FOOD, CLEANING AGENTS
OR ANY OTHER MATERIAL TO ENTER THE GAS OPENING. Always
keep the Burner Caps in place whenever the surface burners are in use.
Burner Caps
Figure 1
Dual Ring Burner Head Assembly
Make sure that the Burner Caps and Burner Grates are installed properly
and at the correct locations.
1. Remove all packing tape from cooktop and the dual burner.
2. Discard all packing material located under all Burners (if applicable).
3. To install Burner Caps, refer to figure 2 and make sure both caps are
aligned properly with the burner head.
4. Put back the grates on the cooktop.
REMEMBER — DO NOT ALLOW SPILLS, FOOD, CLEANING AGENTS
OR ANY OTHER MATERIAL TO ENTER THE GAS ORIFICE HOLDER
OPENING. Always keep the Burner Caps and Burner Heads in place
whenever the surface burners are in use.
Fixed Burner Head
Bridge Burner Head
I
Bridge
Burner
End
Cap
Bridge
Burner ___
Center
Cap
>
Bridge
Burner _
End
Cap
>
■4
Figure 3
;■— Igniter
Hole
-— Igniter
Hole
Bridge Burner Head Assembly
Make sure that the Burner Caps and Burner Grates are installed properly and
at the correct locations.
1. Remove all packing tape from cooktop and the bridge burner.
2. Discard all packing material located under all Burners (if applicable).
3. Install Burner Caps, these include one Bridge Burner Center Cap (rectangular
shaped) and the two Bridge Burner End Caps (The Bridge Burner End Caps
will fit either the front or rear Bridge Burner Head locations). Make sure that
the tabs located under the Bridge Burner Caps fall into the slots located
in the Bridge Burner Head (See arrows in Figure 3) and that all the Bridge
Burner Caps lie fiat and evenly on the Bridge Burner Head.
4. Put back the grates on the cooktop.
NOTE: The Bridge Burner Head is removable but should left in place. If you
need to put it back in place, take caution not to damage the igniters. Also
make sure the Bridge Burner Head is flat on the cooktop.
REMEMBER — DO NOT ALLOW SPILLS, FOOD, CLEANING AGENTS OR
ANY OTHER MATERIAL TO ENTER THE GAS ORIFICE HOLDER OPENING.
Always keep the Burner Caps and Burner Heads in place whenever the
surface burners are in use.