Fig *5 – Kenmore 625.384600 User Manual
Page 7
Attention! The text in this document has been recognized automatically. To view the original document, you can use the "Original mode".
INSTALLATION STEPS
STEP 4 - MAKE TUBING CONNECTIONS
1. Allowing some slack, measure and cut a length of
3/8" tubing to connect between the supply fitting
and the filter system inlet, FIG. 1. Cut the ends of the
tubing square.
2. Insert tubing aU the way into the supply fitting and
inlet elbow fitting. Pull on the tubing to be sure that
it's held firmly in the fitting.
3. Repeat steps 1 and 2 to connect tubing between the
filter system outlet and the adaptor on the bottom of
the faucet stud, FIG. 1.
TUBING CONNECTION
(aU push-in fitting locations)
This system includes push- in fittings for quick tub
ing connection at most locations. If working with the
fittings do the following.
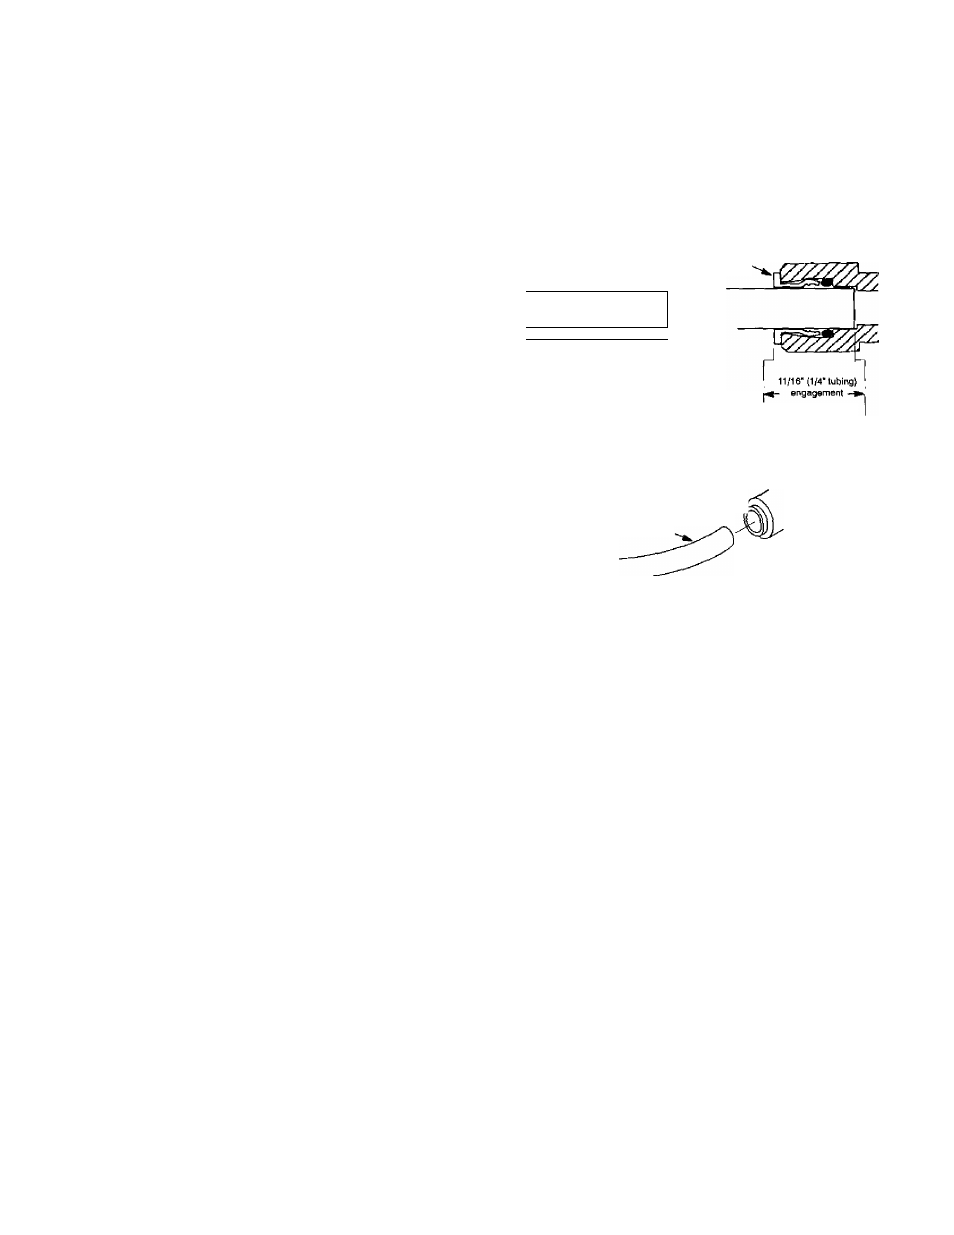
Connection, FIG. 5;
1. Use a sharp cutter or knife to cut the end of tubing
square.
2. Inspect the end (about 1") of the tubing to be sure
there are no nicks, scratches or other rough spots. If
needed cut the tubing again.
3. Push tubing through the collet and all the way into
fitting. Full engagement is 11/16" for 1/4" tubing,
and 3/4" for 3/8" tubing.
If tubing other than supplied with the system is
used, be sure it is of high quality, exact size and
roundness with a smooth surface.
To Disconnect Tubing: Push the collet inward and
hold with a finger while pulling the tubing out.
FIG *5
^
Tubing correctly cut and connected
cut tubing square
collet
------------- r—
1
1
L _ _____
... -1
1__________________
end of tubing round and
smooth, with no cuts,
nicks or flat spots
3/4' (3/8" tubing)
collet (depress to
remove tubing)
tubing.
CAUTION
DO NOT USE VINEGAR, OR OTHER ACID
BASED CLEANERS ON THIS SYSTEM. THEY
WILL DEGRADE SOME SYSTEM PARTS. AL
WAYS USE SOAP AND WATER.
STEF 5 - FILTER CARTRIDGE INSTALLATION
Turn to page 9 and follow all steps under "Filter Cartridge Replacement".