Electrical requirements, Installing the power cord, Warning – Kenmore 580.75281 User Manual
Page 4
Attention! The text in this document has been recognized automatically. To view the original document, you can use the "Original mode".
ELECTRICAL REQUIREMENTS
OBSERVE ALL LOCAL CODES AND ORDINANCES.
DO NOT, UNDER ANY CIRCUMSTANCES, REMOVE
THE POWER SUPPLY CORD GROUND PRONG.
ELECTRICAL GROUND IS REQUIRED ON THIS
APPLIANCE.
For 230/208 volt 60 Hz, AC only, 15A fused and
properly grounded electrical supply is required. A time
delay fuse or time delay circuit breaker is
recommended. Use a dedicated circuit, serving only
this appliance.
DO NOT USE AN EXTENSION CORD.
RECOMMENDED GROUNDING METHOD
For your personal safety, this appliance must be grounded.
This appliance has a power supply cord with a 3-prong
grounding plug. To minimize possible shock hazard, the
cord must be plugged into a mating grounding type wall
receptacle and grounded in accordance with the National
Electrical Code (ANSI/NFPA 70) latest edition and all local
codes and ordinances. If a mating wall receptacle is not
available, it is the personal responsibility and obligation of
the customer to have a properly grounded 3-prong wall
receptacle installed by a qualified electrician.
115V-
(T
n
230V-
Power cord may include a current interrupter
device. A test and reset button is provided on the
plug case. The device should be tested on a
periodic basis by first pressing the TEST button
and then the
rese
T button. If the TEST button
does not trip or if the RESET button will not stay
engaged, discontinue use of the air conditioner and
contact a qualified service technician.
NOTE:
The shape may be different according to its model.
A
warning
%r
Electrical Shock Hazard
Plug into a grounded 3 prong outlet.
Do not remove ground prong.
Do not use an adapter.
Do not use an extension cord.
Failure to follow these instructions can result in death, fire, or electrical shock.
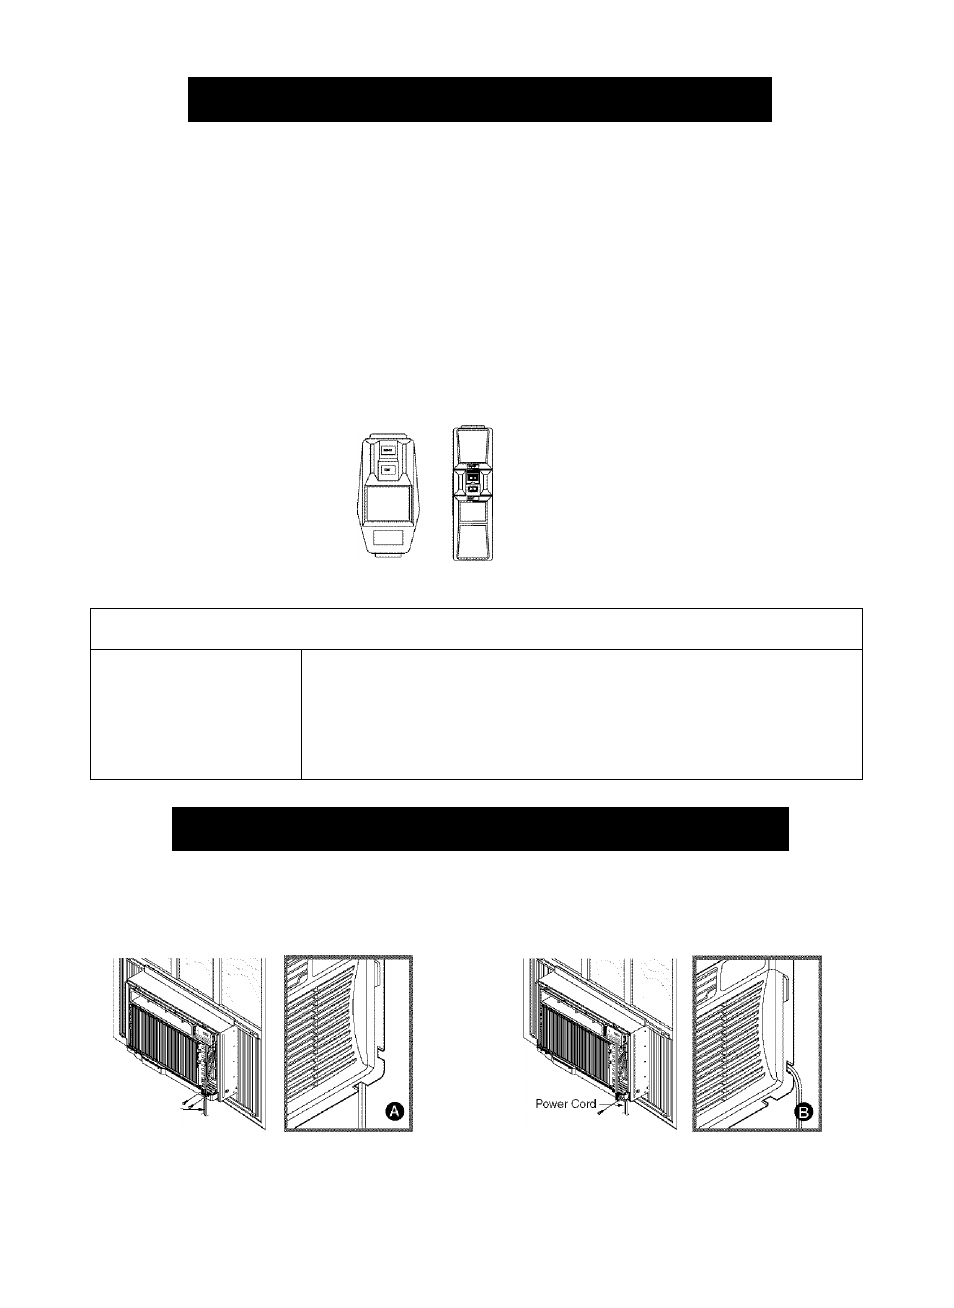
INSTALLING THE POWER CORD
You can choose between two methods below according to your window sill shape and preference.
USING SLIT "A"
USING SLIT "B"
Fasten the stopper using 2 screw holes, and lead
out the power cord through slit "A".
Power Cord
Fasten the stopper using left screw hole, and rotate
properly to lead the power cord out through slit "B".