Healthier Choice SOUNDSOLUTION Acoustical Underlayment User Manual
Sound solution, With
S I M P L E • E A S Y • E F F E C T I V E
F L O A T I N G F L O O R I N S T A L L A T I O N I N S T R U C T I O N S
1. Be sure sub-floor is clean and dry.
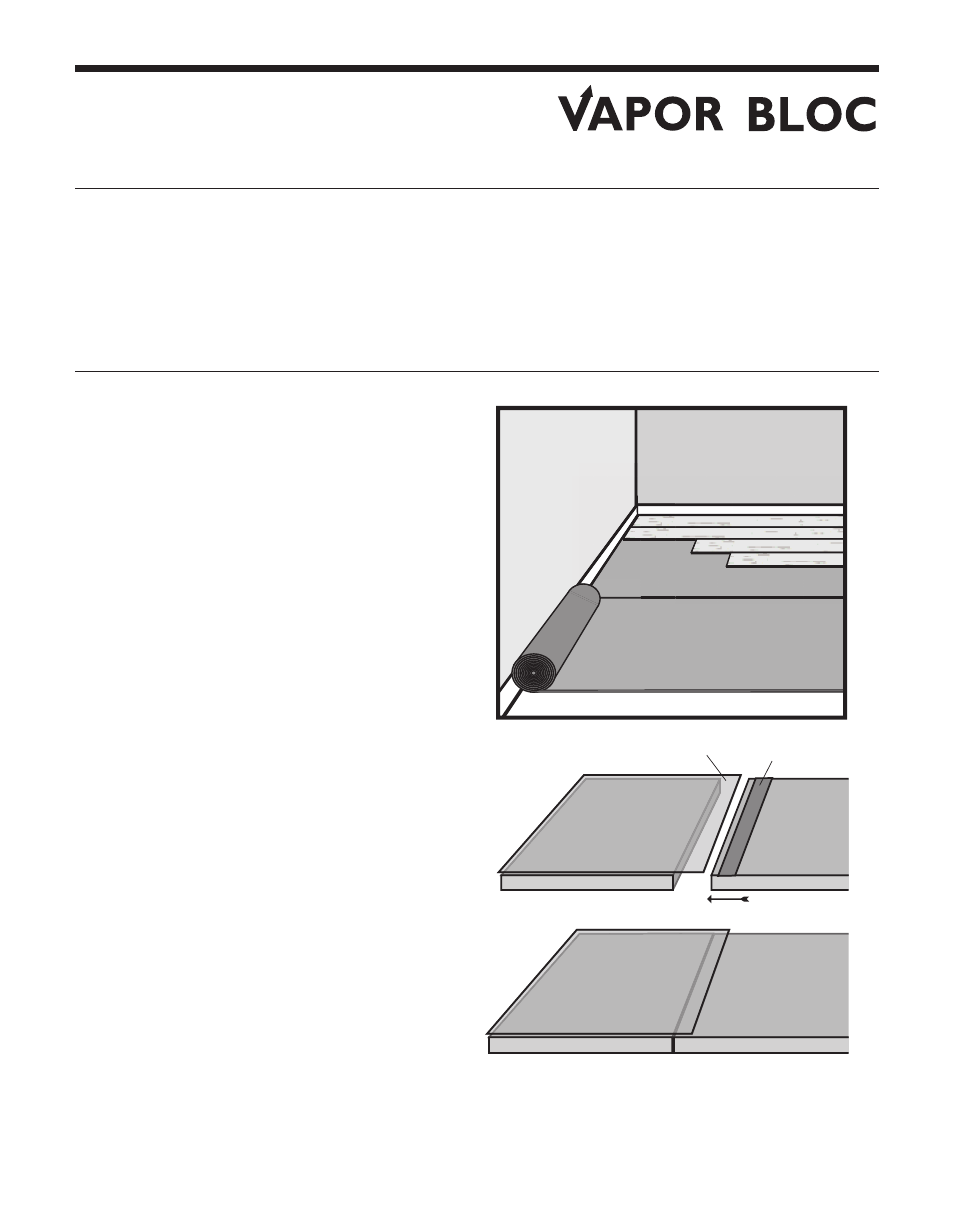
2. Roll out one 6 foot section of Sound
Solution Vapor Bloc parallel to the wall
and in the same direction as you plan to
install the laminate or floating floor. The
product will roll out with the Vapor Bloc
film up and the foam side down to the
sub-floor.
3. Next install the laminate or floating floor
planks atop the underlayment according
to the manufacturer’s instructions. Be
sure that you are still able to see the
edge of the underlayment so that you
can properly line up the next roll.
4. Install the next 6 foot section of
underlayment, butting the foam
underlayment seams together. Remove
release film and press overlapping
Vapor Bloc film into pre-applied
adhesive, making certain the film is
securely bonded to the adjacent section
of underlayment. Repeat the above
steps until installation is complete.
5. Be sure to allow appropriate expansion
gaps at the perimeter of the installation
as recommended by the laminate or
floating floor manufacturer.
Plastic Overlap
Adhesive with
Release Film
Sound Solution underlayment can be installed utilizing the floating or nail-down installation method with the film
side up, fabric side down. NOTE: Nail-down installation method compromises vapor barrier. Do NOT glue
down Sound Solution Vapor Bloc. Sound Solution without Vapor Bloc film is available for glue down
installations. For more information please call (800) 872-8426.
SOUNDSOLUTION
PREMIUM ACOUSTICAL UNDERLAYMENT FOR LAMINATE & WOOD FLOORS
TM
WITH